
We've seen earlier how to install Elastic SIEM Part I, how to monitor Cisco Switches (Part II) and Windows Machines (Part III).
But what about security?
Indeed, by default there is no authentication, no login/password is requested when connecting to the web interface and all connections made by the different modules are not encrypted which is not a good thing in terms of security.
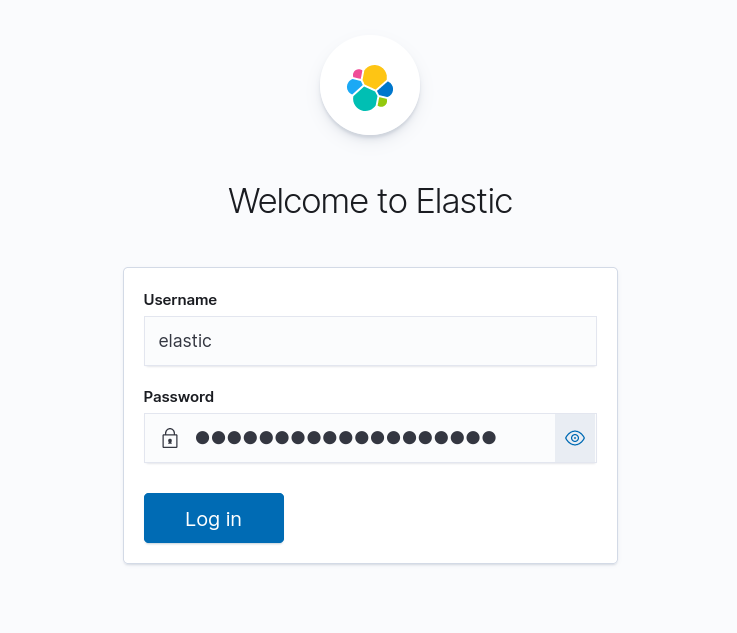
So, we will see here how to apply a minimal security in order to authenticate and encrypt the communications beetween our different modules and to set up an authentication when the users want to access the web interface.
As we can see here, we are going to encrypt all communications (except syslog).

Since there is no security in the default configuration the first thing to do is to enable the xpack security.
xpack.security.enabled: true
root@host:~# systemctl restart elasticsearch.service
root@host:~# /usr/share/elasticsearch/bin/elasticsearch-setup-passwords interactive
Initiating the setup of passwords for reserved users elastic,apm_system,kibana,kibana_system,logstash_system,beats_system,remote_monitoring_user.
You will be prompted to enter passwords as the process progresses.
Please confirm that you would like to continue [y/N]y


Enter password for [elastic]:
Reenter password for [elastic]:
Enter password for [apm_system]:
Reenter password for [apm_system]:
Enter password for [kibana_system]:
Reenter password for [kibana_system]:
Enter password for [logstash_system]:
Reenter password for [logstash_system]:
Enter password for [beats_system]:
Reenter password for [beats_system]:
Enter password for [remote_monitoring_user]:
Reenter password for [remote_monitoring_user]:
Changed password for user [apm_system]
Changed password for user [kibana_system]
Changed password for user [kibana]
Changed password for user [logstash_system]
Changed password for user [beats_system]
Changed password for user [remote_monitoring_user]
Changed password for user [elastic]
elasticsearch.username: "kibana_system"
elasticsearch.password: "shebangthe_password"
root@host:~# systemctl restart kibana.service
root@host:~# /usr/share/elasticsearch/bin/elasticsearch-certutil ca
This tool assists you in the generation of X.509 certificates and certificate
signing requests for use with SSL/TLS in the Elastic stack.

The 'ca' mode generates a new 'certificate authority'
This will create a new X.509 certificate and private key that can be used
to sign certificate when running in 'cert' mode.

Use the 'ca-dn' option if you wish to configure the 'distinguished name'
of the certificate authority

By default the 'ca' mode produces a single PKCS#12 output file which holds:
    * The CA certificate
    * The CA's private key

If you elect to generate PEM format certificates (the -pem option), then the output will
be a zip file containing individual files for the CA certificate and private key

Please enter the desired output file [elastic-stack-ca.p12]:
Enter password for elastic-stack-ca.p12 :stp1234
root@host:~# /usr/share/elasticsearch/bin/elasticsearch-certutil cert --ca elastic-stack-ca.p12
This tool assists you in the generation of X.509 certificates and certificate
signing requests for use with SSL/TLS in the Elastic stack.

The 'cert' mode generates X.509 certificate and private keys.
    * By default, this generates a single certificate and key for use
       on a single instance.
    * The '-multiple' option will prompt you to enter details for multiple
       instances and will generate a certificate and key for each one
    * The '-in' option allows for the certificate generation to be automated by describing
       the details of each instance in a YAML file

    * An instance is any piece of the Elastic Stack that requires an SSL certificate.
      Depending on your configuration, Elasticsearch, Logstash, Kibana, and Beats
      may all require a certificate and private key.
    * The minimum required value for each instance is a name. This can simply be the
      hostname, which will be used as the Common Name of the certificate. A full
      distinguished name may also be used.
    * A filename value may be required for each instance. This is necessary when the
      name would result in an invalid file or directory name. The name provided here
      is used as the directory name (within the zip) and the prefix for the key and
      certificate files. The filename is required if you are prompted and the name
      is not displayed in the prompt.
    * IP addresses and DNS names are optional. Multiple values can be specified as a
      comma separated string. If no IP addresses or DNS names are provided, you may
      disable hostname verification in your SSL configuration.

    * All certificates generated by this tool will be signed by a certificate authority (CA).
    * The tool can automatically generate a new CA for you, or you can provide your own with the
         -ca or -ca-cert command line options.

By default the 'cert' mode produces a single PKCS#12 output file which holds:
    * The instance certificate
    * The private key for the instance certificate
    * The CA certificate

If you specify any of the following options:
    * -pem (PEM formatted output)
    * -keep-ca-key (retain generated CA key)
    * -multiple (generate multiple certificates)
    * -in (generate certificates from an input file)
then the output will be be a zip file containing individual certificate/key files

Enter password for CA (elastic-stack-ca.p12) :stp1234
Please enter the desired output file [elastic-certificates.p12]:
Enter password for elastic-certificates.p12 :stp1234

Certificates written to /usr/share/elasticsearch/elastic-certificates.p12

This file should be properly secured as it contains the private key for
your instance.

This file is a self contained file and can be copied and used 'as is'
For each Elastic product that you wish to configure, you should copy
this '.p12' file to the relevant configuration directory
and then follow the SSL configuration instructions in the product guide.

For client applications, you may only need to copy the CA certificate and
configure the client to trust this certificate.
root@host:~# cp /usr/share/elasticsearch/elastic-certificates.p12 /etc/elasticsearch/
Now that our certificates have been created we can enable https protocol communication between kibana and elasticsearch.
root@host:~# systemctl stop elasticsearch.service
root@host:~# systemctl stop kibana.service
cluster.name: my-cluster
#node.name: node-1 #uncomment if not already defined
xpack.security.transport.ssl.enabled: true
xpack.security.transport.ssl.verification_mode: certificate
xpack.security.transport.ssl.client_authentication: required
xpack.security.transport.ssl.keystore.path: elastic-certificates.p12
xpack.security.transport.ssl.truststore.path: elastic-certificates.p12
root@host:~# /usr/share/elasticsearch/bin/elasticsearch-keystore add xpack.security.transport.ssl.keystore.secure_password
Enter value for xpack.security.transport.ssl.keystore.secure_password:stp1234
root@host:~# /usr/share/elasticsearch/bin/elasticsearch-keystore add xpack.security.transport.ssl.truststore.secure_password
Enter value for xpack.security.transport.ssl.truststore.secure_password:stp1234
root@host:~# chmod ug+rw /etc/elasticsearch/elastic-certificates.p12
root@host:~# systemctl start elasticsearch.service
root@host:~# systemctl start kibana.service
Now we are going to enable https for kibana.
root@host:~# /usr/share/elasticsearch/bin/elasticsearch-certutil http
Generate a CSR? [y/N]N

## Do you have an existing Certificate Authority (CA) key-pair that you wish to use to sign your certificate?

If you have an existing CA certificate and key, then you can use that CA to
sign your new http certificate. This allows you to use the same CA across
multiple Elasticsearch clusters which can make it easier to configure clients,
and may be easier for you to manage.

If you do not have an existing CA, one will be generated for you.

Use an existing CA? [y/N]y
Please enter the full pathname to the Certificate Authority that you wish to use for signing your new http certificate. This can be in PKCS#12 (.p12), JKS (.jks) or PEM (.crt, .key, .pem) format.
CA Path: /usr/share/elasticsearch/elastic-stack-ca.p12
Reading a PKCS12 keystore requires a password.
It is possible for the keystore's password to be blank,
in which case you can simply press <ENTER> at the prompt
Password for elastic-stack-ca.p12:stp1234
For how long should your certificate be valid? [5y]
Generate a certificate per node? [y/N]N
Enter all the hostnames that you need, one per line.
When you are done, press <ENTER> once more to move on to the next step.

node-1

You entered the following hostnames.

 - node-1

Is this correct [Y/n]Y
Enter all the IP addresses that you need, one per line.
When you are done, press <ENTER> once more to move on to the next step.

<IP_SERVER>

You entered the following IP addresses.

 - <IP_SERVER>

Is this correct [Y/n]Y

## Other certificate options

The generated certificate will have the following additional configuration
values. These values have been selected based on a combination of the
information you have provided above and secure defaults. You should not need to
change these values unless you have specific requirements.

Key Name: node-1
ubject DN: CN=node-1
Key Size: 2048

Do you wish to change any of these options? [y/N]N

## What password do you want for your private key(s)?

Your private key(s) will be stored in a PKCS#12 keystore file named "http.p12".
This type of keystore is always password protected, but it is possible to use a
blank password.

If you wish to use a blank password, simply press <enter> at the prompt below.
Provide a password for the "http.p12" file:  [<ENTER> for none]std1234

What filename should be used for the output zip file? [/usr/share/elasticsearch/elasticsearch-ssl-http.zip]

Zip file written to /usr/share/elasticsearch/elasticsearch-ssl-http.zip
root@host:~# apt install unzip
root@host:~# cd /usr/share/elasticsearch/ && unzip elasticsearch-ssl-http.zip -d /tmp/
root@host:~# cp /tmp/elasticsearch/http.p12 /etc/elasticsearch/
xpack.security.http.ssl.enabled: true
xpack.security.http.ssl.keystore.path: http.p12
root@host:~# /usr/share/elasticsearch/bin/elasticsearch-keystore add xpack.security.http.ssl.keystore.secure_password
Enter value for xpack.security.http.ssl.keystore.secure_password:std1234
root@host:~# systemctl restart elasticsearch.service
root@host:~# cp /tmp/kibana/elasticsearch-ca.pem /etc/kibana/
elasticsearch.ssl.certificateAuthorities: [ "/etc/kibana/elasticsearch-ca.pem" ]
elasticsearch.hosts: ["https://<IP_SERVER>:9200"]
root@host:~# /usr/share/elasticsearch/bin/elasticsearch-certutil csr -name node-1 -dns node-1.std.local
Please enter the desired output file [csr-bundle.zip]:

Certificate signing requests have been written to /usr/share/elasticsearch/csr-bundle.zip

This file should be properly secured as it contains the private keys for all
instances.
root@host:~# cp /usr/share/elasticsearch/csr-bundle.zip /etc/kibana/ && cd /etc/kibana/ && unzip csr-bundle.zip
root@host:~# mv node-1/node-1.key /etc/kibana/
server.ssl.enabled: true
server.ssl.certificate: /etc/kibana/node-1.crt
server.ssl.key: /etc/kibana/node-1.key
root@host:~# cd /etc/kibana/
root@host:~# openssl x509 -req -in node-1/node-1.csr -signkey node-1.key -out node-1.crt
Signature ok
subject=CN = node-1
Getting Private key
root@host:~# systemctl restart elasticsearch.service
root@host:~# systemctl restart kibana.service
# =================================== Kibana ===================================
setup.kibana:
  host: "https://KIBANA_IP_SERVER:5601"
  ssl.verification_mode: none
# ---------------------------- Elasticsearch Output ----------------------------
output.elasticsearch:
  hosts: ["ELASTICSEARCH_IP_SERVER:9200"]
  protocol: "https"
  ssl.verification_mode: none
  username: "elastic"
  password: "shebangthe_password"
root@host:~# cp /etc/kibana/elasticsearch-ca.pem /etc/logstash/
elasticsearch {
      hosts           => ["https://127.0.0.1:9200"]
      ssl             => true
      cacert          => "/etc/logstash/elasticsearch-ca.pem"
      index           => "cisco-switches-%{+YYYY.MM.dd}"
      user            => "elastic"
      password        => "shebangthe_password"
      ssl_certificate_verification => false
    }
Contact :