How to connect to network switches with a console cable from Windows or GNU/Linux
- Last updated: Apr 1, 2025
Connect Serial Cable to Console Port
Connecting to a device's console port allows you to configure it from the CLI when starting up for the first time, or if remote access is not available (ssh, http etc…).
Nowadays, most serial cables now use a USB interface for connection. On devices (switches, routers, etc.), the connection is made via a classic console port, USB or mini USB.

From a GNU/Linux computer

First connect the USB cable to your Linux computer.
Installing screen
Screen is a terminal multiplexer. It will enable us to connect to the switch's console port from our USB-to-serial converter.
- Install the screen software:
root@host:~# apt update && apt install screenIdentify USB device
- Find device name:
root@host:~# dmesg | grep -i ".*tty" | grep -i usb
[33994.065881] usb 2-1: FTDI USB Serial Device converter now attached to ttyUSB0
Connection
- In most cases, you will be able to connect with this command (you can specify
300,1200,9600(default),19200, or115200as the value for the baud rate):
root@host:~# screen /dev/ttyUSB0 115200- If required, you can also specify the transmission of eight (or seven) bits per byte (by specifying
cs8orcs7):
root@host:~# screen /dev/ttyUSB0 115200,cs8From a Windows computer

First connect the USB cable to your Windows computer.
Device Manager
- Open the Device Manager to retrieve name of the Serial line:

Putty
- Download
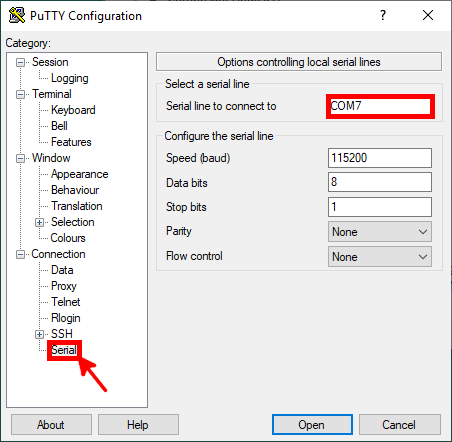
putty.exefrom the official website: www.chiark.greenend.org.uk

- Open putty.exe and configure the serial menu with the information retrieved, then click on Open to connect:
Tera Term (alternative to Putty)
As a good alternative to Putty, we can choose to use Tera Term: https://en.wikipedia.org/wiki/Tera_Term.
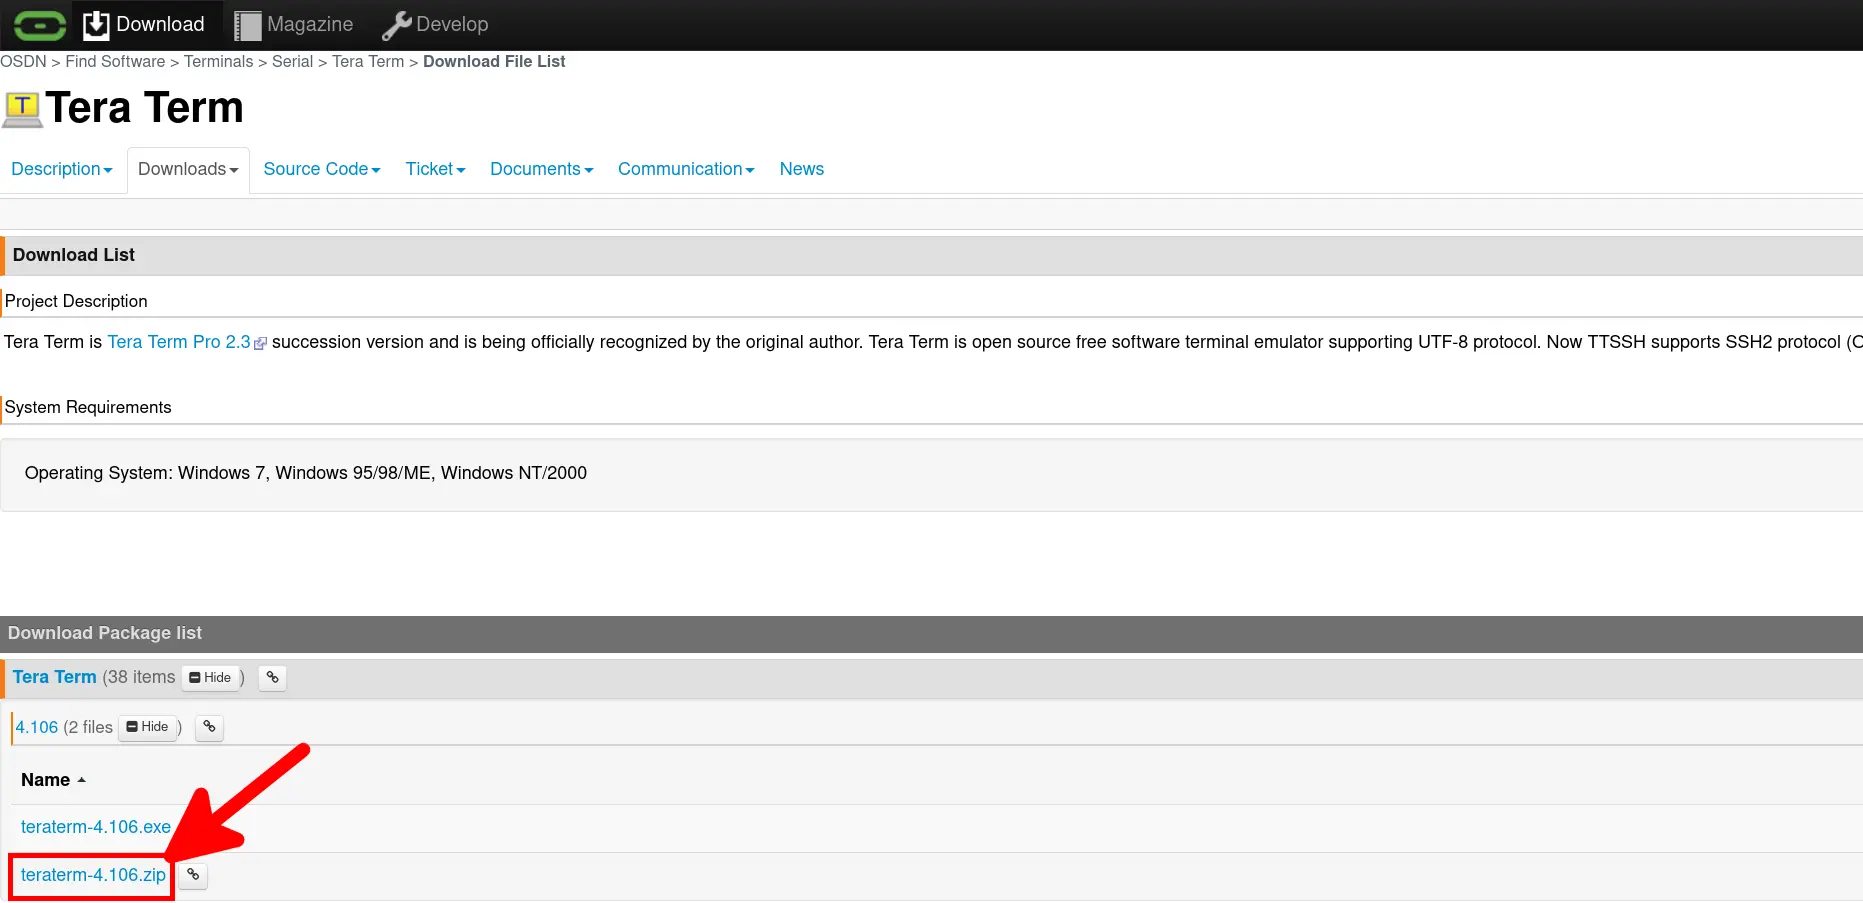
- Download Tera Term here: https://osdn.net/projects/ttssh2/releases/ (I personally download the portable zip archive):
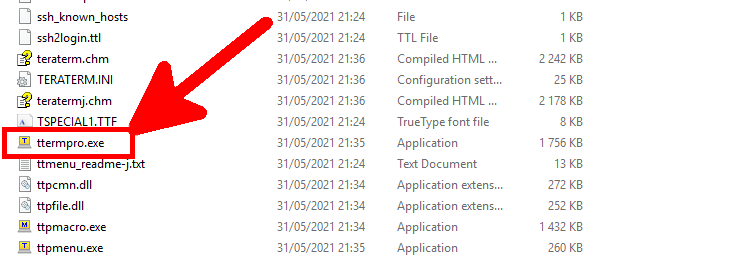
- Unzip the downloaded archive, then run
ttempro.exe:
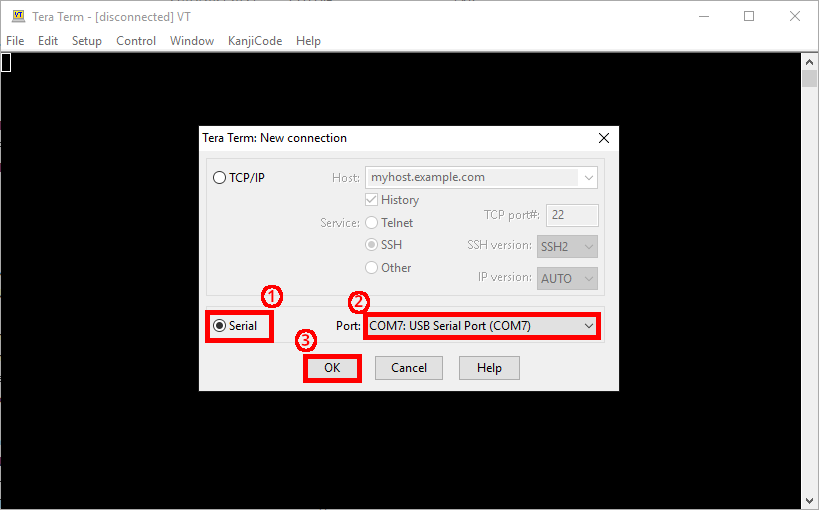
- Select Serial, your USB serial port and click OK: