Setting Up a Web Filtering Server with Unbound and RPZ on Linux
- Last updated: Mar 27, 2026

I was looking for a reliable way to implement web filtering on GNU/Linux. While tools like SquidGuard can be used for this purpose, I found them overly complex to configure and difficult to deploy automatically across multiple workstations, especially in environments not managed by an Active Directory domain. During my research, I discovered the DynFi Open Source firewall (https://dynfi.com), which offers web filtering capabilities using RPZ (Response Policy Zone) — https://en.wikipedia.org/. This led me to explore RPZ-based filtering further and develop a working solution using Unbound and RPZ on Linux.
- This solution provides the following features:
- Blocks access to a predefined list of forbidden websites
- Redirects users to a custom block page when access is denied
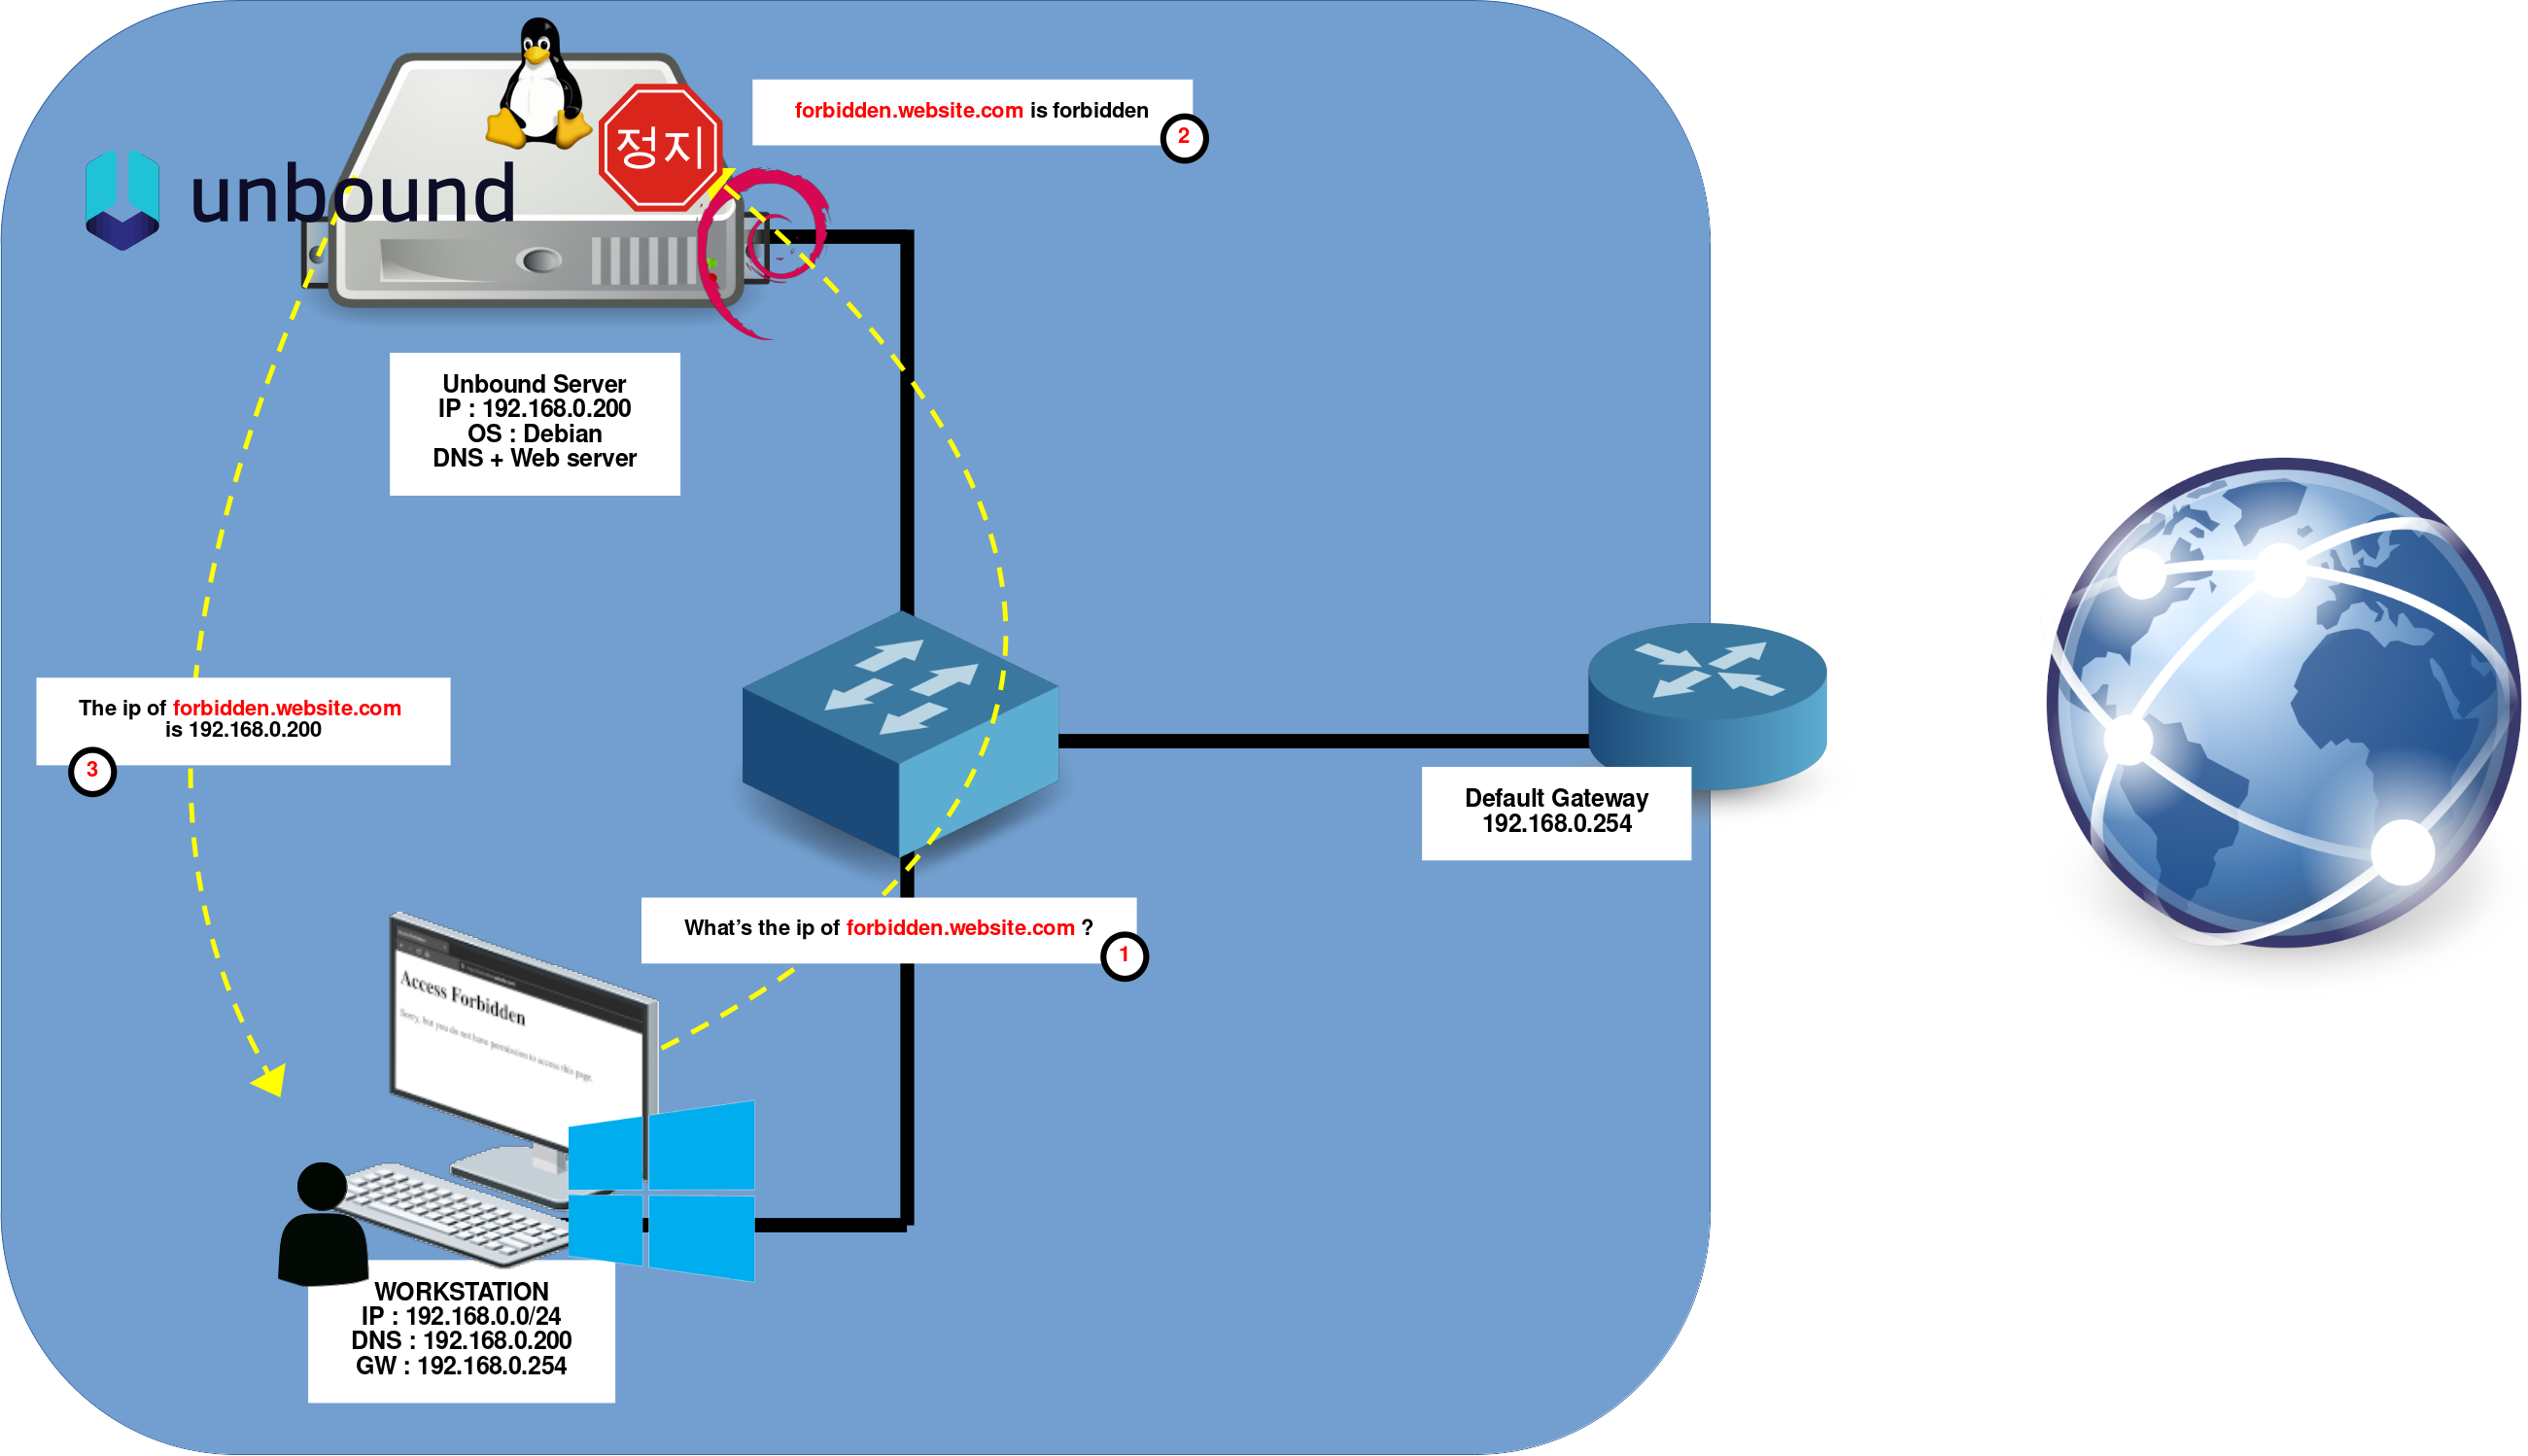
Network Diagram
In this setup, a Debian server functions as both a DNS resolver and a web server. When a client attempts to access a forbidden website (based on a predefined block list), the request is intercepted and redirected to the web server, which displays a custom blocked access page in the user's browser.
Debian Server

As outlined above, our Debian server will run two key services: a web server to display a notification page when users attempt to access blocked websites, and a DNS resolver to deliver either standard or modified DNS responses based on filtering rules. To meet these requirements, we'll use micro-httpd, a lightweight and minimalist HTTP server, and Unbound as the DNS resolver supporting RPZ-based filtering.
micro-httpd
To notify users when access to a website is blocked, we need a lightweight web server capable of serving a simple "access forbidden" page. For this purpose, we'll use micro-httpd, which is minimal yet sufficient for displaying static messages.
Installation
- Install the micro-httpd package:
root@host:~# apt install micro-httpdConfiguration
- The micro-httpd systemd service configuration is located in
/lib/systemd/system/micro-httpd@.service:
[Unit]
Description=micro-httpd
Documentation=man:micro-httpd(8)

[Service]
User=nobody
Group=www-data
ExecStart=-/usr/sbin/micro-httpd /var/www/html
StandardInput=socket- The socket configuration is defined in the file
/lib/systemd/system/micro-httpd.socket:
[Unit]
Description=micro-httpd
Documentation=man:micro-httpd(8)

[Socket]
ListenStream=0.0.0.0:80
Accept=true

[Install]
WantedBy=sockets.target- Create a simple HTML file at
/var/www/html/index.htmlto serve as the block page:
<!DOCTYPE html>
<html>
<head>
  <meta charset="UTF-8">
  <title>Access Forbidden</title>
</head>
<body>
  <h1>Access Forbidden</h1>
  <p>Sorry, but you do not have permission to access this page.</p>
</body>
</html>
root@host:~# chown -R www-data:www-data /var/www/html- If needed, you can use the
systemctlcommand to restart the micro-httpd socket:
root@host:~# systemctl restart micro-httpd.socketOpen a web browser and navigate to http://192.168.0.200/ to verify that the block page is being displayed correctly.
Unbound
Unbound is the core component of our web-filtering setup. It acts as the DNS resolver and returns a modified IP address to forbidden URLs. Indeed, by inspecting every DNS query on the network, Unbound can block, redirect, or modify responses according to a custom rule set, effectively becoming a central control point for domain-level filtering. In this section, we will configure Unbound to serve as both a traditional DNS resolver and the engine that enforces our web-filtering policies.
Installation
- Install the unbound package:
root@host:~# apt install unboundConfiguration
- Create the configuration file
/etc/unbound/unbound.conf.d/rpz.confwith the following content:
server:
    module-config: "respip validator iterator"  # Load respip, validator, and iterator modules. Needed for rpz
    interface: 192.168.0.200  # Network interface used for DNS queries
    interface: 127.0.0.1  # Loopback interface used for local DNS queries
    do-ip4: yes  # Enable IPv4 support
    do-ip6: no  # Disable IPv6 support
    do-udp: yes  # Enable UDP support for DNS queries
    do-tcp: yes  # Enable TCP support for DNS queries
    do-daemonize: yes  # Run Unbound as a daemon (in the background)
    access-control: 0.0.0.0/0 allow  # Allow all IP addresses to make DNS queries
    local-zone: "std.priv." static  # Define a local zone for DNS queries
    local-data: "denied.std.priv. IN A 192.168.0.200"  # Define a local DNS entry for a specific domain
    local-data-ptr: "192.168.0.200 denied.std.priv."  # Define a local DNS PTR entry for a specific IP address

rpz:
    name: rpz.std.rocks  # RPZ zone name
zonefile: /etc/unbound/blacklist.zone # RPZ zone file used for DNS query filtering- Create the file
/etc/unbound/blacklist.zone. For testing purposes, we'll redirect all DNS requests fororange.frandgoogle.frto our block page IP:
*.orange.fr IN A 192.168.0.200
*.google.fr IN A 192.168.0.200- Restart the unbound service to apply the changes:
root@host:~# systemctl restart unboundWorkstation
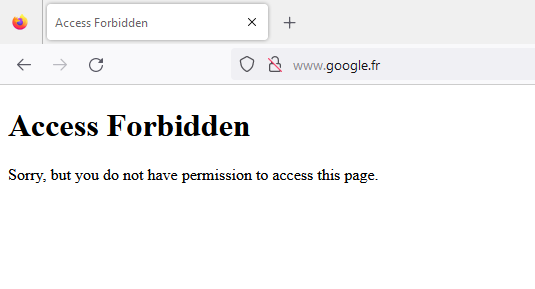
- From your workstation, open a web browser and try accessing
www.google.fr. You should be redirected to the custom block page:
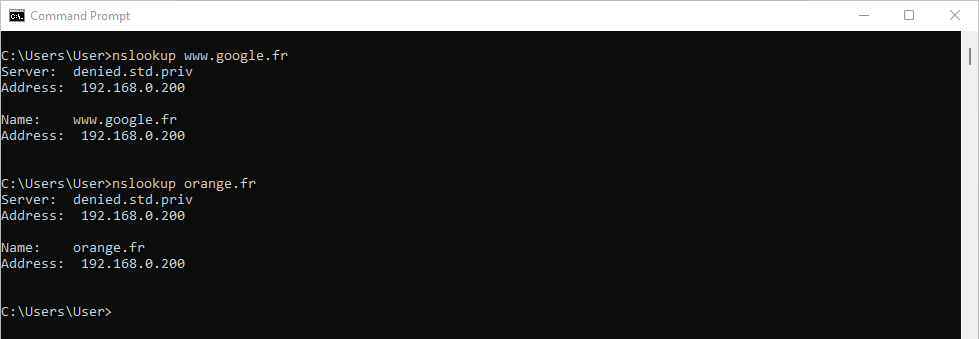
- You can also verify DNS redirection using
nslookupor a similar tool. Bothwww.google.frandorange.frshould resolve to192.168.0.200:
Downloading and Applying a Block List
Now that the web filtering system is in place, we can make it truly effective by applying a real-world block list. Numerous public RPZ lists are available online. For this example, we’ll use one from the Hagezi project: https://github.com/hagezi/dns-blocklists.
- These RPZ lists typically use the following format:
website.to.block CNAME .- For compatibility with our setup, the entries must be converted to this format:
website.to.block IN A 192.168.0.200So, how do we translate the default format into a format that is useful in our architecture, as shown above? There are various approaches, but personally, I'll be using the sed editor. Let's see how it's done!
- First, download one of the RPZ lists:
root@host:~# wget https://raw.githubusercontent.com/hagezi/dns-blocklists/main/rpz/multi.txt- Then convert the list into the required format, with the
sedstream editor:
root@host:~# sed -i 's/CNAME.*/IN A 192.168.0.200/' multi.txtGo Further
To make the filtering system more flexible, you can use access control to apply different RPZ policies to specific networks or individual hosts. This allows for differentiated filtering levels based on IP ranges.
- Edit the configuration file
/etc/unbound/unbound.conf.d/rpz.confto define tagged access controls and associate them with specific RPZ zones:
server:
    module-config: "respip validator iterator"  # Load respip, validator, and iterator modules
    interface: 192.168.0.200  # Network interface used for DNS queries
    interface: 127.0.0.1  # Loopback interface used for local DNS queries
    do-ip4: yes  # Enable IPv4 support
    do-ip6: no  # Disable IPv6 support
    do-udp: yes  # Enable UDP support for DNS queries
    do-tcp: yes  # Enable TCP support for DNS queries
    do-daemonize: yes  # Run Unbound as a daemon (in the background)
    access-control: 0.0.0.0/0 allow  # Allow all IP addresses to make DNS queries
    local-zone: "std.priv." static  # Define a local zone for DNS queries
    local-data: "denied.std.priv. IN A 192.168.0.200"  # Define a local DNS entry for a specific domain
    local-data-ptr: "192.168.0.200 denied.std.priv."  # Define a local DNS PTR entry for a specific IP address

    define-tag: "social adult dnsbypass"
    access-control-tag: 192.168.10.0/24 "social adult dnsbypass"
    access-control-tag: 192.168.10.200/32 "social adult"
    access-control-tag: 192.168.20.0/24 "adult dnsbypass"

rpz:
    name: rpz.social.std.rocks  # RPZ zone name
    zonefile: /var/lib/unbound/social_networks/blacklist.zone
    tags: "social"

rpz:
    name: rpz.adult.std.rocks  # RPZ zone name
    zonefile: /var/lib/unbound/adult/blacklist.zone
    tags: "adult"

rpz:
    name: rpz.dnsbypass.std.rocks  # RPZ zone name
    zonefile: /var/lib/unbound/dns_bypass/blacklist.zone
    tags: "dnsbypass"
In this example:
- The subnet
192.168.10.0/24receives all three filters:social,adult, anddnsbypass. - The specific host
192.168.10.200is assigned onlysocialandadultfilters. - The subnet
192.168.20.0/24receivesadultanddnsbypassfilters.
This modular approach allows precise control over what is filtered for each segment of your network.
Performance Optimization
Depending on the number of users or the size of your block list, Unbound may impact user experience due to slower response times. In this section, we will explore several configuration options to help improve performance.
- You can start by checking the current performance using the
unbound-controlcommand:
root@host:~# unbound-control stats_noreset | grep -E "total.num.queries|total.recursion.time.avg|total.requestlist.avg|cache|requestlist.avg|requestlist.max|requestlist.exceeded"
thread0.num.cachehits=29387234
thread0.num.cachemiss=25838180
thread0.requestlist.avg=2.6
thread0.requestlist.max=518
thread0.requestlist.exceeded=251851
total.num.queries=55225414
total.num.queries_ip_ratelimited=0
total.num.cachehits=29387234
total.num.cachemiss=25838180
total.requestlist.avg=2.62538
total.recursion.time.avg=0.047619
From these values, you can analyze how efficiently your Unbound instance is performing.
The total.num.cachehits (number of queries answered from cache) and total.num.cachemiss (number of queries requiring recursive resolution) indicate that cache efficiency could be improved.
The total.recursion.time.avg value (47 ms) represents the average time required to resolve queries recursively, which is already quite good.
However, the following metrics suggest room for improvement:
thread0.requestlist.avg: average number of pending recursive queriesrequestlist.max: maximum size reached by the request queuerequestlist.exceeded: number of queries dropped because the queue was full
These values indicate that the server may struggle under load and could benefit from tuning.
Finally, only one thread is being used, even though my server has four CPU cores, which highlights another clear optimization opportunity.
- Based on these observations, you can now tune your configuration by editing the
/etc/unbound/unbound.conf.d/rpz.conffile and adding the following directives underserver:(adjust the values according to your hardware; in this example, my server has a 4-core CPU and 8 GB of RAM):
server:
    num-threads: 4              # Number of worker threads (ideally match the number of CPU cores)
    msg-cache-size: 512m        # Cache size for DNS message responses (improves response time)
    rrset-cache-size: 1g        # Cache size for DNS resource records (main DNS data cache)
    so-reuseport: yes           # Allow better load distribution across threads (improves scalability)
    prefetch: yes               # Refresh frequently used cache entries before they expire
    prefetch-key: yes           # Also prefetch DNSSEC keys to avoid validation delays
    outgoing-range: 8192        # Number of simultaneous outgoing queries (higher = better concurrency)
    num-queries-per-thread: 4096 # Max queries handled per thread (increase for high load environments)
    serve-expired: yes          # Serve expired cache data if upstream servers are slow/unreachable
    cache-min-ttl: 3600         # Minimum TTL (in seconds) to keep records in cache (reduces recursion)
Finally, run the unbound-control command to reset the counters, then use unbound-control stats_noreset after a few hours to verify that performance has improved.
Troubleshooting
When using RPZ lists containing hundreds of thousands of entries, the Unbound service may fail to start. This is usually due to the service taking too long to load the configuration and being automatically stopped by systemd due to a timeout.
- Example of the error message when starting Unbound:
root@host:~# systemctl restart unbound
Job for unbound.service failed because a timeout was exceeded.
See "systemctl status unbound.service" and "journalctl -xeu unbound.service" for details.- (Optional) Set your preferred text editor. For example, to use
vim:
root@host:~# export EDITOR=vim- Edit the
unbound.serviceoverride configuration:
root@host:~# systemctl edit unbound.service- Add the following lines to increase the startup and shutdown timeout limits:
### Editing /etc/systemd/system/unbound.service.d/override.conf
### Anything between here and the comment below will become the new contents of the file

[Service]
TimeoutStartSec=300
TimeoutStopSec=300

### Lines below this comment will be discarded

### /lib/systemd/system/unbound.service
# [Unit]
# Description=Unbound DNS server
# Documentation=man:unbound(8)
# After=network.target
# Before=nss-lookup.target
# Wants=nss-lookup.target
#
# [Service]
# Type=notify
# Restart=on-failure
# EnvironmentFile=-/etc/default/unbound
# ExecStartPre=-/usr/libexec/unbound-helper chroot_setup
# ExecStartPre=-/usr/libexec/unbound-helper root_trust_anchor_update
# ExecStart=/usr/sbin/unbound -d -p $DAEMON_OPTS
# ExecStopPost=-/usr/libexec/unbound-helper chroot_teardown
# ExecReload=+/bin/kill -HUP $MAINPID
#
# [Install]
# WantedBy=multi-user.target- The unbound service should now be able to start without error:
root@host:~# systemctl restart unbound