How to Set Up Remote Desktop in Linux
- Last updated: Sep 21, 2022

We will see here how to use remote desktop from Windows or GNU/Linux systems to a GNU/Linux X.Org or a Wayland display servers. As we will see it's completly different dependly on which display server we use.
Know your display server
As explained above, depending of your display server, screen sharing configuration won't be the same. So the first thing to do is to identify display server.
- With loginctl command
std@host:~$ loginctl
SESSION  UID USER      SEAT  TTY
      5 1000 std       seat0 tty2
std@host:~$ loginctl show-session 5 -p Type
Type=wayland
- Or with $XDG_SESSION_TYPE variable from the desktop environment

Screen Sharing With Wayland Display Server
In Wayland, the native VNC support is broken, so we will use gnome-remote-desktop which offer remote desktop sharing using VNC with PipeWire.
Configuration
- Debian : GNU/Linux 10 (buster)
- Desktop environment : GNOME 3.3
- Mutter / wayland : 3.30
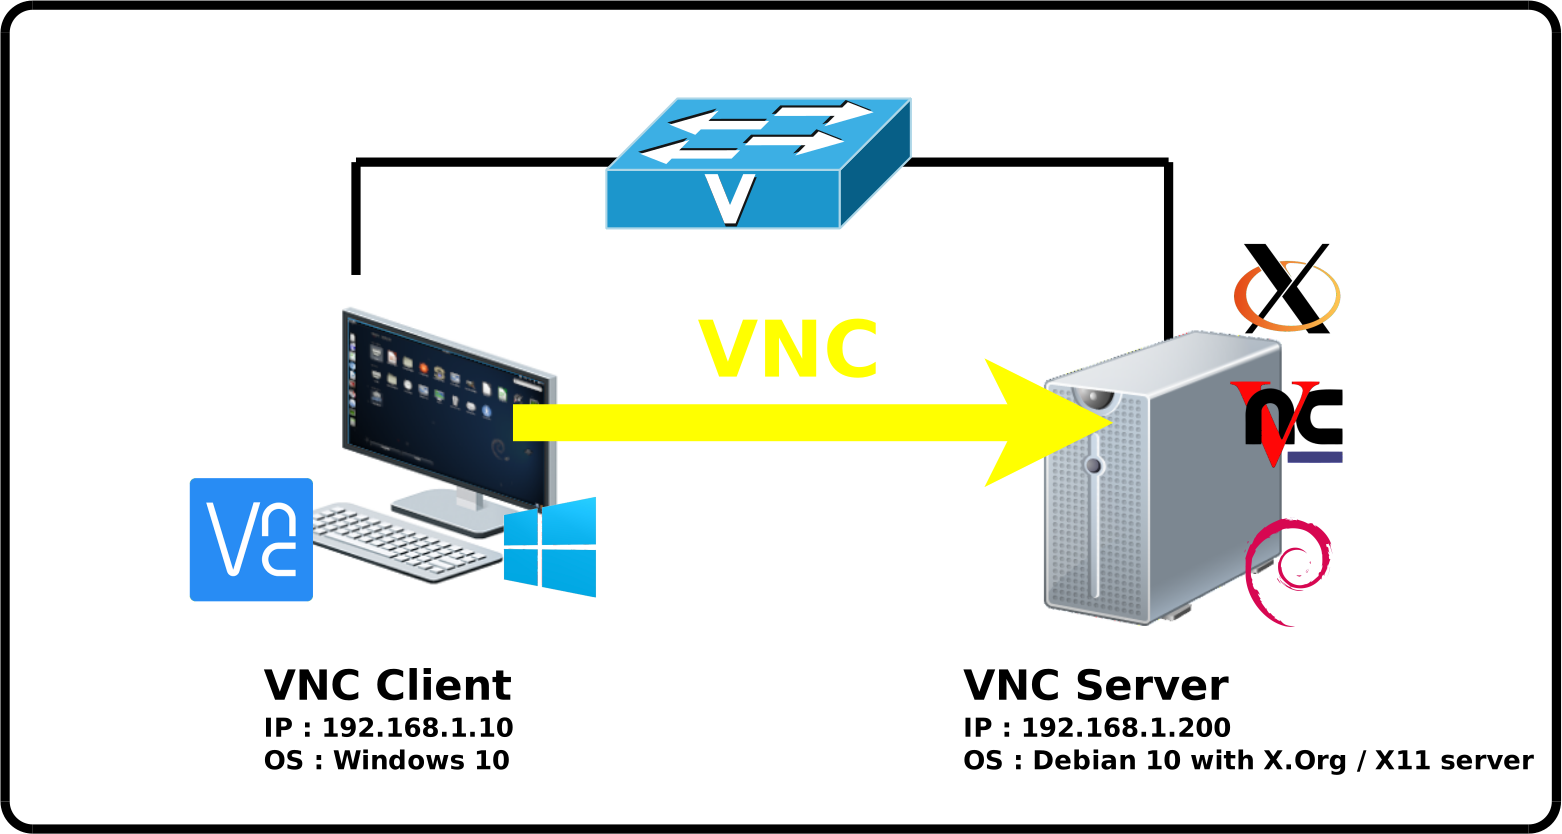
Network diagram
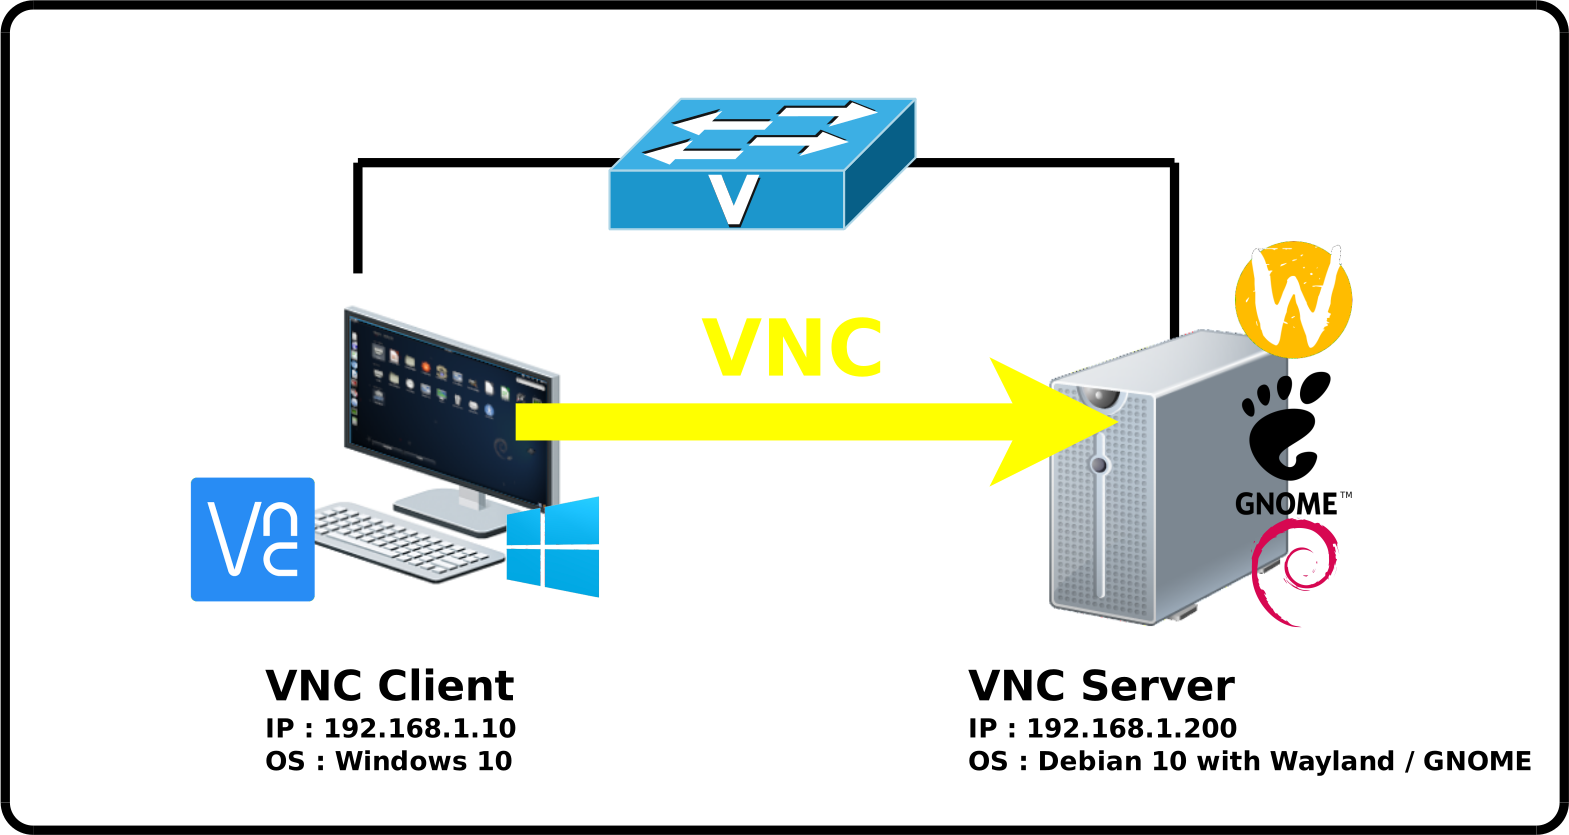
Install Softwares
root@host:~# apt install gnome-remote-desktop
Network Configuration
We need to set a network configuration that will be associate later to screen sharing profile.
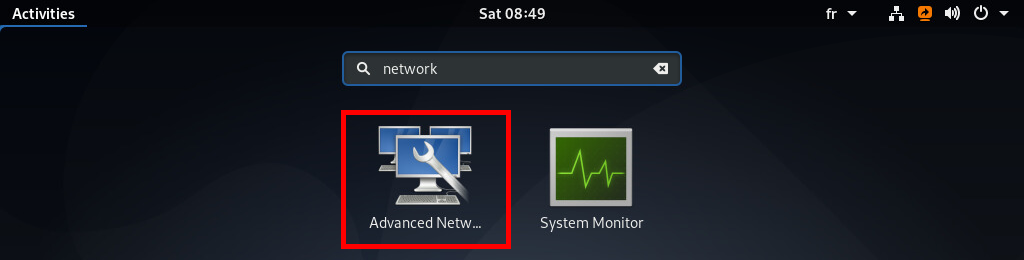
- Open Advanced Network :
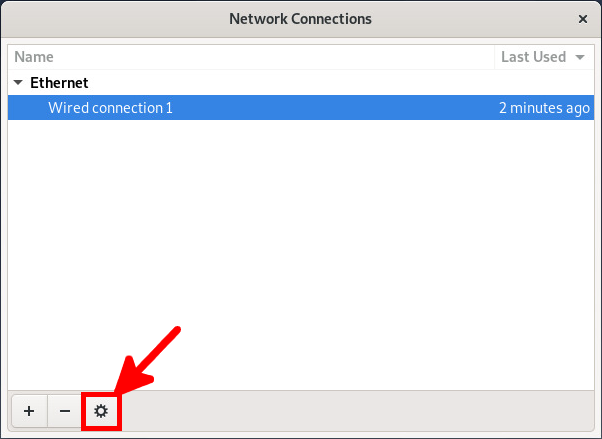
- Edit the network connection :
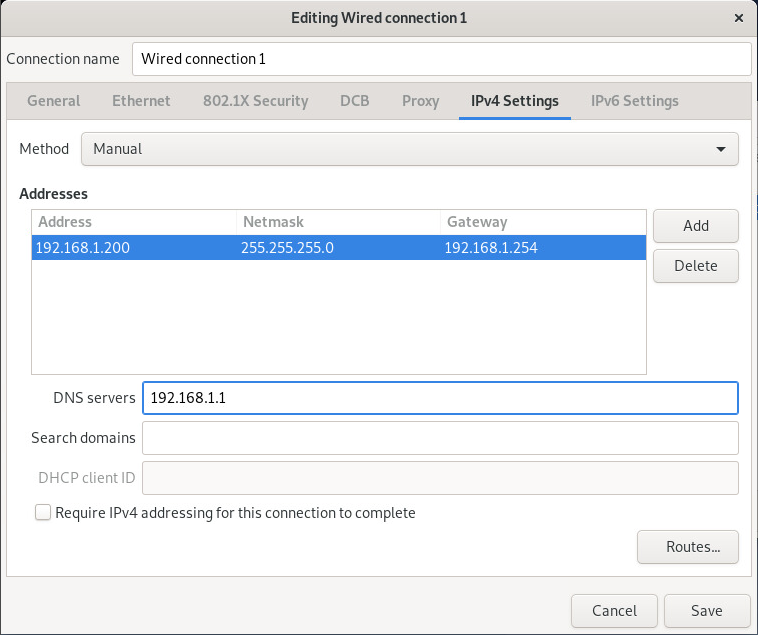
- Set your IP Address :
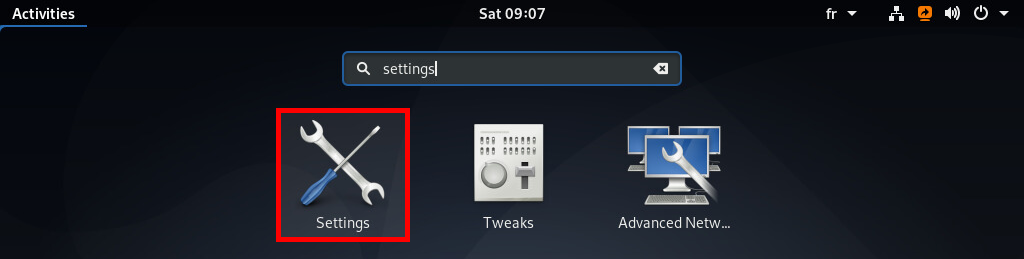
- Now go to Settings :
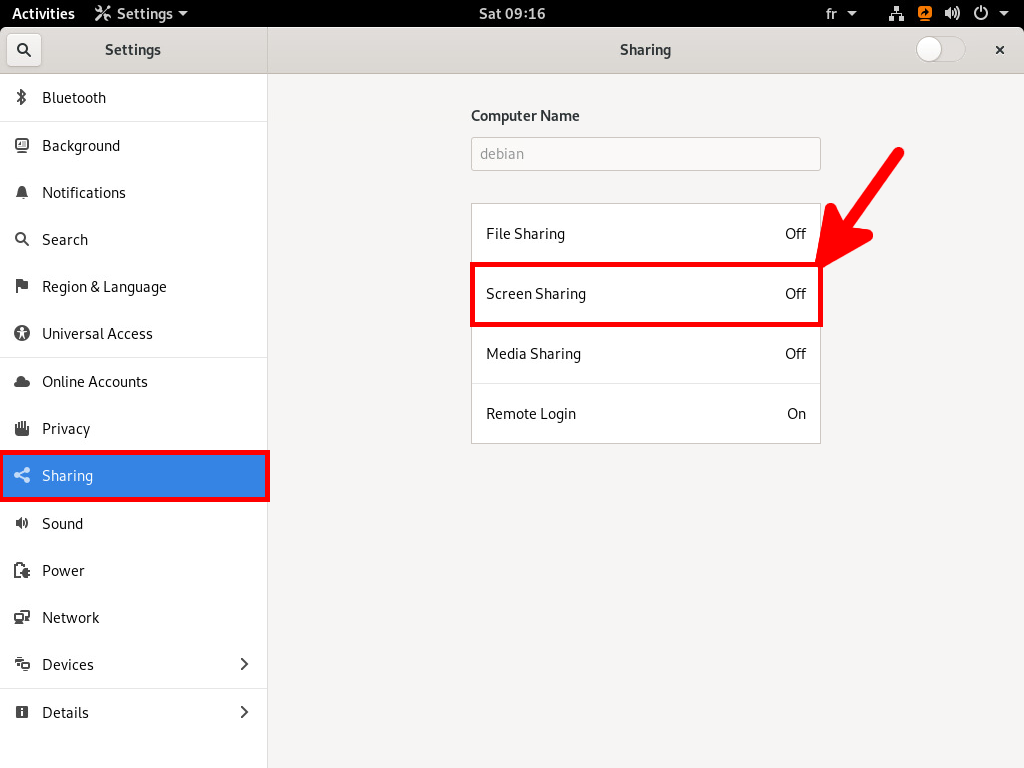
- From Settings go to Sharing then Screen Sharing :
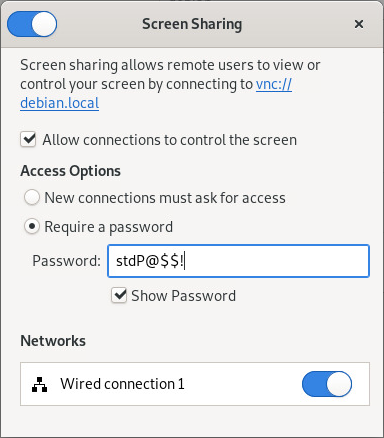
- Configure Screen Sharing settings :
Screen Sharing With X.Org / X11 Display Server
With X11 we can use classic VNC Server, so let's see how to do it with x11vnc server.
Configuration
- Debian : GNU/Linux 10 (buster)
- xorg : 7.7
- x11vnc : 0.9
Network diagram
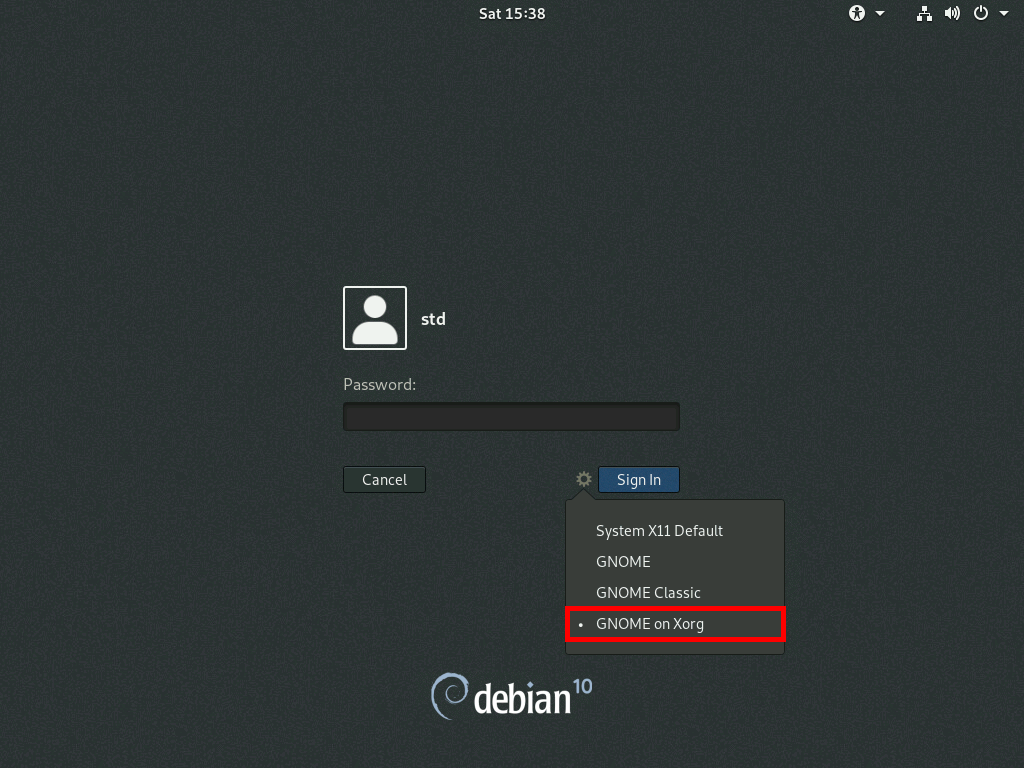
Open Xorg Session
From GDM3 (GNOME Display Manager) we will select Xorg GNOME session.
Install Softwares
- We now install our VNC server
root@host:~# apt install x11vnc
Network Configuration
Here, we can use classic method and edit /etc/network/interface or use graphical one (see above).
auto ens192
iface ens192 inet static
	address 192.168.1.200
	netwmask 255.255.255.0
	gateway 192.168.1.254
	dns-nameserver 192.168.1.1
Run x11vnc
- Get Display number
std@host:~$ echo $DISPLAY

- Here we specify port number 5900 (default) as the port to listen to and on display :0.
std@host:~$ x11vnc -rfbport 5900 -display :0
- It's also possible to connect to the Gnome Display Manager interface (Gnome log screen) :
std@host:~$ sudo x11vnc -rfbport 5900 -display :0 -auth /var/lib/gdm/:0.Xauth
- Or to the lightdm interface (Xfce log screen :
std@host:~$ sudo x11vnc -rfbport 5900 -display :0 -auth /var/run/lightdm/root/:0
Set password (Optional)
For security reasons it is recommended to protect the vnc access with a password.
- To do so install tigervnc-common :
std@host:~$ sudo apt install tigervnc-common
- Set a vnc password :
std@host:~$ vncpasswd vnc
- Run your x11vnc server :
std@host:~$ x11vnc -display :0 -rfbauth vnc -rfbport 5900
Connection from the clients

Connect from a Windows host
Now from the Windows host, download a VNC client. VNC Viewer is a good one.
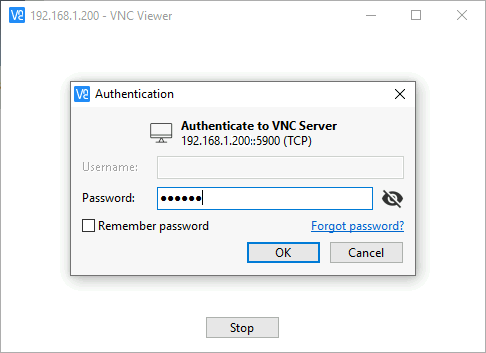
- Run the VNC Viewer and connect to the server (192.168.1.200:XXXX if you didn't set default port number) :

- Enter the Password previously set
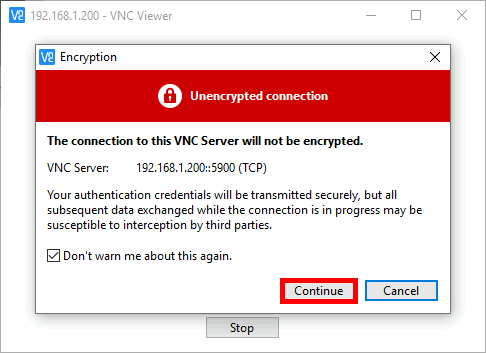
- Continue despite the warning :
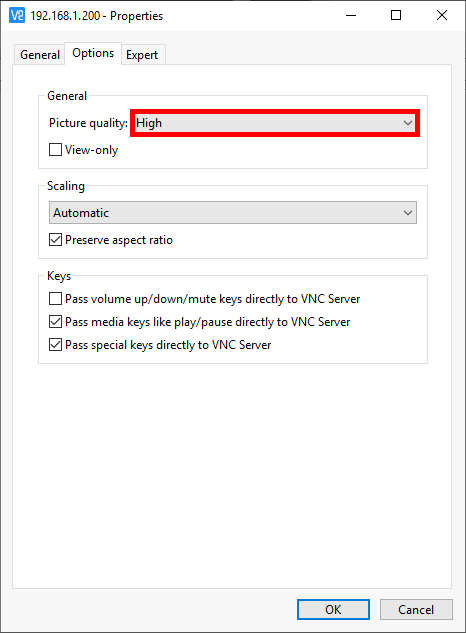
- Once connected, if you have unstable display, go to properties (to me it happened with Wayland).
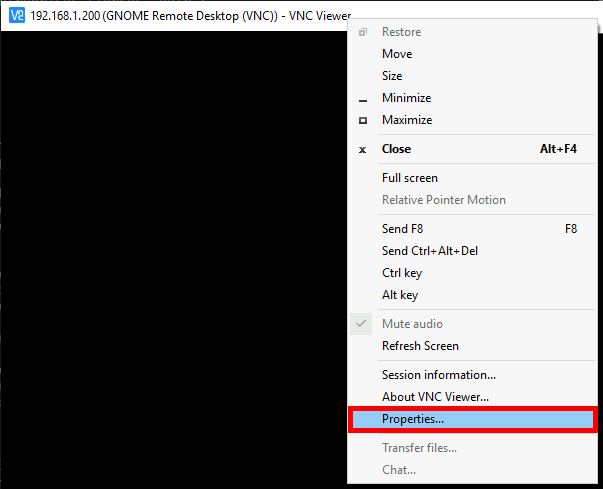
- And manually set Picture quality
Connect from a Linux host
We can use anyone of the many VNC Clients available. Example with tigervnc :
root@host:~# apt install tigervnc
std@host:~$ vncviewer 192.168.1.200:5900
caught XIO error
- If like me you have a lot of vnc crash with the caught XIO error add the -noxdamage (server side) :
std@host:~$ x11vnc -display :0 -noxdamage -rfbport 5900