Microsoft Entra: Automate Microsoft 365 Tasks with PowerShell App-Only Authentication
- Last updated: Jun 23, 2026

In the enterprise, more and more Microsoft services are being moved to their in-house cloud solutions: Microsoft 365, Azure and Microsoft Entra ID. This may be frustrating, but it's a fact. The use of PowerShell to administer these services is almost mandatory, and to open a PowerShell administration console, we generally authenticate with a login, a password and Microsoft Authenticator. But how can we run scripts that will be launched automatically and will therefore require authentication without any human interaction? Well, that's exactly what I'm going to explain in this article: how to authenticate to Exchange Online PowerShell and Microsoft Graph PowerShell with PowerShell without a password, using certificate-based app-only authentication.
Prerequisites
- Prerequisites:
- .Net: 4.7.2
- Tls: 1.2
Make sure you have a version of .Net at least equal to 4.7.2 and Tls with version 1.2. For example on a Windows 2016 server, I had to update my .Net version and enable Tls to 1.2.
- Display current configured Tls version:
PS C:\> [Net.ServicePointManager]::SecurityProtocol
Ssl3, Tls- Set Tls to version 1.2 for the current session context:
PS C:\> [Net.ServicePointManager]::SecurityProtocol = [Net.SecurityProtocolType]::Tls12
PS C:\> [Net.ServicePointManager]::SecurityProtocol
Tls12- Alternatively, we can run this PowerShell script to activate Tls 1.2 permanently:
If (-Not (Test-Path 'HKLM:\SOFTWARE\WOW6432Node\Microsoft\.NETFramework\v4.0.30319'))
{
    New-Item 'HKLM:\SOFTWARE\WOW6432Node\Microsoft\.NETFramework\v4.0.30319' -Force | Out-Null
}
New-ItemProperty -Path 'HKLM:\SOFTWARE\WOW6432Node\Microsoft\.NETFramework\v4.0.30319' -Name 'SystemDefaultTlsVersions' -Value '1' -PropertyType 'DWord' -Force | Out-Null
New-ItemProperty -Path 'HKLM:\SOFTWARE\WOW6432Node\Microsoft\.NETFramework\v4.0.30319' -Name 'SchUseStrongCrypto' -Value '1' -PropertyType 'DWord' -Force | Out-Null

If (-Not (Test-Path 'HKLM:\SOFTWARE\Microsoft\.NETFramework\v4.0.30319'))
{
    New-Item 'HKLM:\SOFTWARE\Microsoft\.NETFramework\v4.0.30319' -Force | Out-Null
}
New-ItemProperty -Path 'HKLM:\SOFTWARE\Microsoft\.NETFramework\v4.0.30319' -Name 'SystemDefaultTlsVersions' -Value '1' -PropertyType 'DWord' -Force | Out-Null
New-ItemProperty -Path 'HKLM:\SOFTWARE\Microsoft\.NETFramework\v4.0.30319' -Name 'SchUseStrongCrypto' -Value '1' -PropertyType 'DWord' -Force | Out-Null

If (-Not (Test-Path 'HKLM:\SYSTEM\CurrentControlSet\Control\SecurityProviders\SCHANNEL\Protocols\TLS 1.2\Server'))
{
    New-Item 'HKLM:\SYSTEM\CurrentControlSet\Control\SecurityProviders\SCHANNEL\Protocols\TLS 1.2\Server' -Force | Out-Null
}
New-ItemProperty -Path 'HKLM:\SYSTEM\CurrentControlSet\Control\SecurityProviders\SCHANNEL\Protocols\TLS 1.2\Server' -Name 'Enabled' -Value '1' -PropertyType 'DWord' -Force | Out-Null
New-ItemProperty -Path 'HKLM:\SYSTEM\CurrentControlSet\Control\SecurityProviders\SCHANNEL\Protocols\TLS 1.2\Server' -Name 'DisabledByDefault' -Value '0' -PropertyType 'DWord' -Force | Out-Null

If (-Not (Test-Path 'HKLM:\SYSTEM\CurrentControlSet\Control\SecurityProviders\SCHANNEL\Protocols\TLS 1.2\Client'))
{
    New-Item 'HKLM:\SYSTEM\CurrentControlSet\Control\SecurityProviders\SCHANNEL\Protocols\TLS 1.2\Client' -Force | Out-Null
}
New-ItemProperty -Path 'HKLM:\SYSTEM\CurrentControlSet\Control\SecurityProviders\SCHANNEL\Protocols\TLS 1.2\Client' -Name 'Enabled' -Value '1' -PropertyType 'DWord' -Force | Out-Null
New-ItemProperty -Path 'HKLM:\SYSTEM\CurrentControlSet\Control\SecurityProviders\SCHANNEL\Protocols\TLS 1.2\Client' -Name 'DisabledByDefault' -Value '0' -PropertyType 'DWord' -Force | Out-Null
Creating a new self-signed certificate
We will need a certificate to authenticate our script. So we're going to create one on the computer on which we want to run the script automatically.
- From a PowerShell administrator console, create a self-signed certificate valid for 10 years and to the Personal Local Machine store:
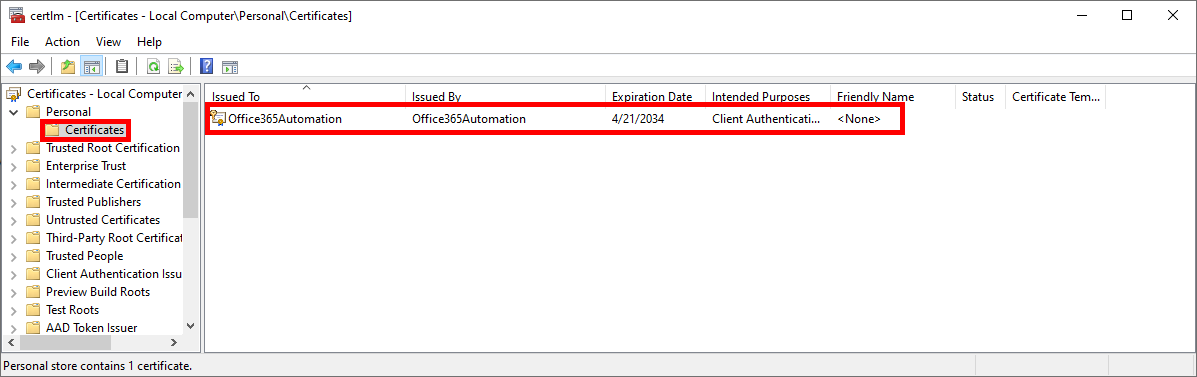
PS C:\> $cert = New-SelfSignedCertificate -CertStoreLocation Cert:\LocalMachine\My -NotAfter (Get-Date).AddYears(10) -Subject "CN=Office365Automation" -KeySpec KeyExchange- Use the
certlm.msccommand to open the Certificates Manager Tool console and check the presence of the previously created certificate:
- Export the self-signed certificate to a
mycert.cerfile inside C:\:
PS C:\> $cert = Get-ChildItem -Path Cert:\LocalMachine\My | Where-Object { $_.Subject -eq "CN=Office365Automation" }PS C:\> Export-Certificate -Cert $cert -FilePath "C:\mycert.cer"Microsoft Entra
- From https://entra.microsoft.com, log on to the Microsoft Entra Portal with an administrator account:
App Registration
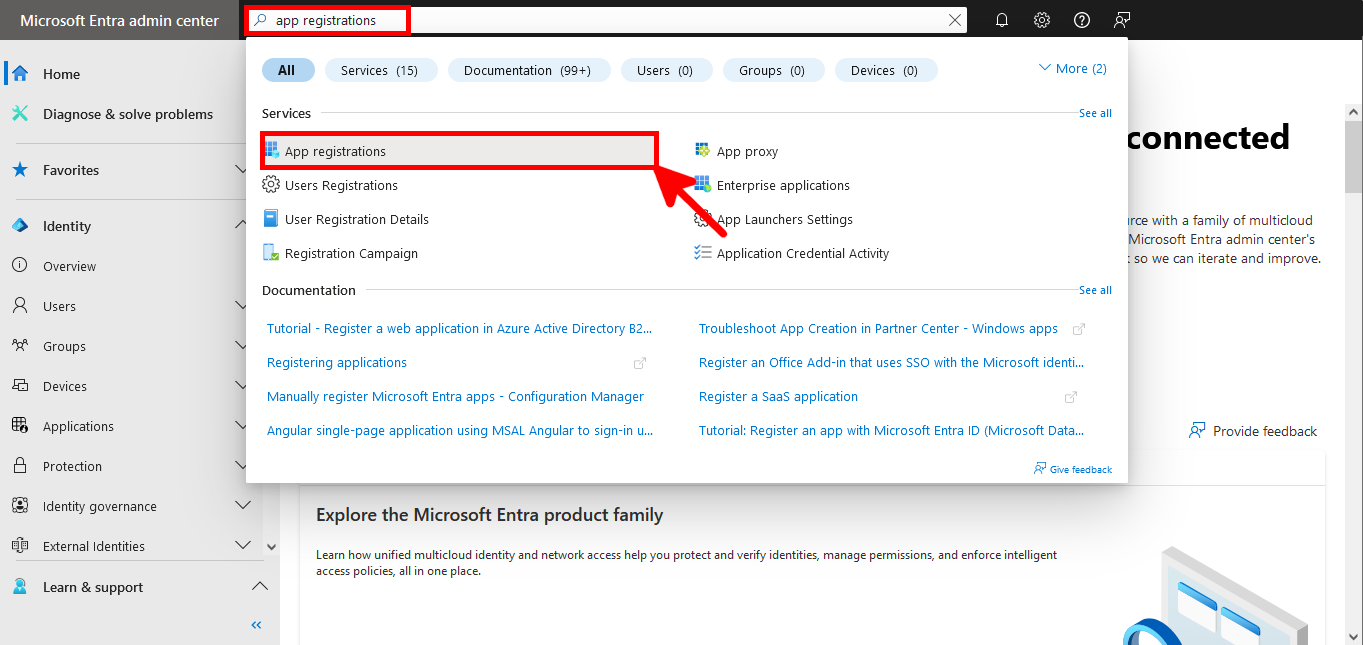
- Search for App Registrations in the search toolbar:
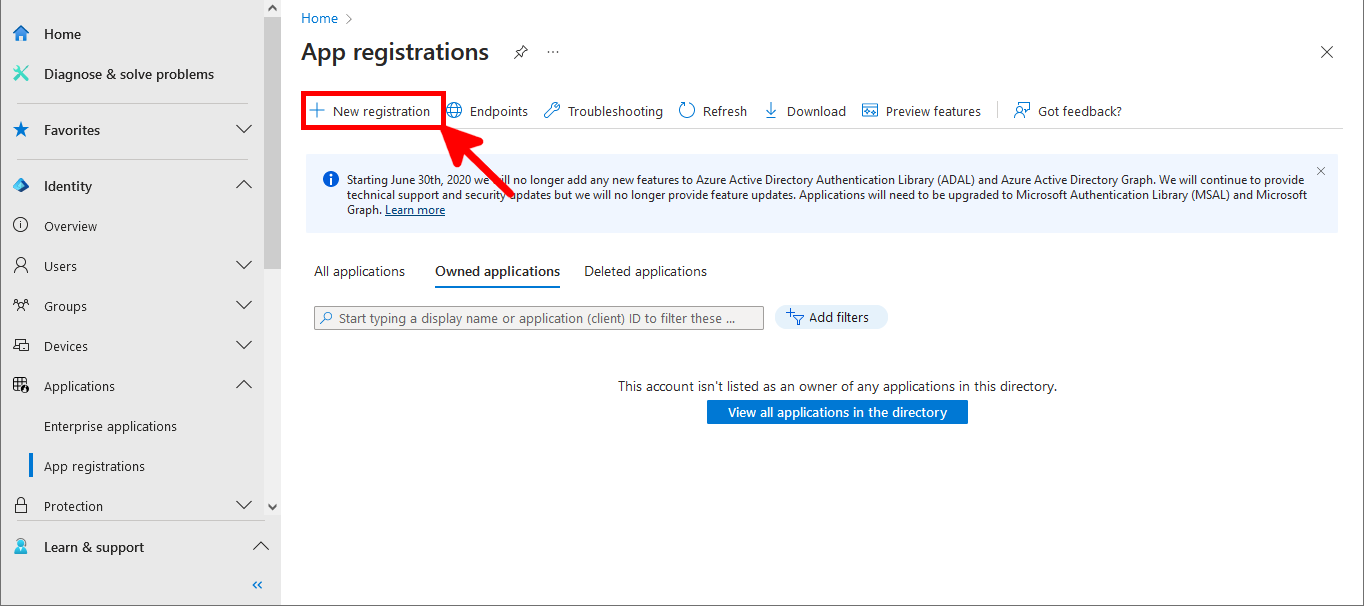
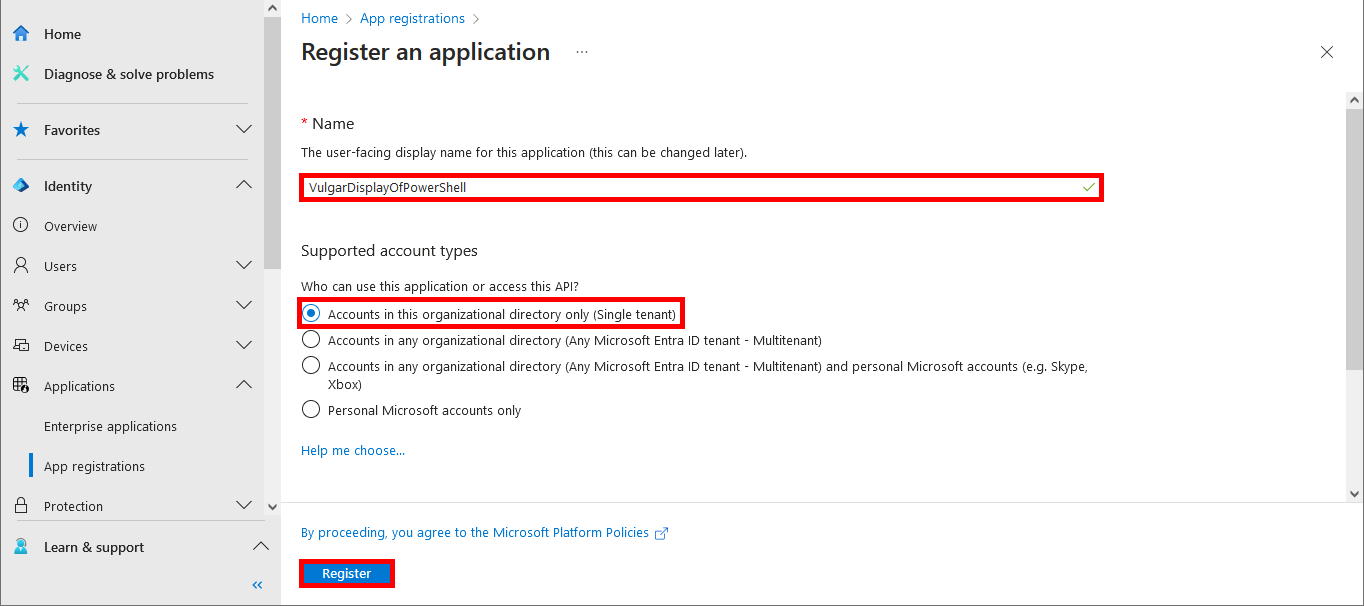
- Click to New registration:
- Enter a Name, select Single tenant and click on Register:
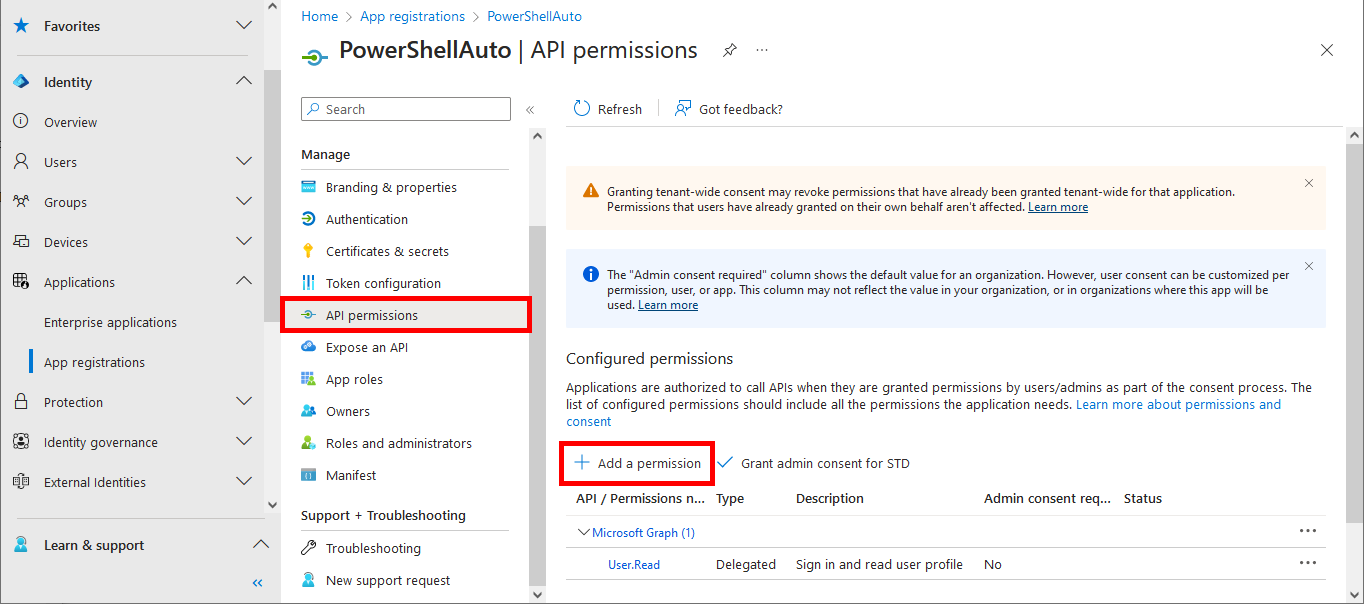
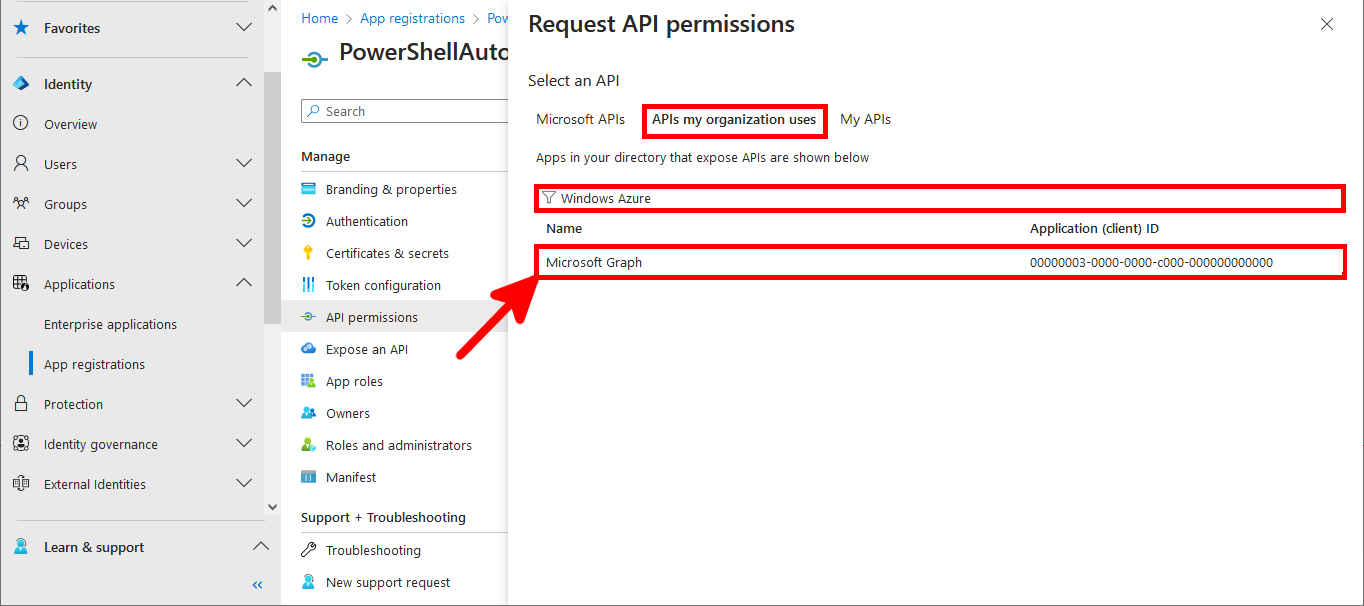
- Go to the API permissions menu and click on Add a permission:
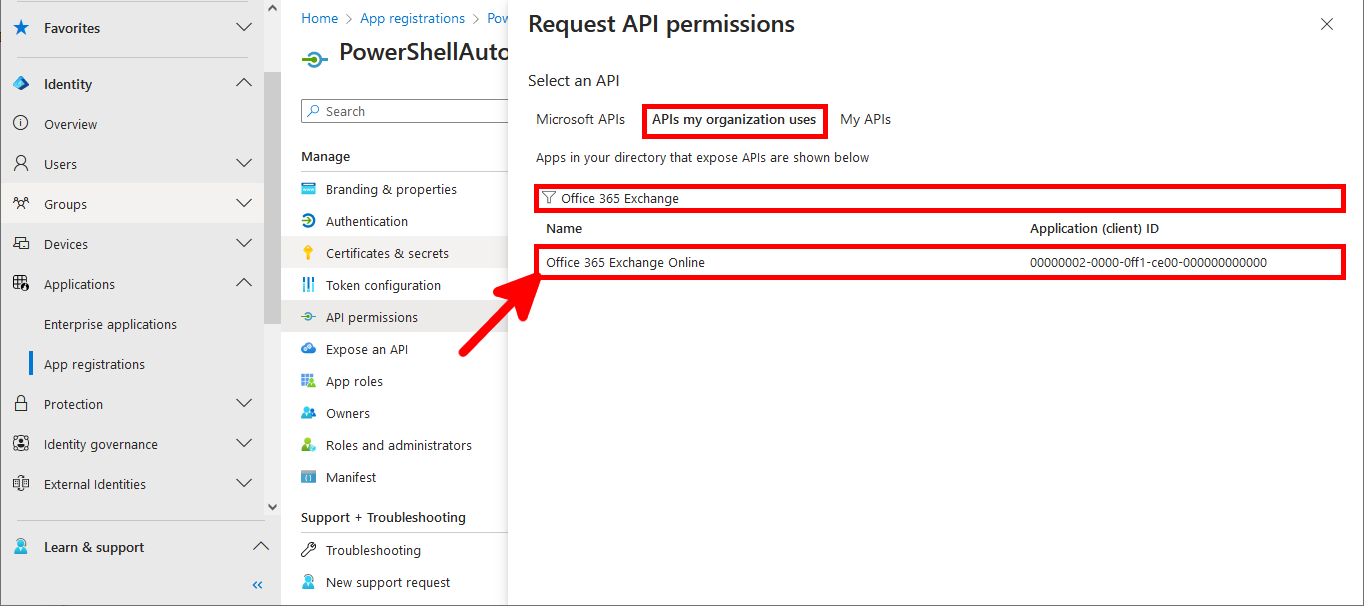
- In the APIs my organization uses tab, search for Office 365 Exchange (or with its id:
00000002-0000-0ff1-ce00-000000000000) and click on Office 365 Exchange Online:
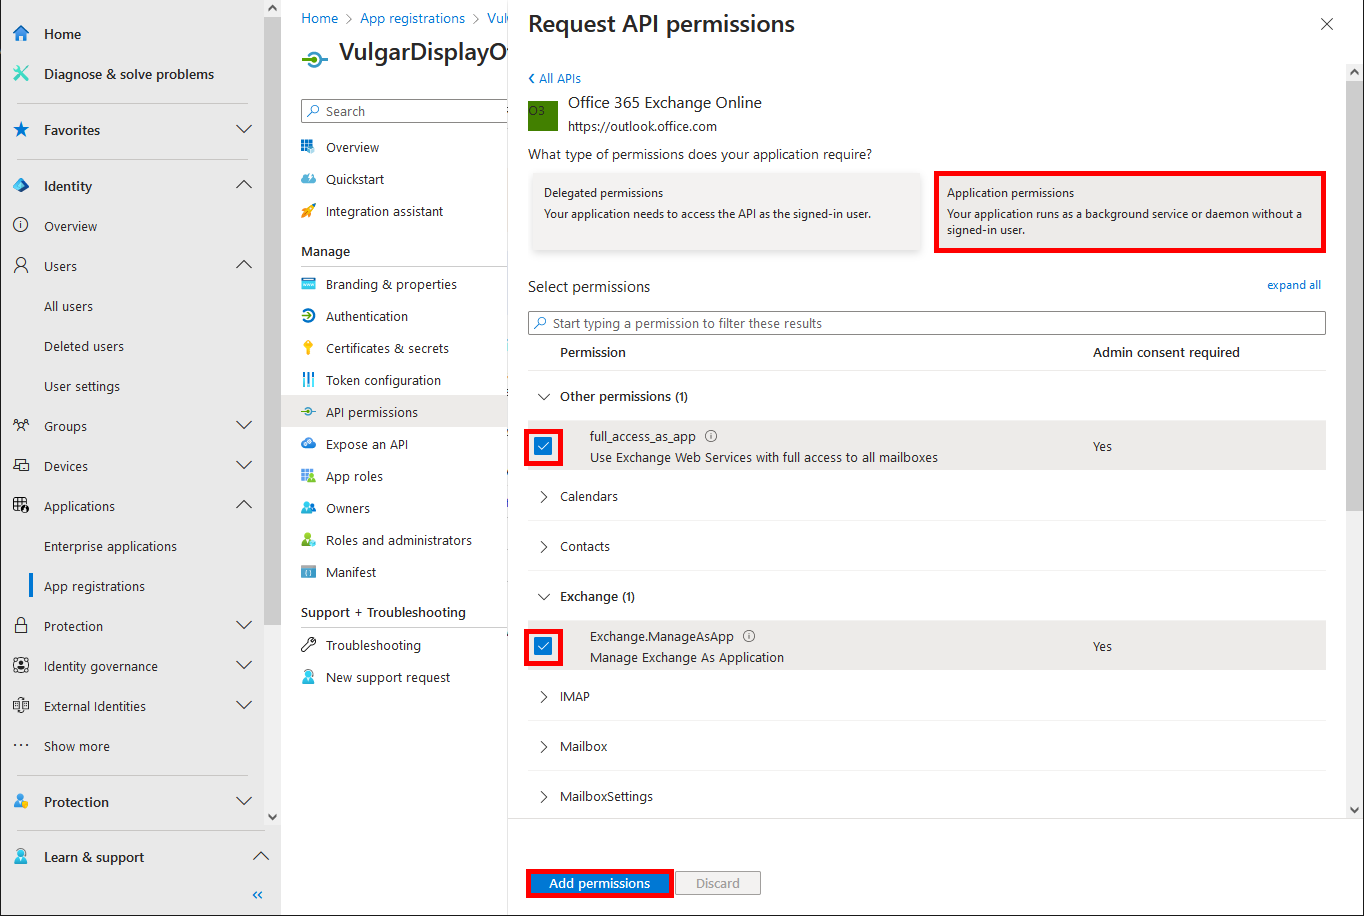
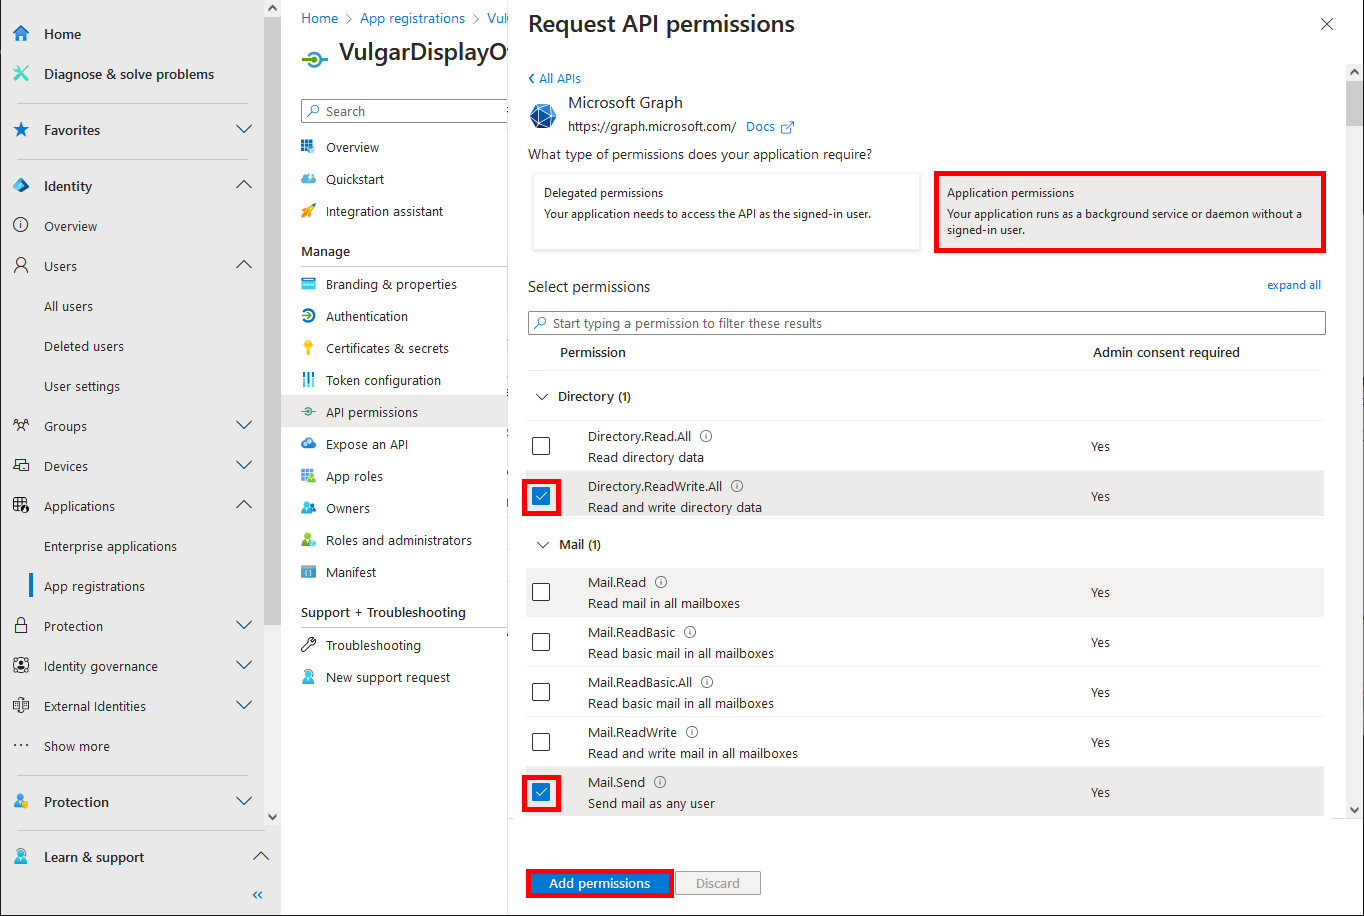
- Select Application permissions then check the
full_access_as_appandExchange.ManageAsAppboxes and click to Add permissions:
- Do the same with Microsoft Graph (or with its id:
00000003-0000-0000-c000-000000000000):
- Look for the
Directory.ReadWrite.Allpermission (andMail.Sendif we want to be able to send mails from our script), check the corresponding box and click on Add permissions:
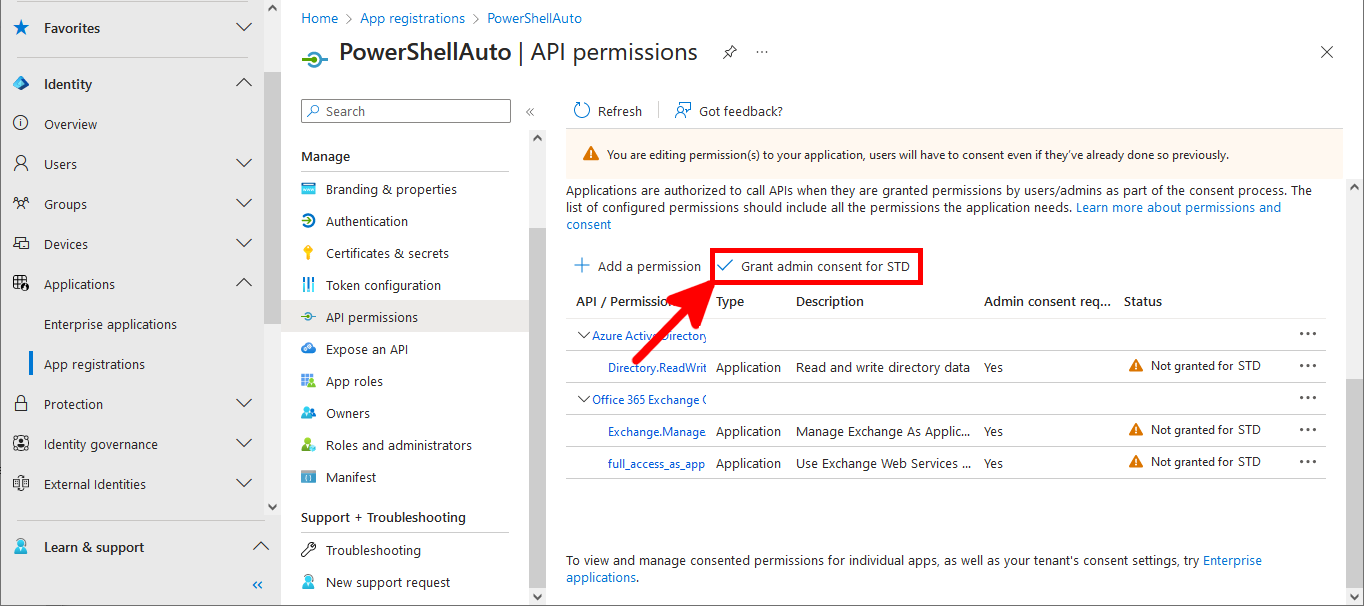
- In the API permissions menu, click on Grant admin consent:
Import the certificate
- In the Certificates & secrets menu, click on the Certificates tab then on Upload certificate:
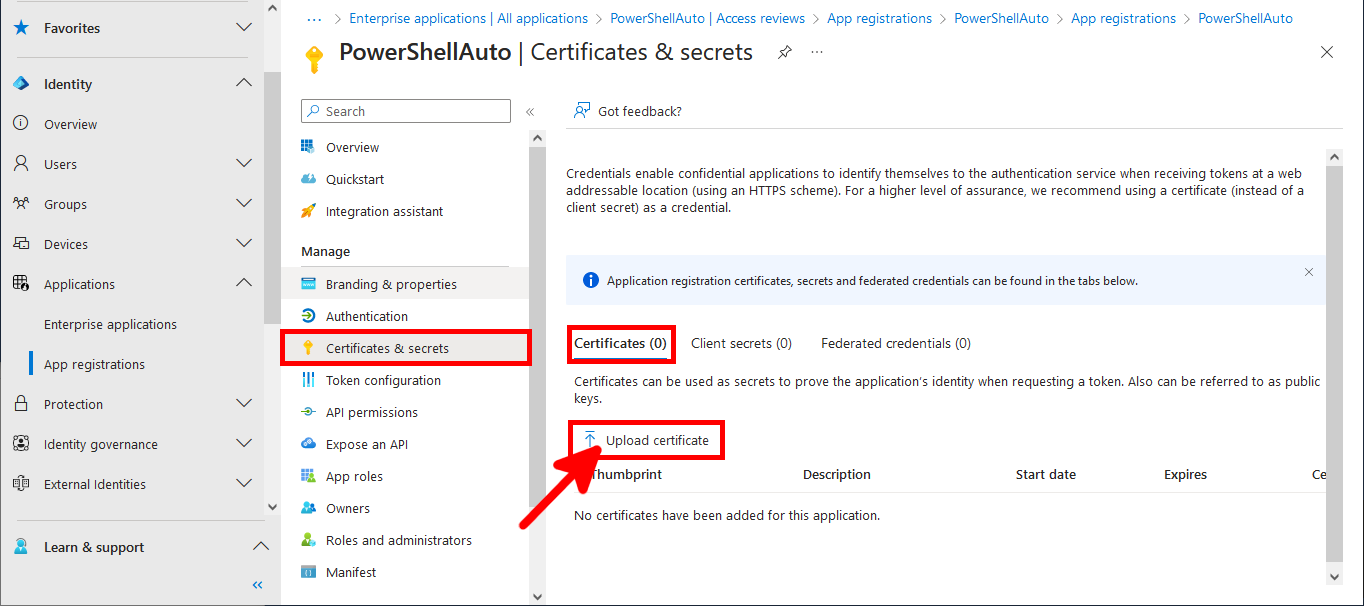
- Import the previously created Certificate and click on the Add button:
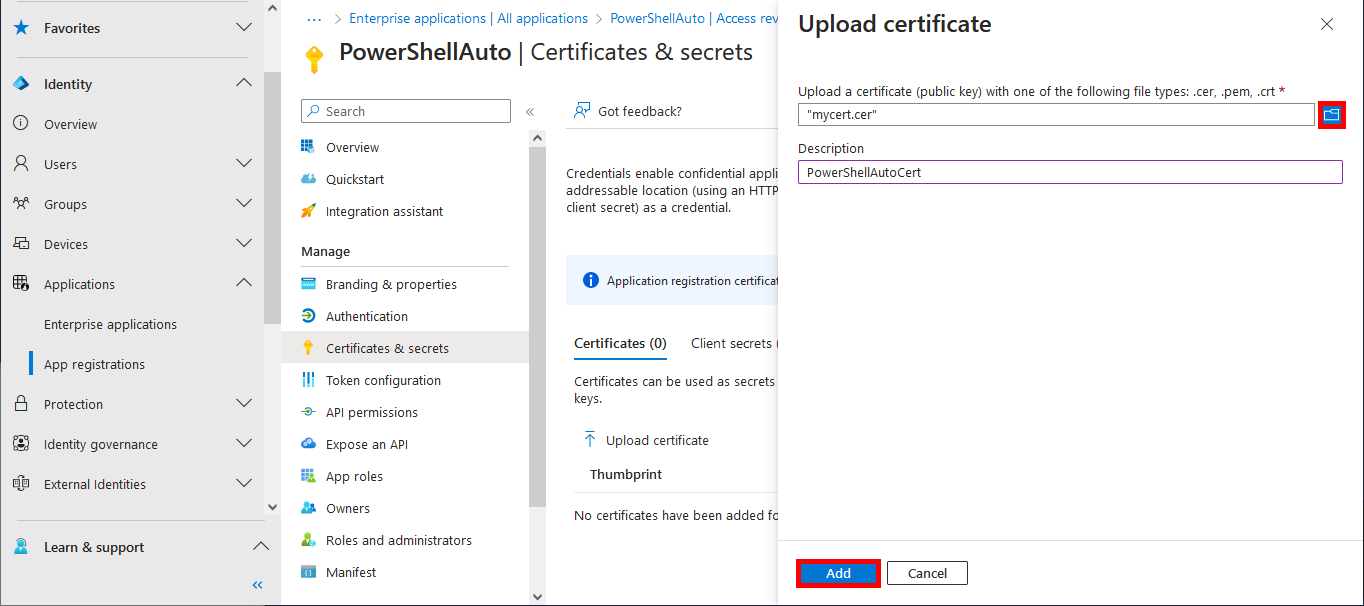
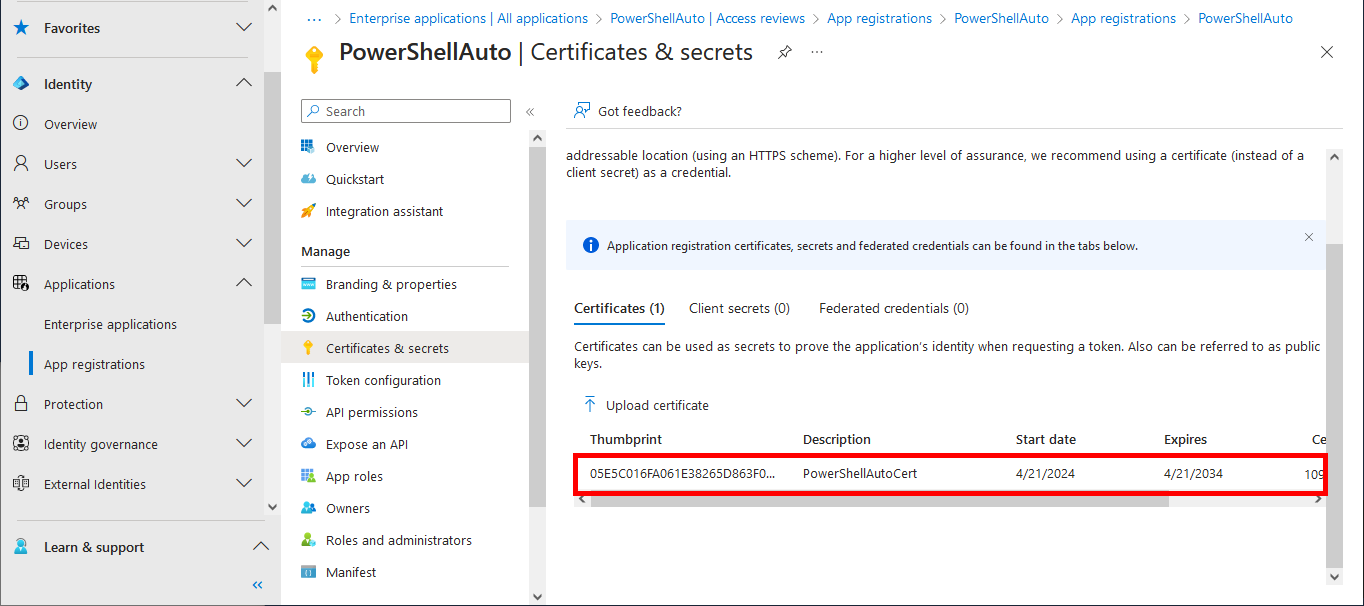
- Once imported, the certificate should appear:
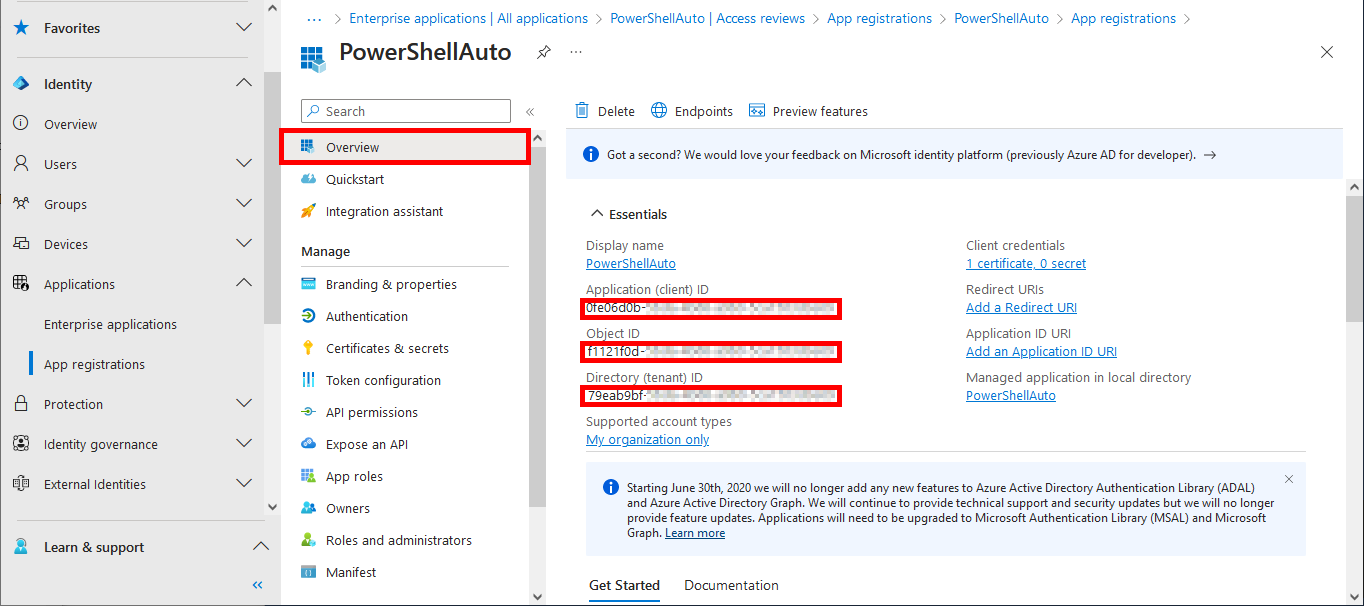
- From the Overview menu, retrieve information on Application ID, Object ID and Tenant ID:
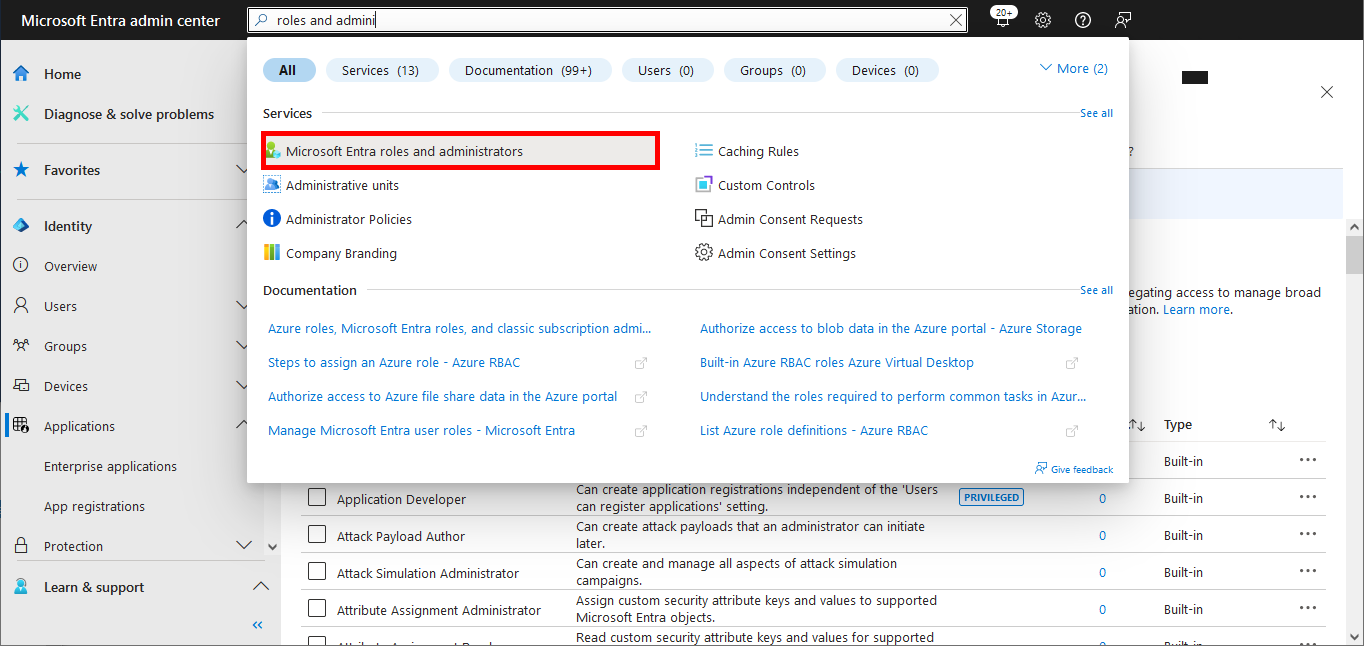
Microsoft Entra roles and administrators
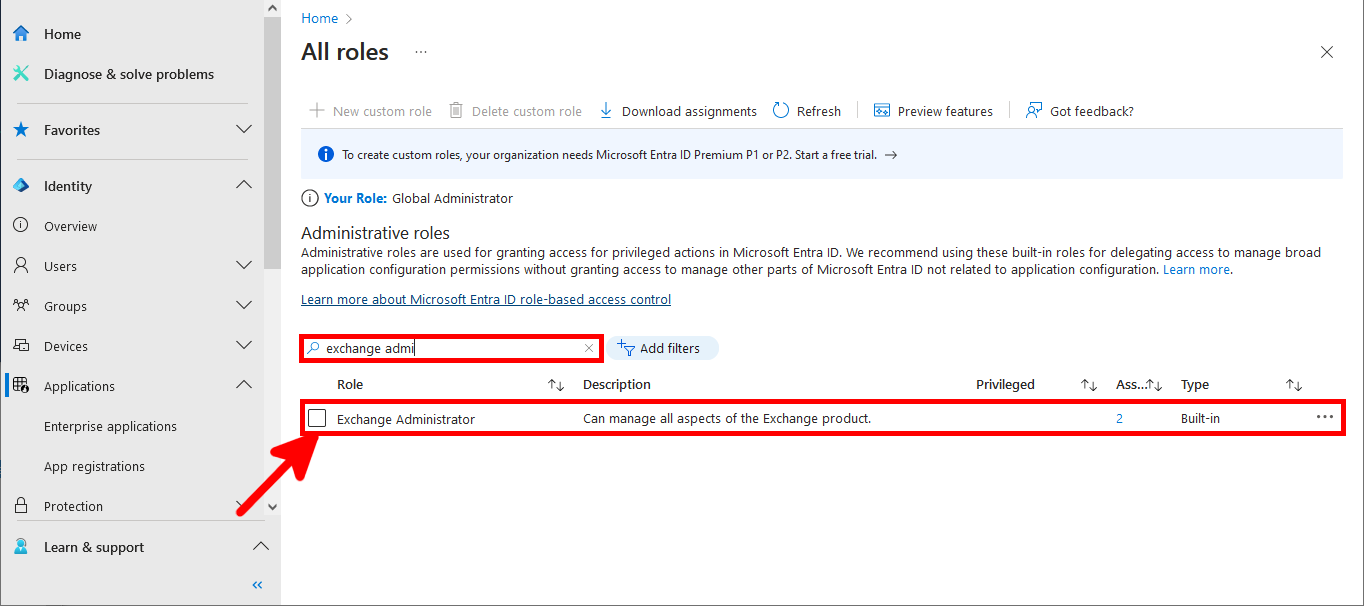
- From the search bar, search for Microsoft Entra roles and administrators:
- In All roles search for Exchange Administrator and edit the role:
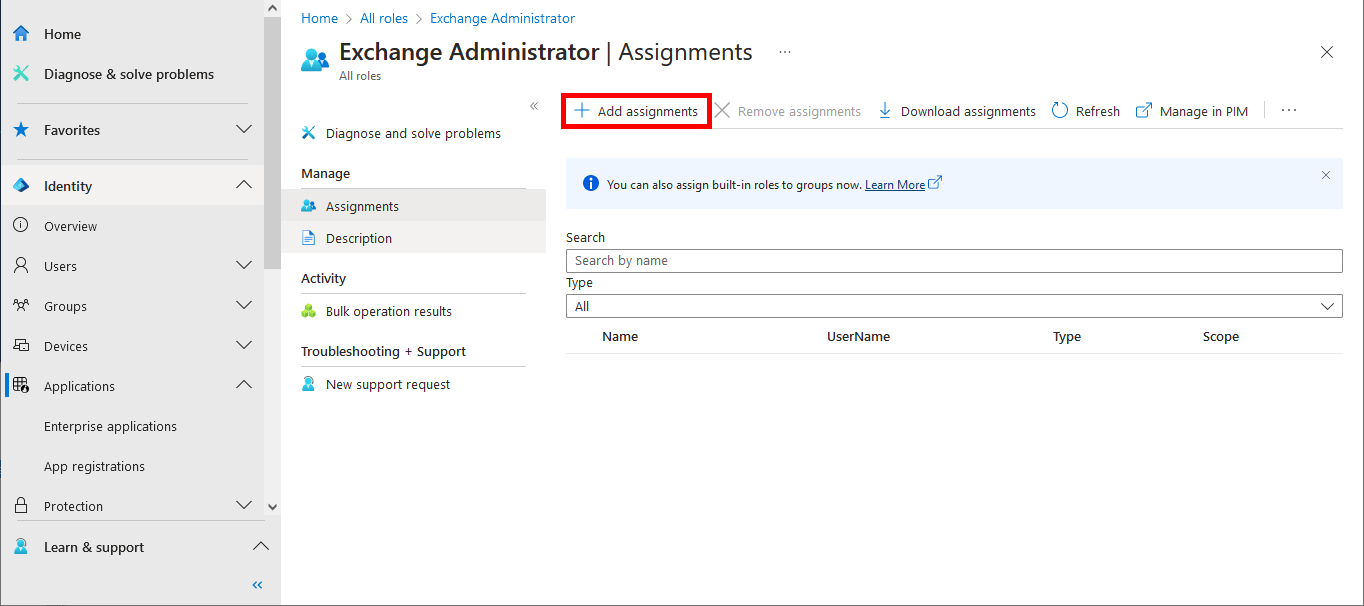
- Click on Add Assignments:
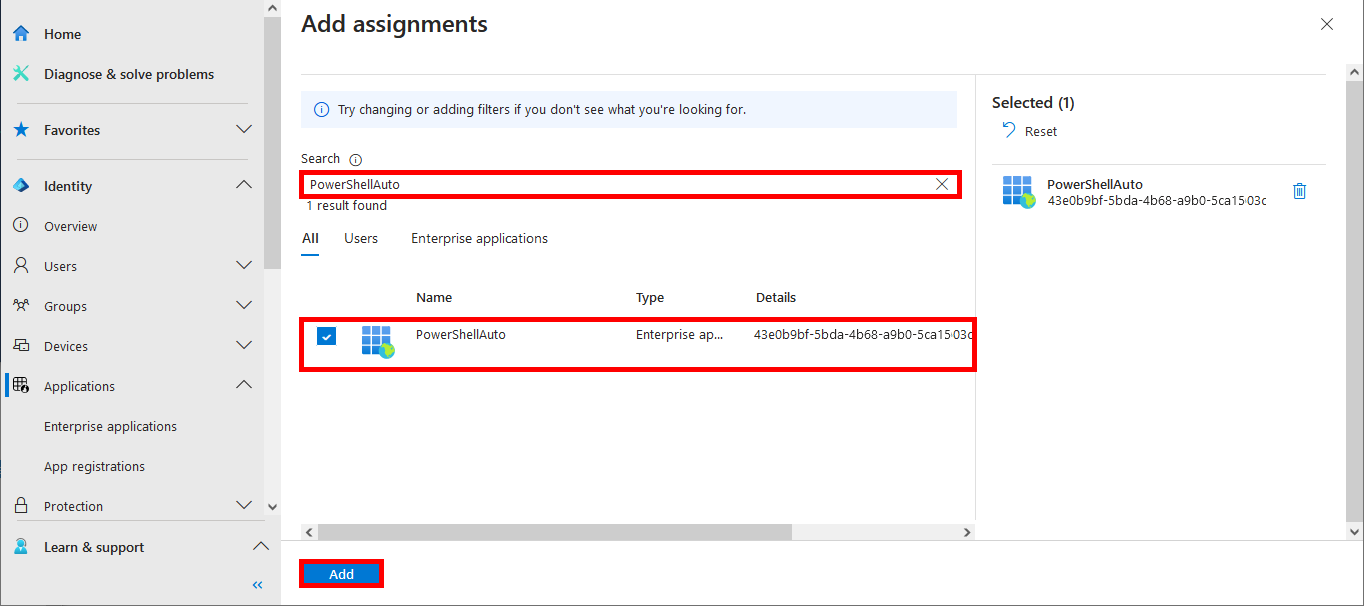
- Add the name of the previously defined Application:
- Still in All roles, search for global administrator:
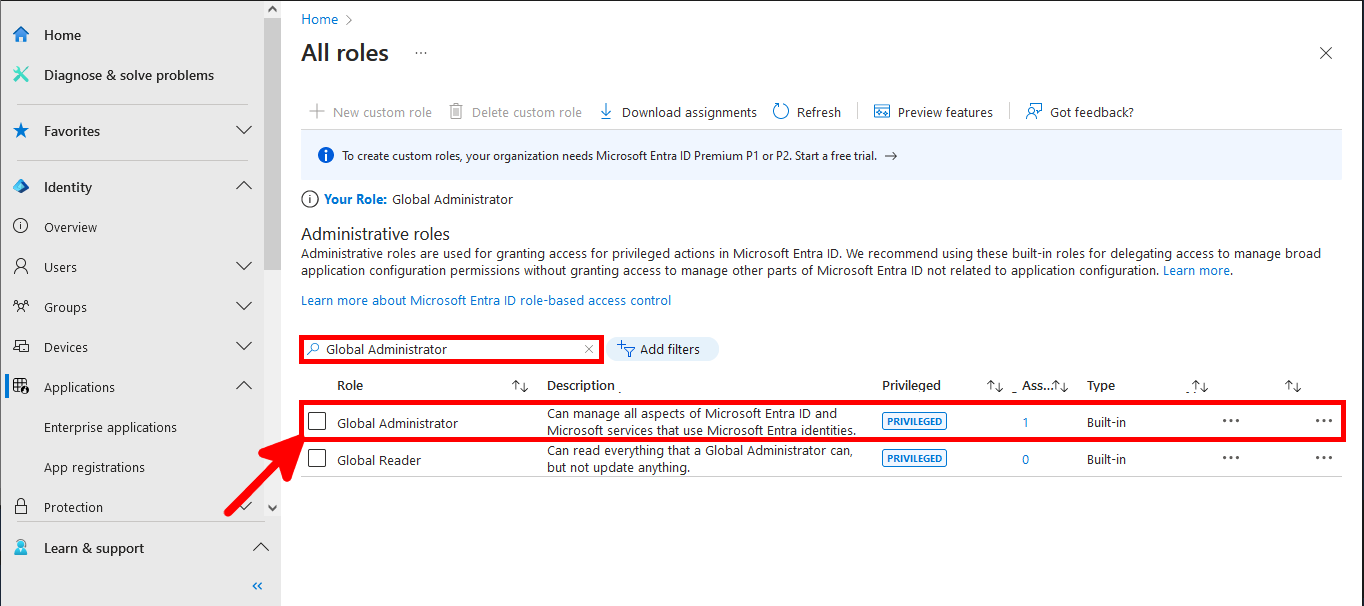
- As for the Exchange Administrator role, click on Add assignments:
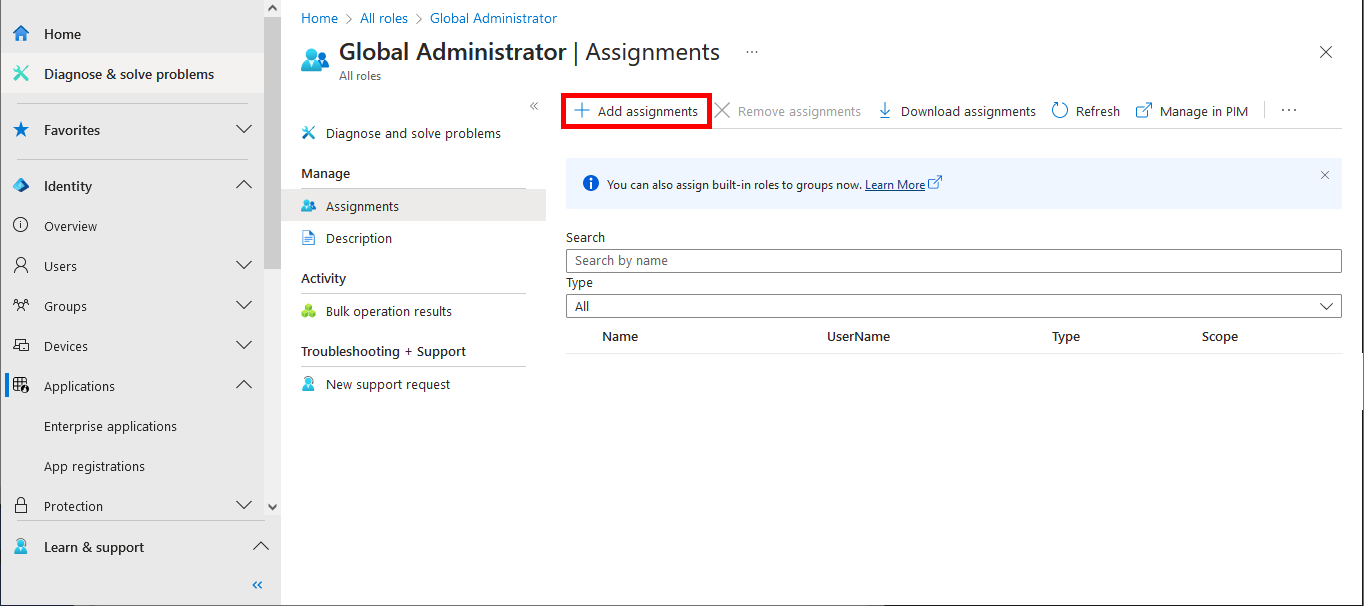
- Add the name of the previously defined Application:
Connect with PowerShell

Everything has been configured on the Entra portal, so we can now open a PowerShell prompt (with administrator rights) to connect to Exchange Online Management and AzureAd without needing a password.
PowerShell Modules
- Install the ExchangeOnlineManagement and Microsoft Graph PowerShell modules:
PS C:\> Install-Module -name ExchangeOnlineManagementPS C:\> Install-Module -name Microsoft.Graph- Check that you can import modules and enter the
powershell.exe -ExecutionPolicy Unrestrictedcommand if you get the following error:
PS C:\> Import-Module ExchangeOnlineManagement
Import-Module : File C:\Program Files\WindowsPowerShell\Modules\ExchangeOnlineManagement\3.4.0\netFramework\ExchangeOnlineManagement.psm1 cannot be loaded because running scripts is disabled on this system. For more information, see about_Execution_Policies at https:/go.microsoft.com/fwlink/?LinkID=135170.
At line:1 char:1
+ Import-Module ExchangeOnlineManagement
+ ~~~~~~~~~~~~~~~~~~~~~~~~~~~~~~~~~~~~~~
    + CategoryInfo          : SecurityError: (:) [Import-Module], PSSecurityException
    + FullyQualifiedErrorId : UnauthorizedAccess,Microsoft.PowerShell.Commands.ImportModuleCommand
PS C:\> PowerShell.exe -ExecutionPolicy Unrestricted PS C:\> Import-Module ExchangeOnlineManagementPS C:\> Import-Module Microsoft.GraphConnect to services
- Get the certificate thumbprint:
PS C:\> Get-ChildItem -Path Cert:\LocalMachine\My | Where-Object { $_.Subject -eq "CN=Office365Automation" } | Select-Object Thumbprint

Thumbprint
----------
05E5C016FA061E38265D863F04C6CAFC674C84B0- Arguments:
- CertificateThumbprint: Self-signed certificate thumbprint
- AppId or ApplicationId: Application ID
- Organization or TenantDomain: the account name in the format XXX.onmicrosoft.com or the domain
- Connect to ExchangeOnline with informations previously collected:
PS C:\> Connect-ExchangeOnline -CertificateThumbprint "05E5C016FA061E38265D863F04C6CAFC674C84B0" -AppId "0fe06d0b-XXXXXX-XXXX-XXXX-XXXXXXXXXXXX" -Organization "XXX.onmicrosoft.com"- Connect to AzureAD:
PS C:\> Connect-MgGraph -CertificateThumbprint "05E5C016FA061E38265D863F04C6CAFC674C84B0" -ApplicationId "0fe06d0b-XXXXXX-XXXX-XXXX-XXXXXXXXXXXX" -Tenant "XXX.onmicrosoft.com" -NoWelcomeTests
Once logged in, we should be able to create Office365 accounts and set AzureAD rights.
- For example, create a MailBox and force account to change password:
PS C:\> New-Mailbox -Name "Jane Doe" -DisplayName "Jane Doe" -MicrosoftOnlineServicesID "jane.doe@STD.onmicrosoft.com" -Password (ConvertTo-SecureString -String "P@ssW0rDSuXX" -AsPlainText -Force) -FirstName "Jane" -LastName "Doe"PS C:\> Set-Mailbox -Identity "Jane Doe" -Office "In Hell To Pay"PS C:\> Update-MgUser -UserId "jane.doe@STD.onmicrosoft.com" -PasswordProfile @{ Password = "P@ssW0rDSuXX"; ForceChangePasswordNextSignIn= $true } -Department "In Hell To Pay" -UsageLocation "US"