How to Configure an IPsec Transport Mode Tunnel Between Two Windows Machines
- Last updated: Jun 5, 2024
This article explains how to set up a secure IPsec VPN between Microsoft Windows hosts on the same LAN, in order to significantly enhance network security. With this configuration, all communications between machines will be fully encrypted, without exception.
Network Architecture
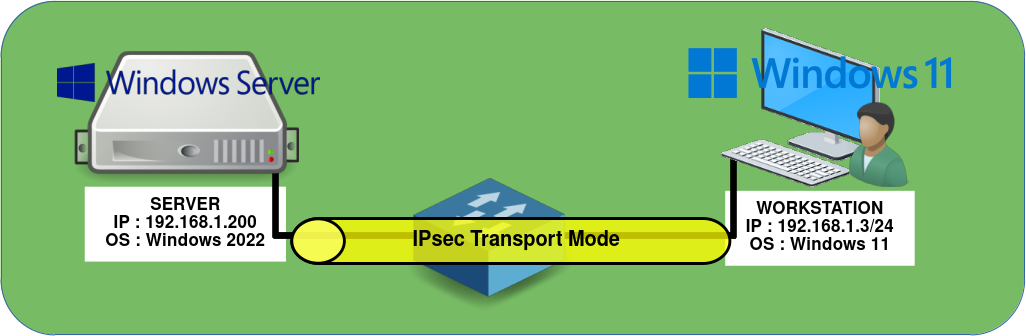
For the purposes of this article, we will keep the network architecture as simple as possible. A secure IPsec VPN connection using a pre-shared key (PSK) will be established between a computer running Windows 11 and a server running Windows Server 2022, both located on the same local network.

Windows Server
IPsec Configuration
Graphical User Interface (GUI)
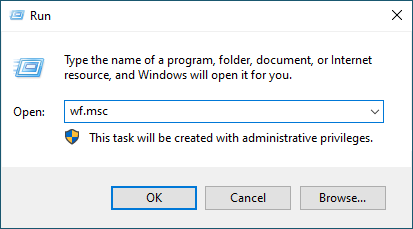
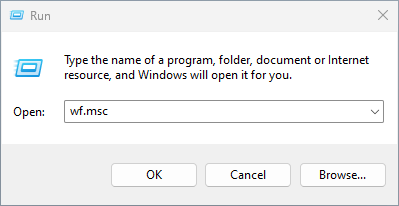
- Open the Windows Defender Firewall with Advanced Security console:
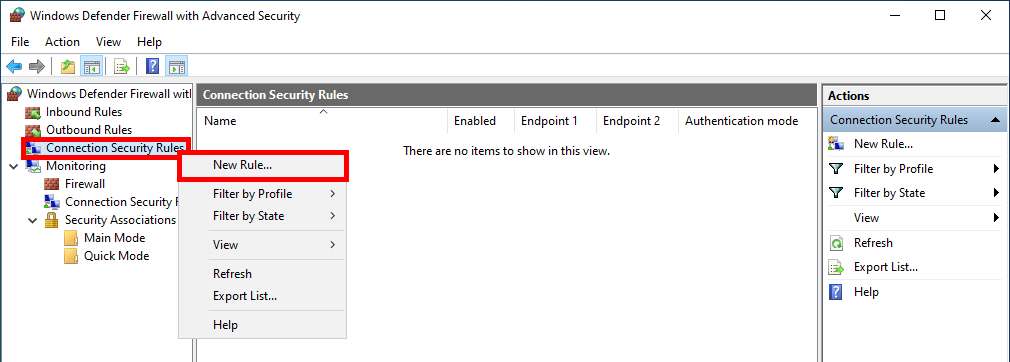
- Do a right click on Connection Security Rules and select New Rule…:
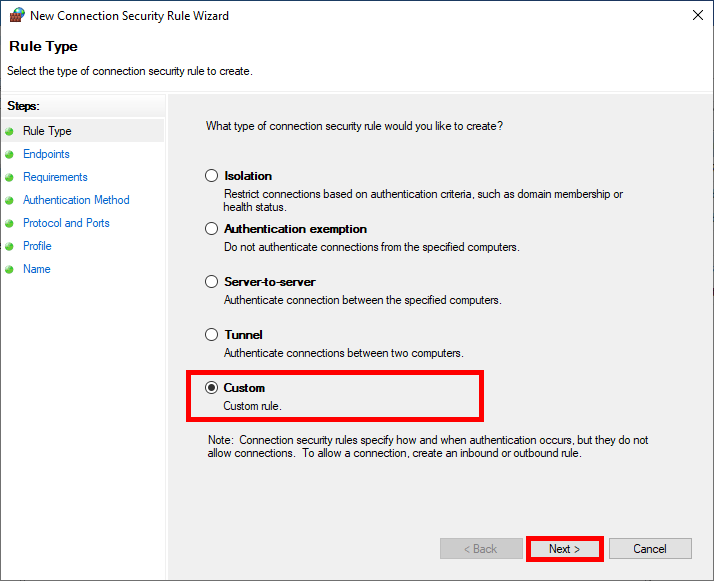
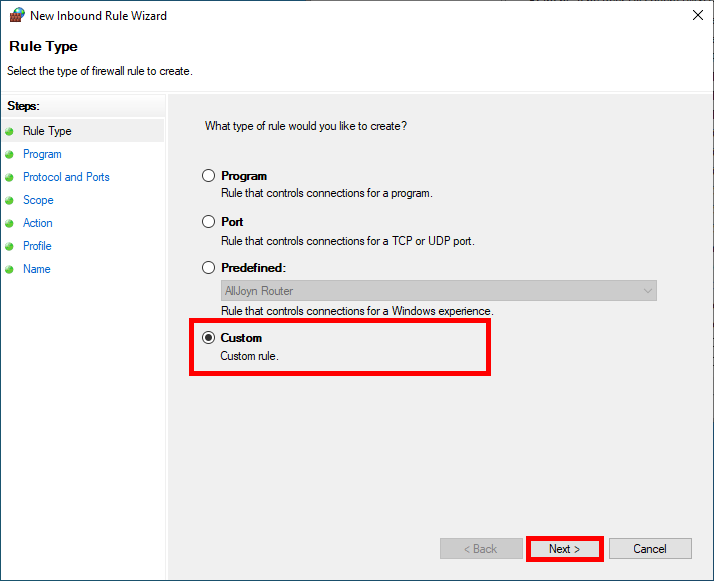
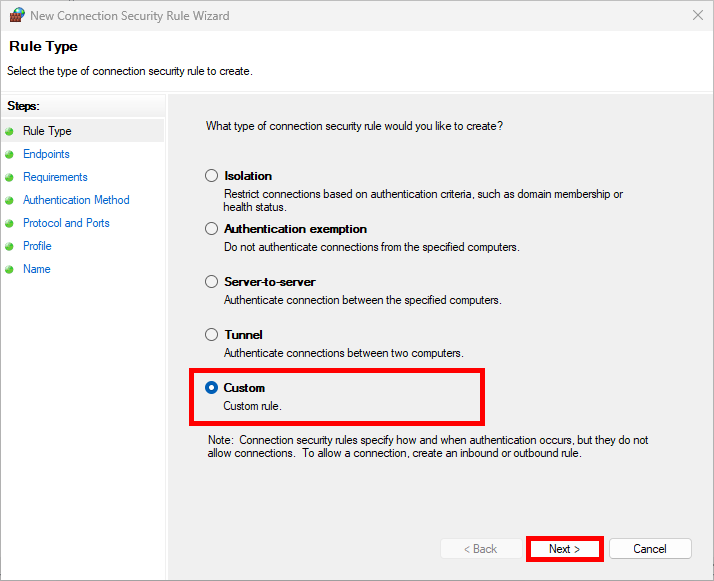
- Select Custom and click Next:
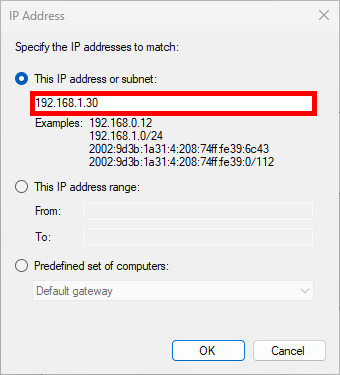
- In the Which computers are in Endpoint 1 section, select These IP addresses and click on Add…:
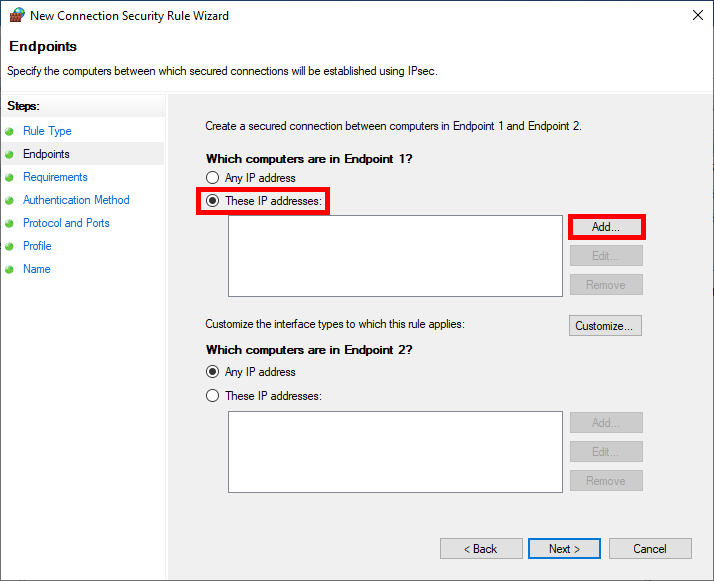
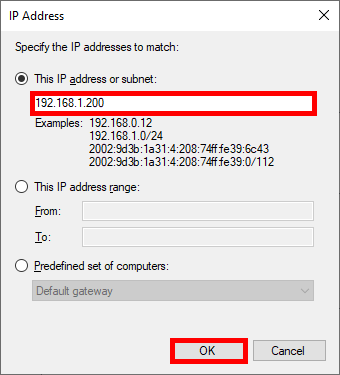
- Here we add the Host or Network with which we need to establish an IPsec connection to communicate:
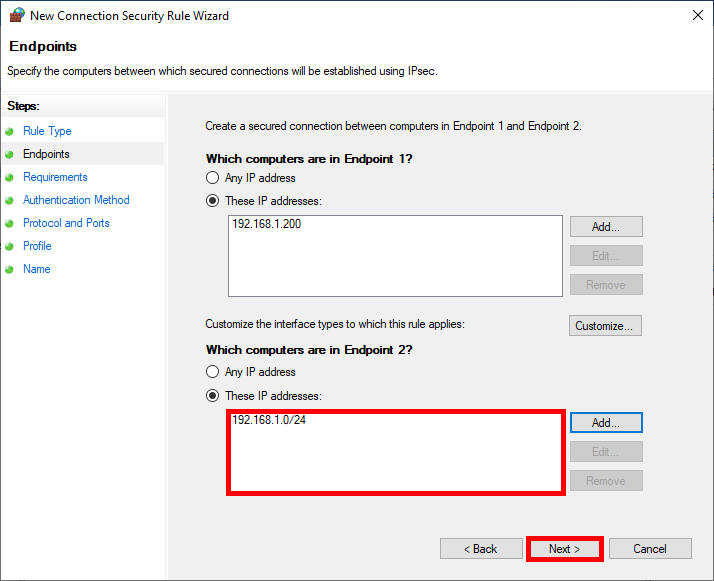
- Do the same with Endpoint 2 entering the server's IP address then click Next:
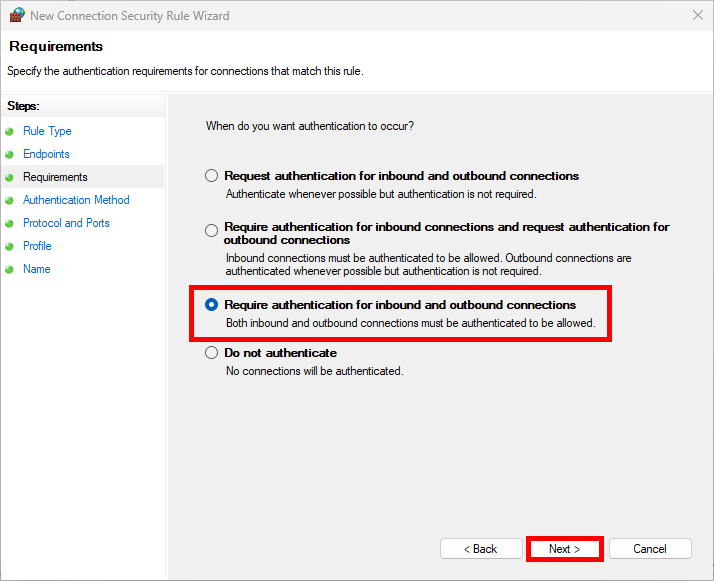
- For maximum security and impose the use of IPsec select Require authentication for inbound and outbound connections:

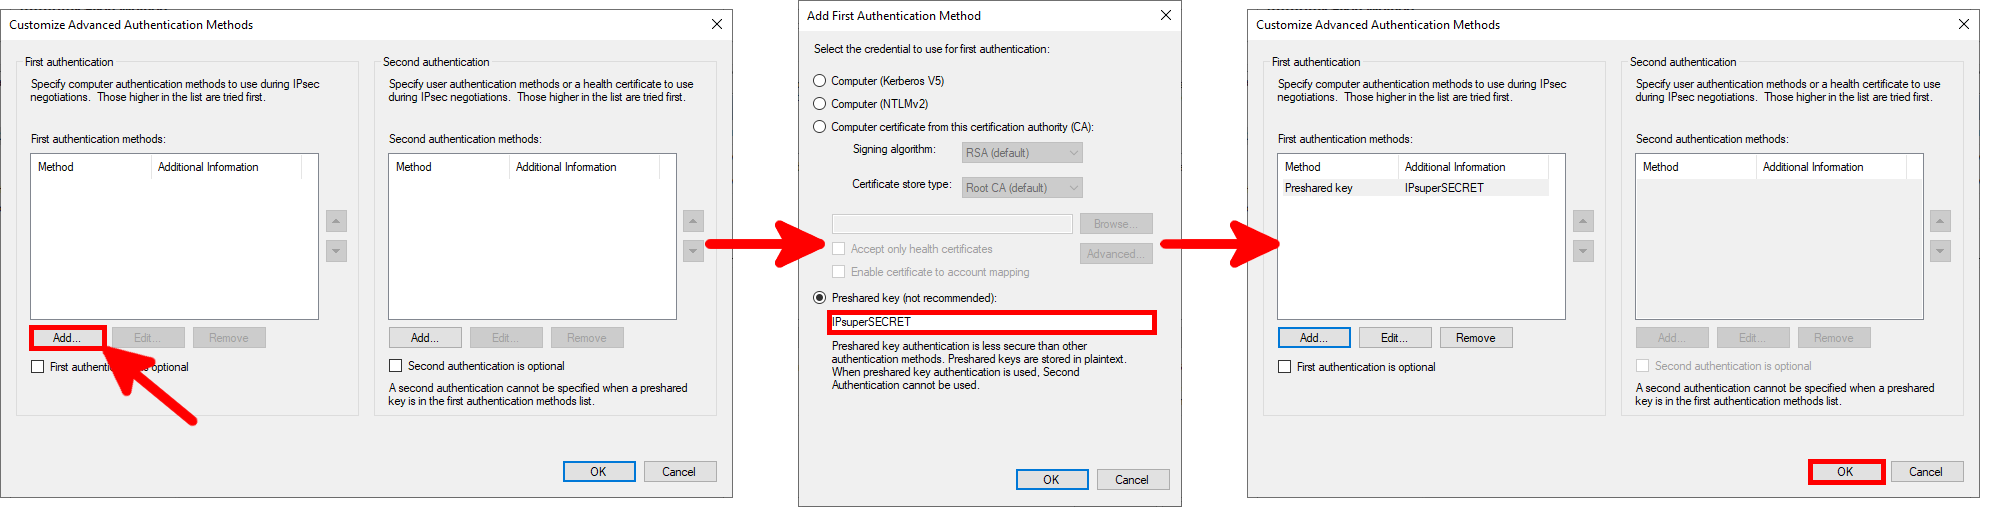
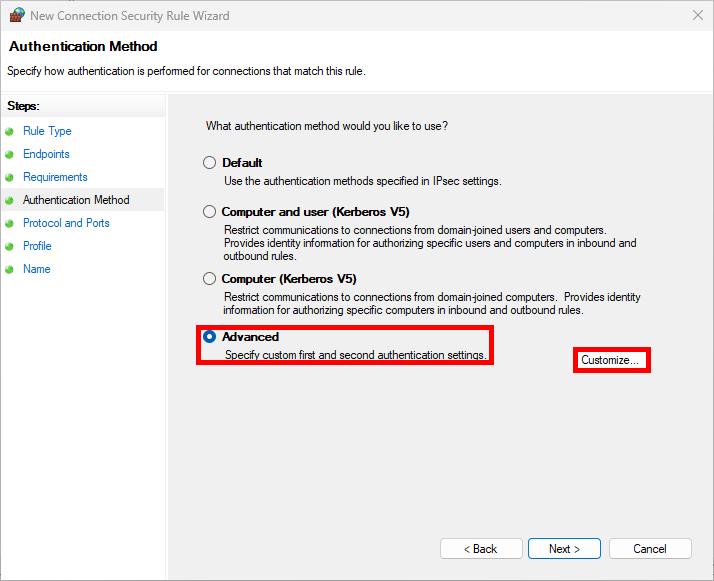
- As we'll be using a preshared key as our Authentication Method in this example, click on Customize…:
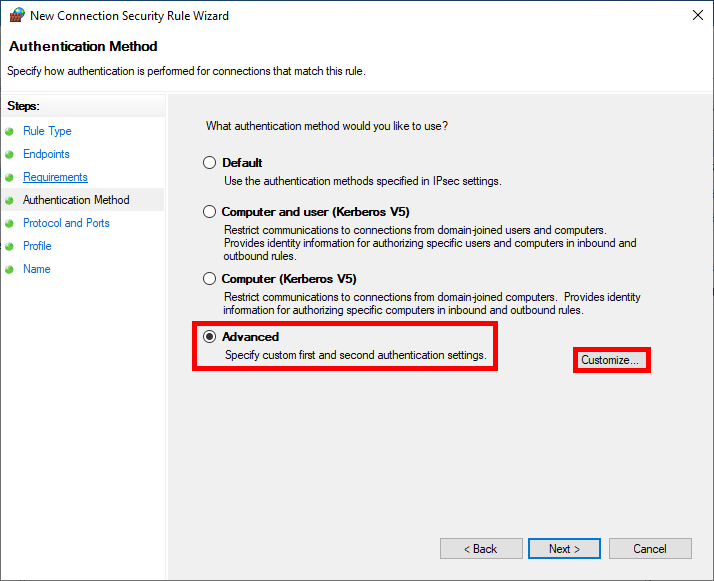
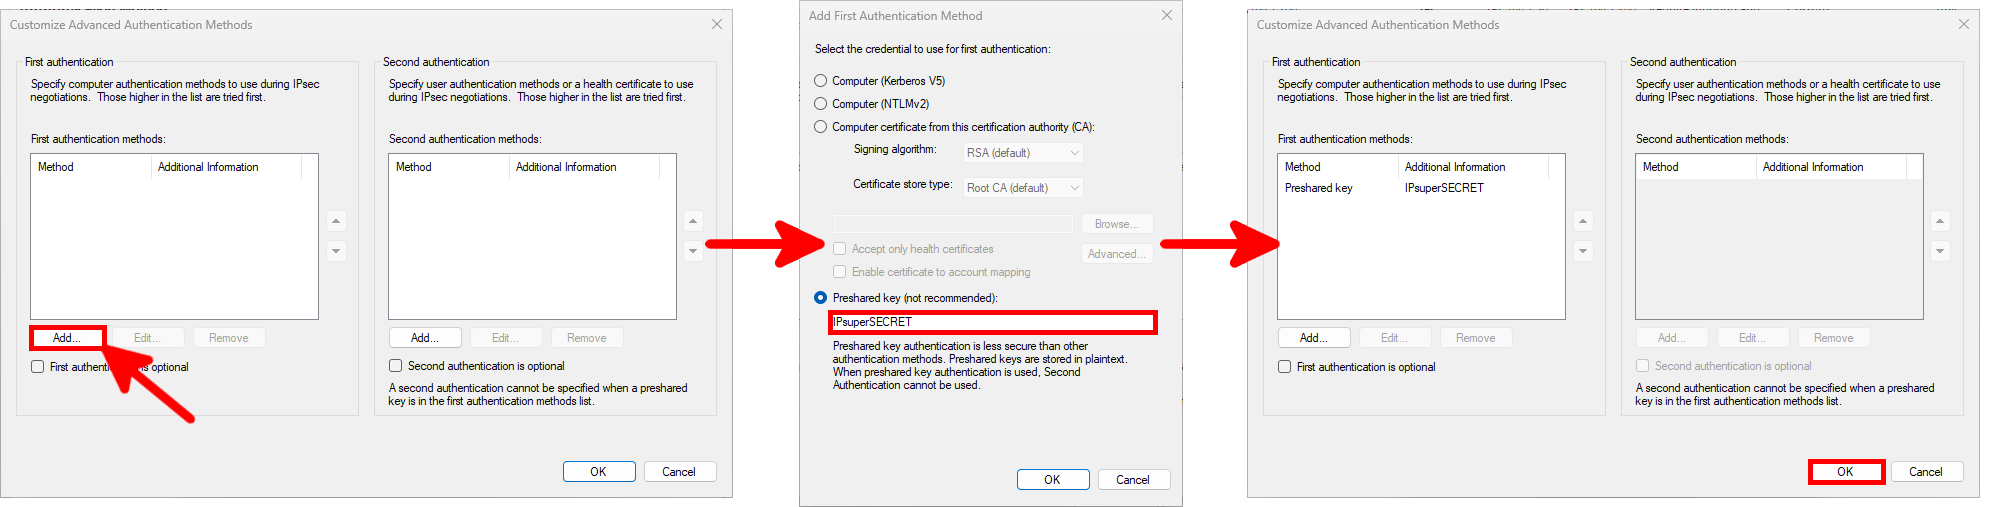
- Follow these steps to set the Preshared key:
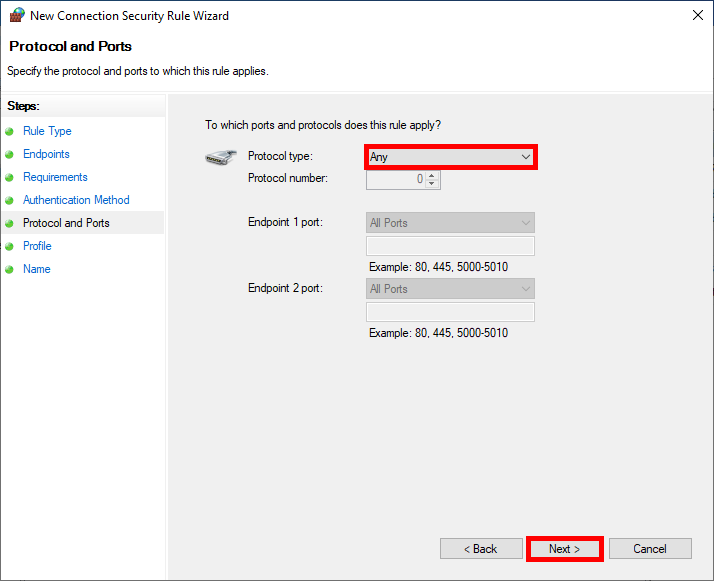
- We can specify one or more specific protocols to be encapsulated inside IPsec, here we encapsulate everything:
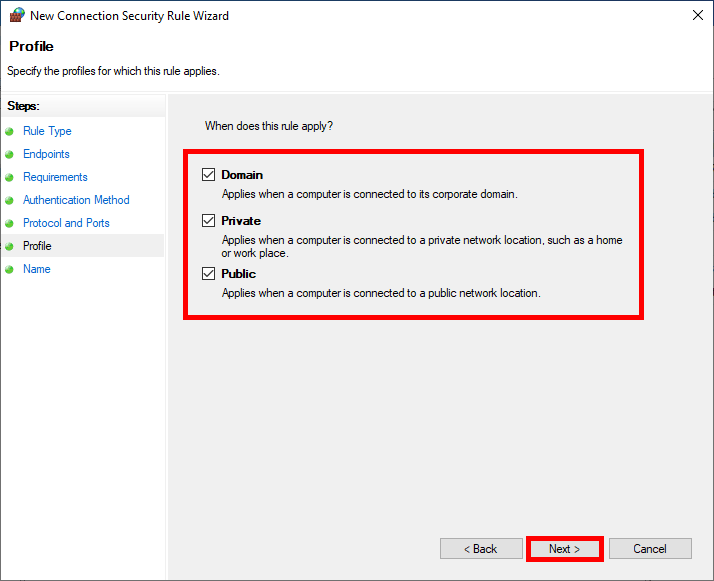
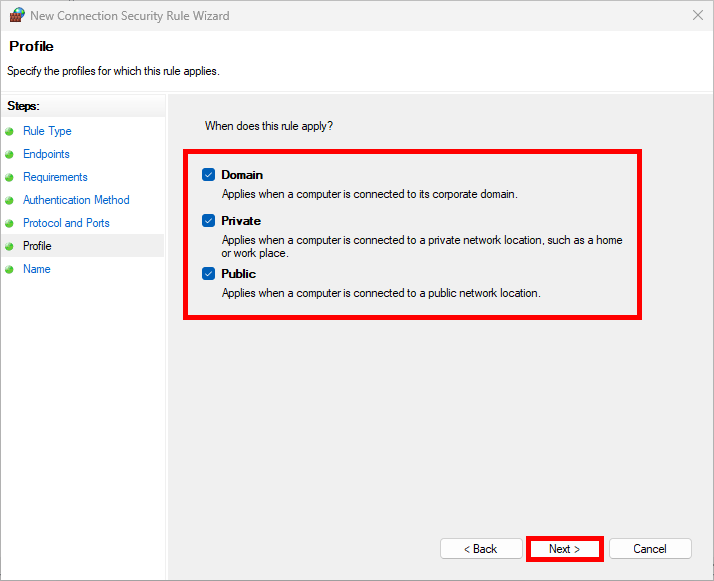
- We can restrict the rule to specific profiles:
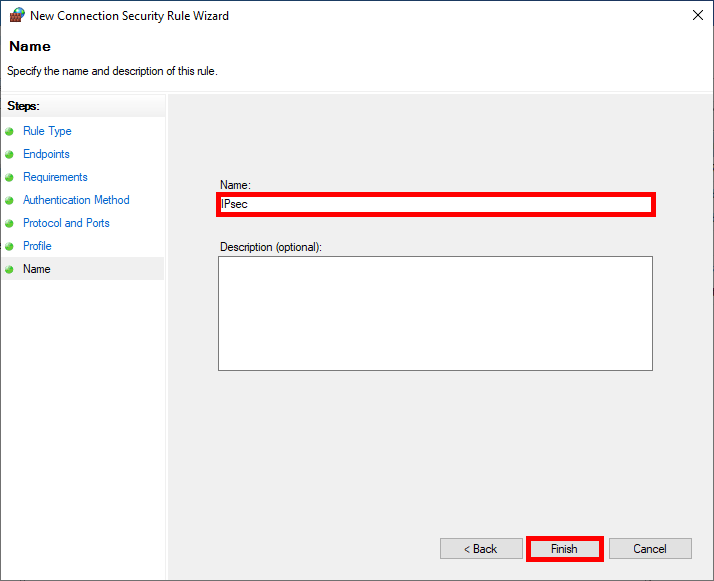
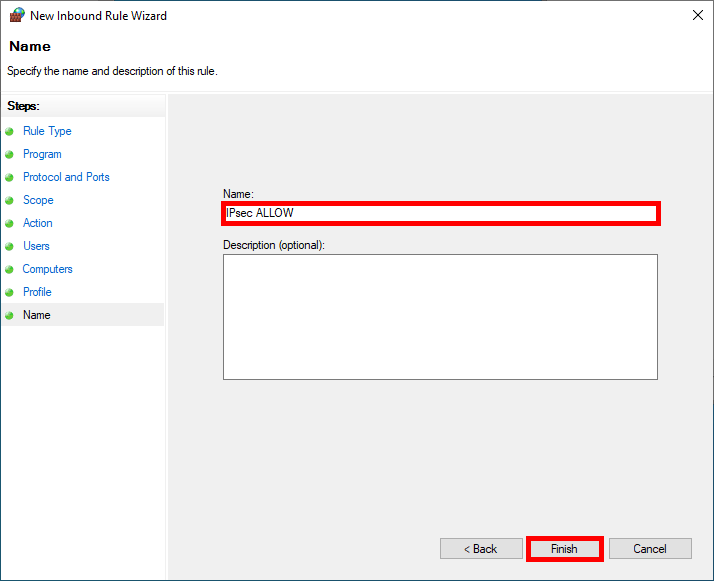
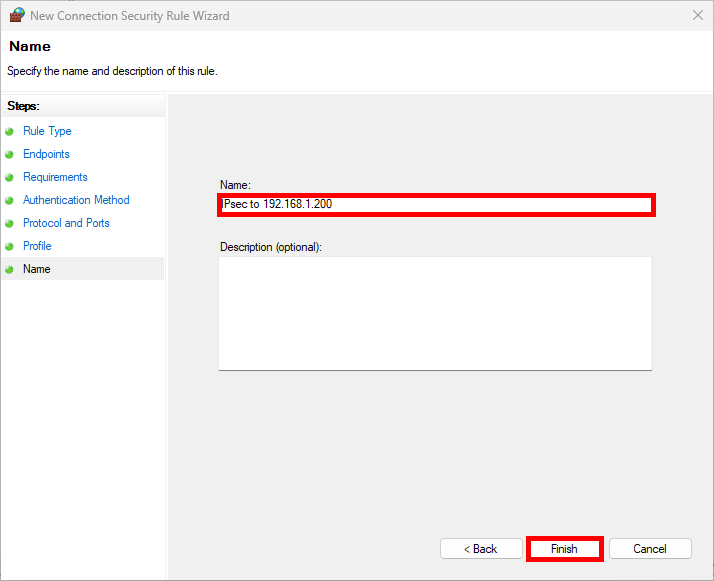
- Finally specify the Name of the rule:
PowerShell
- We can create the same IPsec Rule as the one configured just above, in a three PowerShell commands line:
PS C:\> $PSKAuthProp = New-NetIPsecAuthProposal -Machine -PreSharedKey "IPsuperSECRET"PS C:\> $PSKAuthSet = New-NetIPsecPhase1AuthSet -DisplayName "PSK auth" -Proposal $PSKAuthPropPS C:\> New-NetIPsecRule -DisplayName "IPsec" -Name "IPsec" -Mode Transport -InboundSecurity Require -OutboundSecurity Require -LocalAddress 192.168.1.200 -RemoteAddress 192.168.1.30 -Enable True -Phase1AuthSet $PSKAuthSet.NameFireWall Configuration
We will create a Firewall Rule to allow encrypted flows.
Graphical User Interface (GUI)
- Do a right click on Inbound Security Rules and select New Rule…:

- Select Custom and click Next:
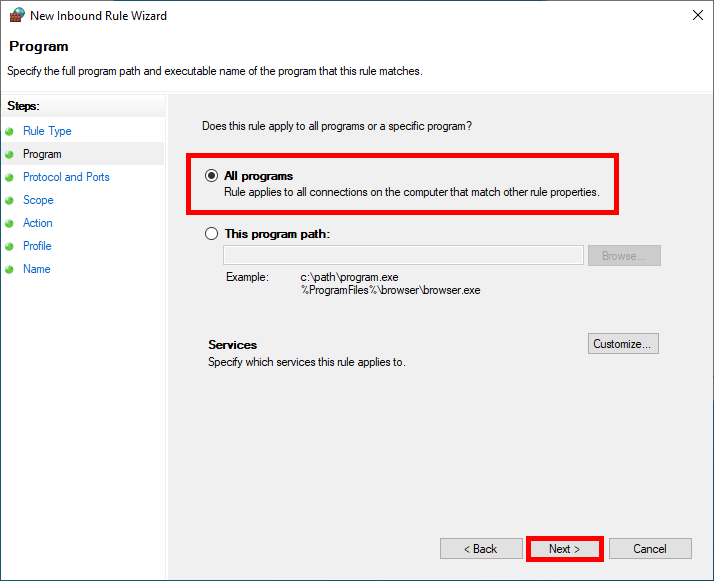
- Choose All programs and click on Next:
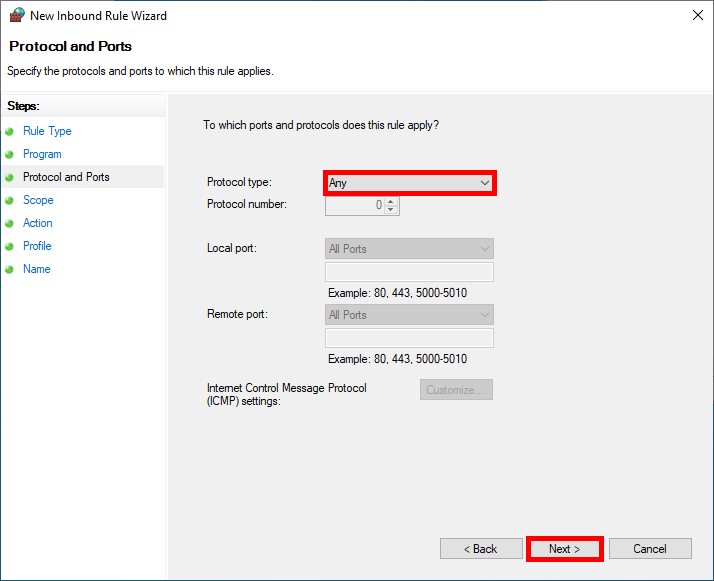
- We can specify one or more specific protocols to be matched by the rule, here we will match Any protocols:
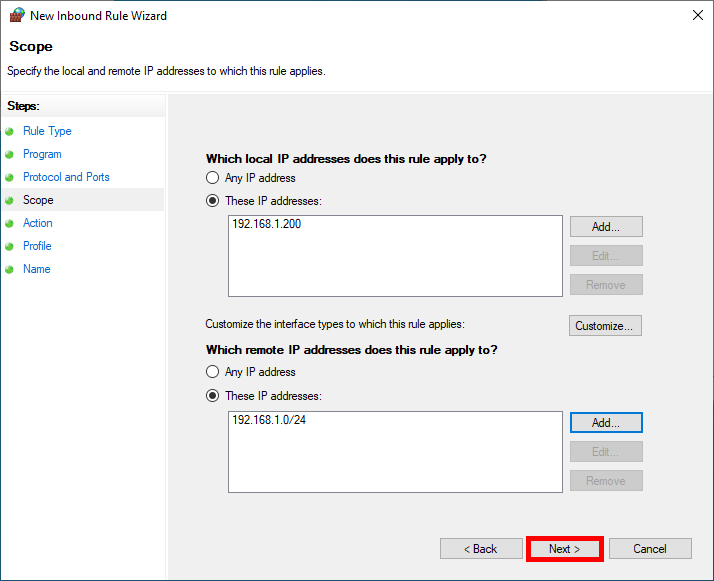
- Restrict rule application to defined ip addresses concerned:
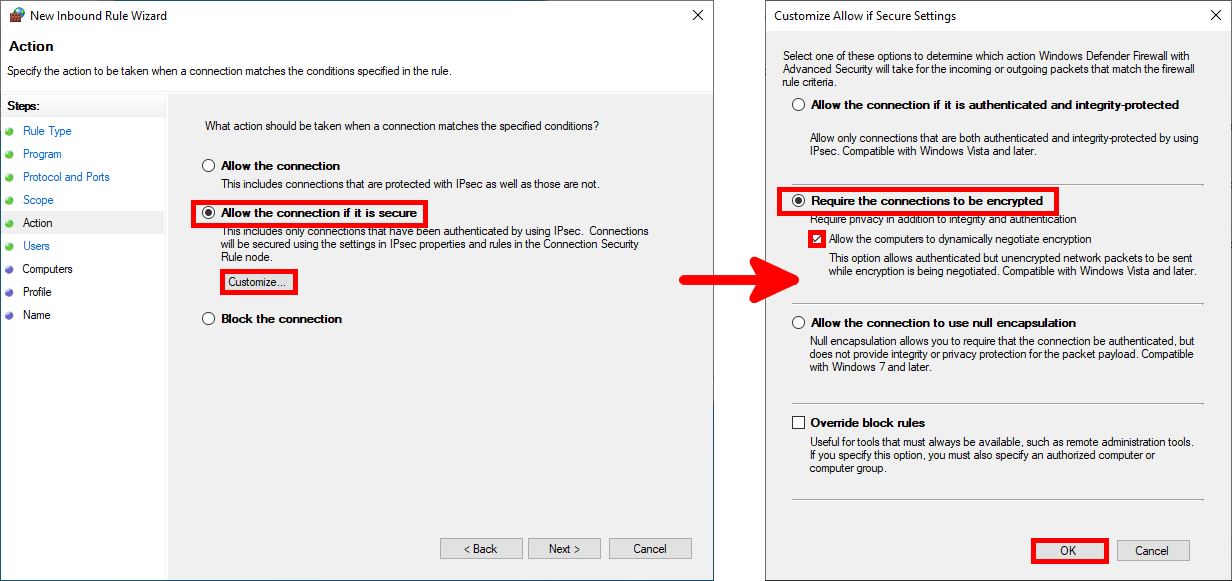
- In the Action step, configure the Require the connections to be encrypted condition:
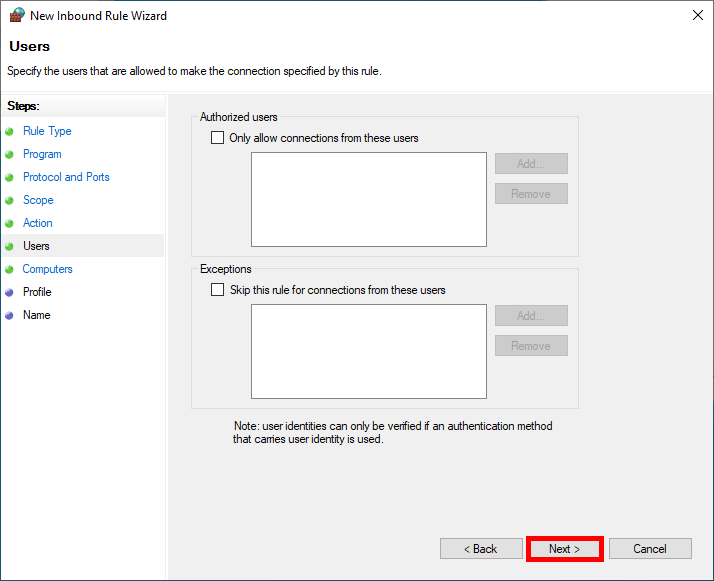
- We can limit the application of the rule to specific users, which will not be used for our purposes:
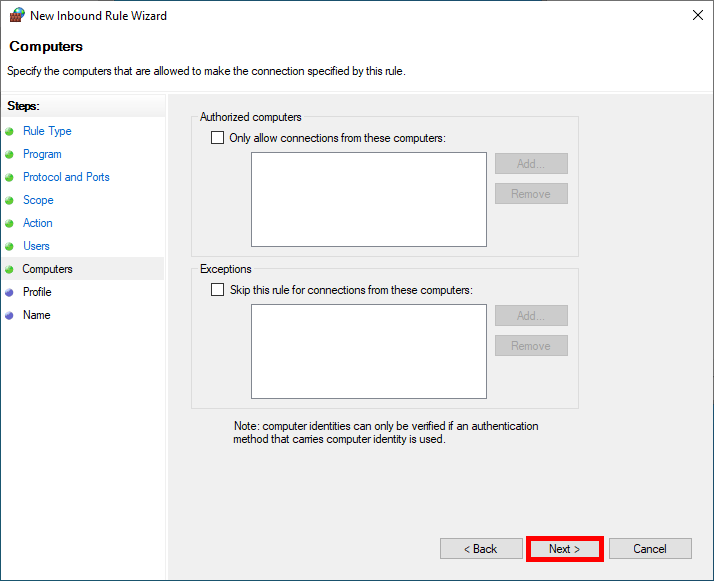
- We can do the same to limit the rule to specific computers, which won't be used in this example either:
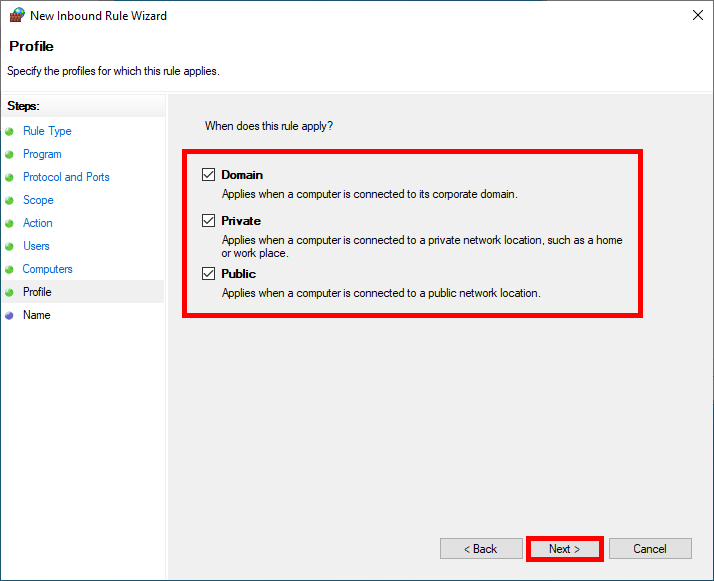
- We can restrict the rule to specific profiles:
- Finally specify the Name of the rule:
PowerShell
- We can create the same Firewall Rule as the one configured just above, in a single PowerShell command line:
PS C:\> New-NetFirewallRule -DisplayName "IPsec ALLOW" -Direction Inbound -Enabled True -Action Allow -LocalAddress 192.168.1.200 -RemoteAddress 192.168.1.0/24 -Protocol Any -Encryption Dynamic -Authentication RequiredWe've now finished configuring the server. Now it's time to move on to client configuration.
Windows 11

I'm going to describe them all, but the steps are pretty much the same as those we followed for the server.
- Open the Windows Defender Firewall with Advanced Security console:
- Right-click on Connection Security Rules and select New Rule…:

- Select Custom and click Next:
- In the Which computers are in Endpoint 1 section, select These IP addresses and click on Add…:
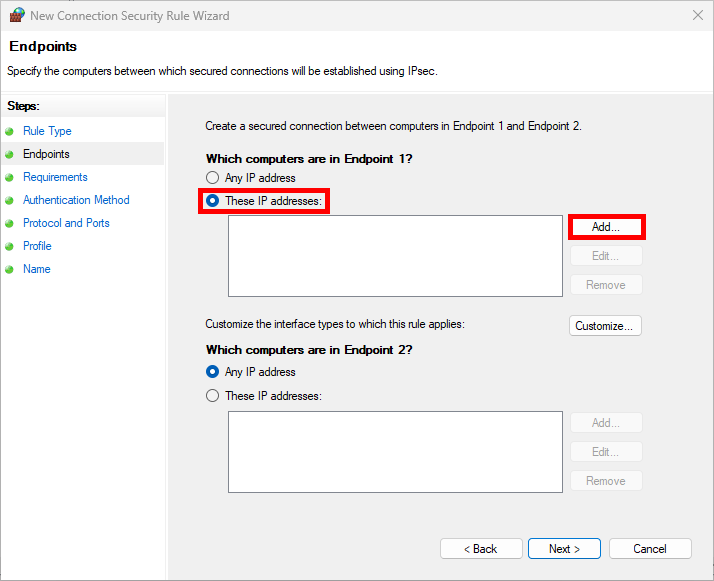
- Here we add our client's IP address:
- Do the same with Endpoint 2 entering the server's IP address then click Next:

- For maximum security and impose the use of IPsec select Require authentication for inbound and outbound connections:
- As we'll be using a preshared key as our Authentication Method in this example, click on Customize…:
- Follow this steps to set the Preshared key:
- We can specify one or more specific protocols to be encapsulated inside IPsec, here we encapsulate everything:
- We can restrict the rule to specific profiles:
- Finally specify the Name of the rule:
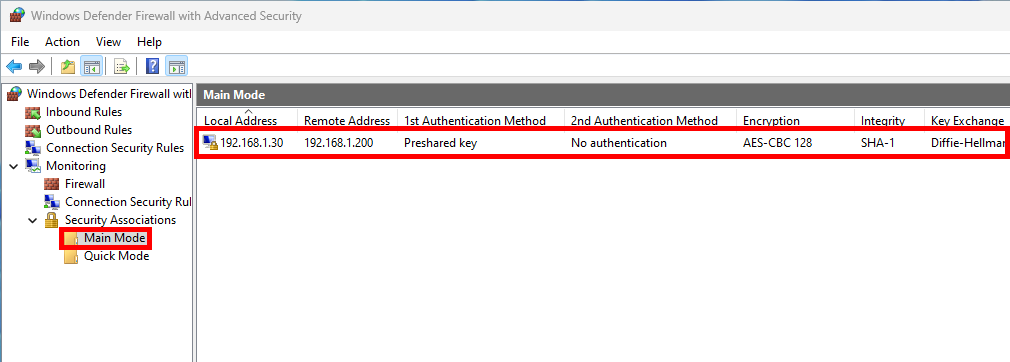
- Do a ping to the server and check security association is present:
Improve Security
From here, everything should work and connections are already encrypted. Here, we'll look at how to further enhance security by choosing more robust IPsec protocols than those offered by default. All command listed below must be entered on both client and server.
IKEv2
- Enable IKEv2 mode:
PS C:\> Set-NetIPsecRule -DisplayName "IPsec" -KeyModule IKEv2 -ForwardPathLifetime 120Enforce Security by Changing Protocols with Graphical User Interface (GUI)
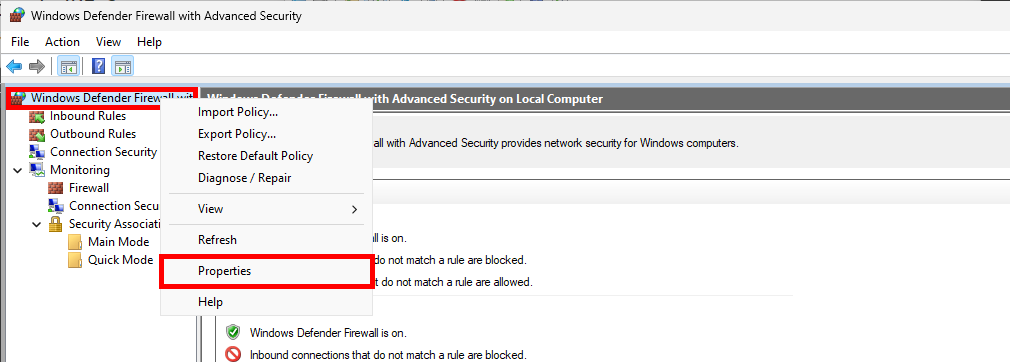
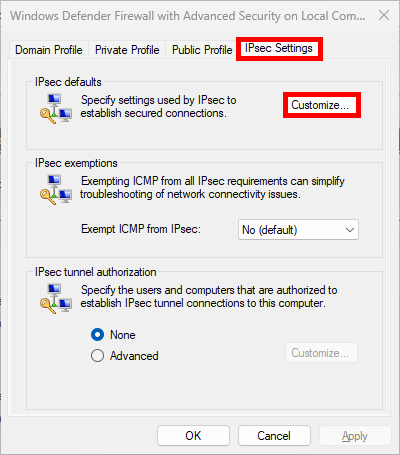
- From the Windows Defender Firewall with Advanced Security console, right-click on Windows Defender Firewall with Advanced Security, then select Properties:
- In the IPsec Settings tab, click Customize…:
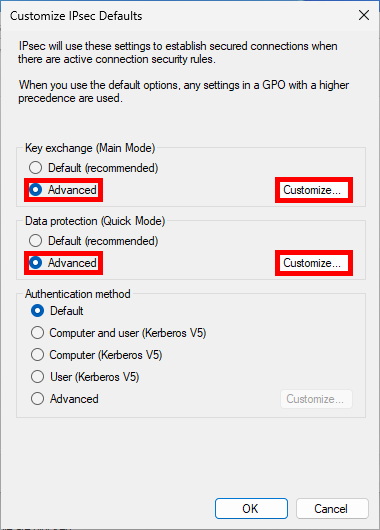
- Select Advanced and click Customize…:
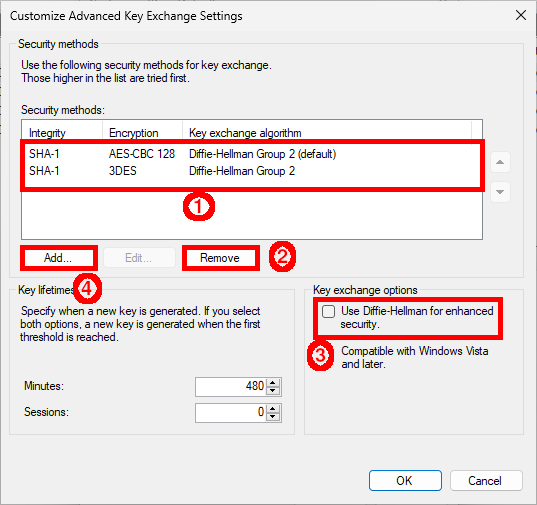
Main Mode
- First, Remove existing entries, then enable Diffie-Hellman and finally click Add…:
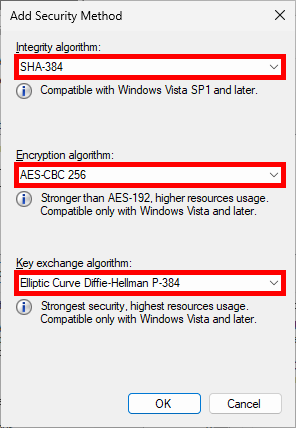
- Change default algorithms:
Quick Mode
- Enable Require encryption, then Remove the predefined algorithms and finally click Add…:
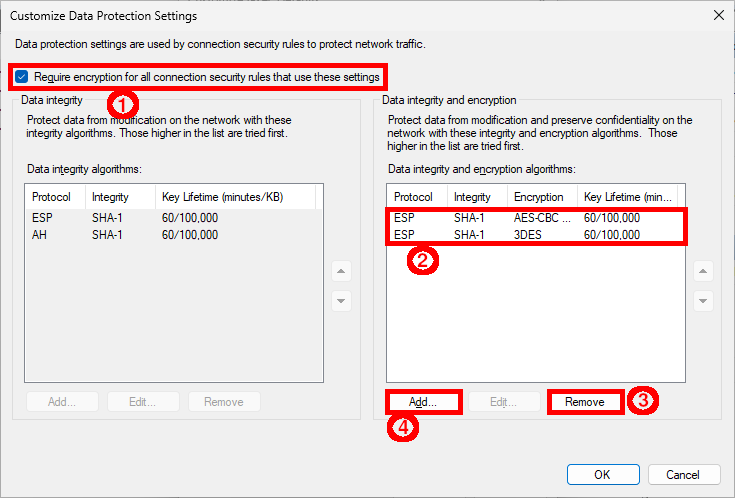
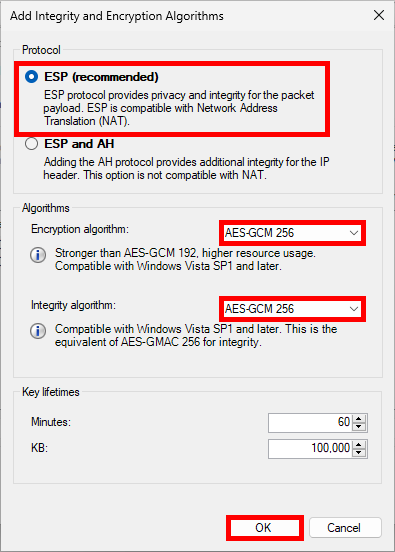
- Select ESP, then modify algorithms:
Enforce Quick Mode with PowerShell
- Change protocols:
PS C:\> $proposal1 = (New-NetIPsecQuickModeCryptoProposal -Encapsulation ESP -Encryption AES256 -ESPHash SHA256)PS C:\> $mMCryptoSet=(New-NetIPsecQuickModeCryptoSet -DisplayName "Quick Mode Rule" -Proposal $proposal1)PS C:\> Set-NetIPsecRule -DisplayName IPsec -QuickModeCryptoSet $mMCryptoSet.NameSome Commands
- Gets IPsec properties from IPsec rule:
PS C:\> Get-NetIPsecRule -DisplayName IPsec- Remove IPsec rule named IPsec:
PS C:\> Remove-NetIPsecRule -DisplayName IPsec- Gets the IPsec main mode properties for the IPsecMain rule:
PS C:\> Get-NetIPsecMainModeRule -DisplayName IPsecMain- Remove IPsec main profile:
PS C:\> Remove-NetIPsecMainModeRule -Name "{XXX-XXX-XXX}"- Get active Main Mode SA (security association):
PS C:\> Get-NetIPsecMainModeSA- Gets active Quick Mode SA (security association):
PS C:\> Get-NetIPsecQuickModeSA