How to Configure Passwordless SSH on Debian
- Last updated: Jul 28, 2025

In this article, you'll learn how to set up passwordless SSH access on Debian using SSH key pairs.
Passwordless SSH is not only convenient — it also provides significant advantages in terms of security and automation:
- Improved security:
- SSH key-based authentication is more secure than traditional passwords
- Resistant to brute-force and dictionary attacks
- Enables secure remote access as root
- Allows you to disable password authentication entirely
- Better efficiency and automation:
- Faster logins — no need to enter a password
- Ideal for services and automated tasks that require remote access
- Centralized access control via
~/.ssh/authorized_keys
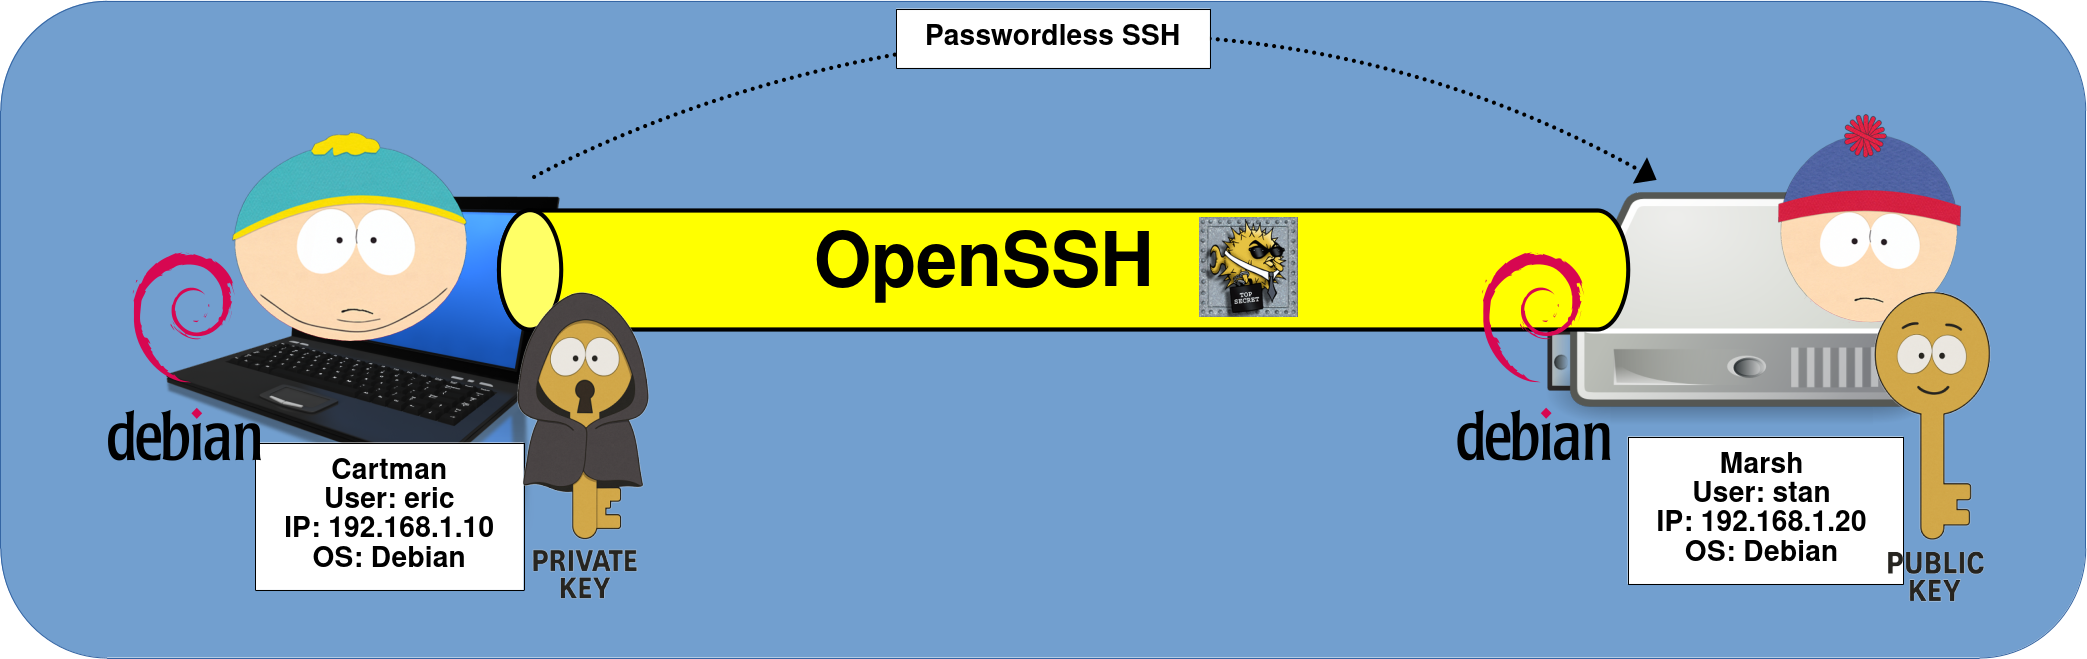
SSH Connection Architecture
For this demonstration, we’ll keep things simple. The goal is to configure passwordless SSH between two machines, allowing the user eric to connect remotely to the Marsh host without needing to enter a password.
Generate and Transfer the SSH Key
First, on the Cartman host, generate a public/private key pair using the ssh-keygen command. The private key remains on the local machine, while the corresponding public key will be copied to the remote host to allow authentication without a password.
- During key generation, you will be prompted to:
- Choose the file location for the new key. You can press Enter to accept the default location (usually your home directory).
- Set a passphrase to protect the private key. Leave it empty if you plan to use passwordless SSH for automated scripts or services. Use a passphrase to enhance security in interactive scenarios.
eric@Cartman:~$ ssh-keygen
Generating public/private rsa key pair.
Enter file in which to save the key (/home/eric/.ssh/id_rsa): [Press enter key]
Created directory '/home/eric/.ssh'.
Enter passphrase (empty for no passphrase): [Press enter key]
Enter same passphrase again: [Press enter key]
Your identification has been saved in /home/eric/.ssh/id_rsa
Your public key has been saved in /home/eric/.ssh/id_rsa.pub
The key fingerprint is:
SHA256:Ib1cGOH36Qf2/372L3Z/fhavH1WFtggItRGAJSeMUJo eric@Cartman
The key's randomart image is:
+---[RSA 3072]----+
|.o.ooo=+*+     ..|
| o. o+ o.=.   o .|
|E     . * o. o ..|
|       o = .... .|
|        S   =   .|
|           o o ..|
|            . o.o|
|             .o.X|
|             ..X^|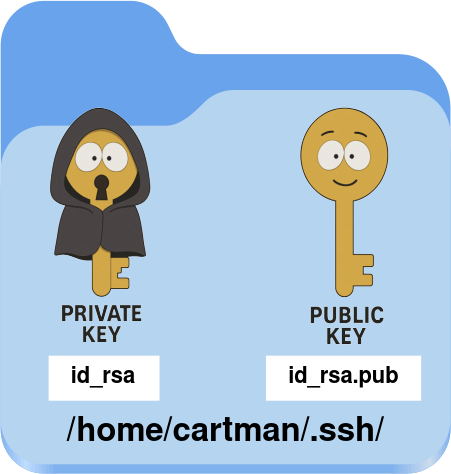
+----[SHA256]-----+- Once the key pair is generated, you should see both the private and public keys stored in the
~/.sshdirectory:
- Next, still on the Cartman host, create the
.sshdirectory on the Marsh host. This folder will store the public key:
eric@Cartman:~$ ssh stan@192.168.1.20 'mkdir -p .ssh'
The authenticity of host '192.168.1.20 (192.168.1.20)' can't be established.
ED25519 key fingerprint is SHA256:qpm3aOSO8AQv2CWcTh672clHGAb16CUxjUA2Cbzjqwg.
This key is not known by any other names.
Are you sure you want to continue connecting (yes/no/[fingerprint])? yes
stan@192.168.1.20's password: StanPassword- Then, copy the public key from the Cartman host to the
authorized_keysfile on the Marsh host:
eric@Cartman:~$ cat ~/.ssh/id_rsa.pub | ssh stan@192.168.1.20 'cat >> .ssh/authorized_keys'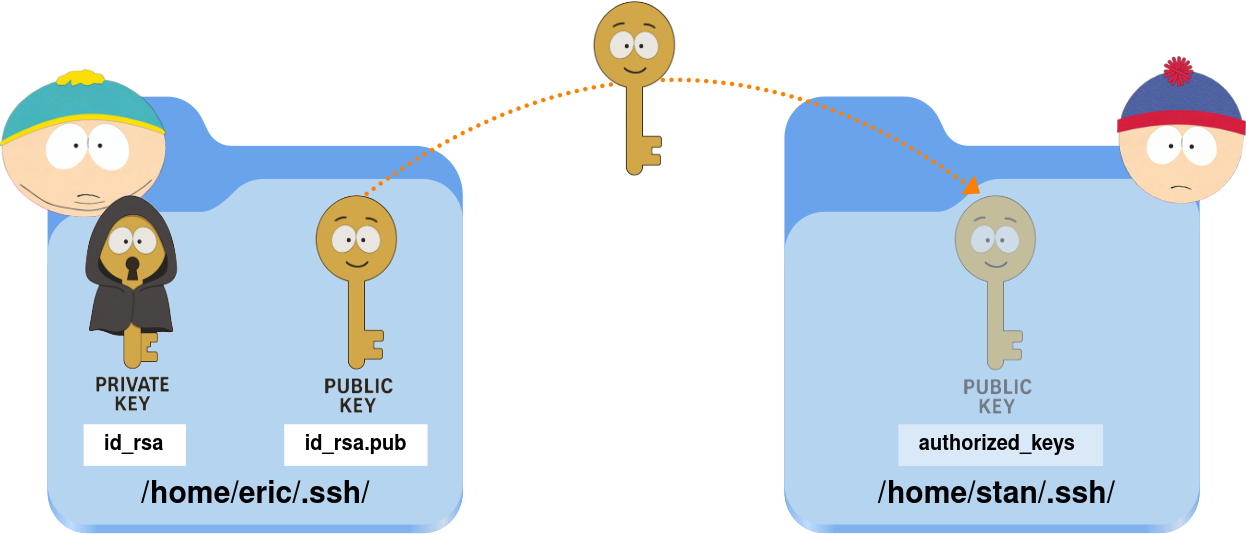
- After that, apply the proper permissions to the file and its parent directory:
eric@Cartman:~$ ssh stan@192.168.1.20 "chmod 700 .ssh; chmod 600 .ssh/authorized_keys"- You should now be able to connect to the Marsh host as stan using passwordless SSH:
eric@Cartman:~$ ssh stan@192.168.1.20Debugging SSH Connection Issues
- If the passwordless connection doesn't work, you can add the
-vvvflag to the SSH command to enable verbose output. This will help you diagnose what’s going wrong during the authentication process:
eric@Cartman:~$ ssh -vvv stan@192.168.1.20- You can also check the status of the SSH service on the remote host for any relevant logs or errors:
root@Marsh:~# journalctl -u ssh