Configure Postfix on Debian 12 as an SMTP Relay to Microsoft 365 with OAuth2
- Last updated: Jul 19, 2025

In this article, I’ll show you how to set up a Postfix mail server on Debian 12.
The goal is to configure this Postfix server as an SMTP relay for applications or devices (such as multifunction printers) that do not support OAuth authentication. This setup ensures they can continue sending emails, even as Microsoft plans to permanently disable basic authentication starting March 1st, 2026.
To achieve this, we’ll use the sasl-xoauth2 SASL plugin, which enables client-side support for OAuth 2.0. You can find more details on the official GitHub project page.
Architecture
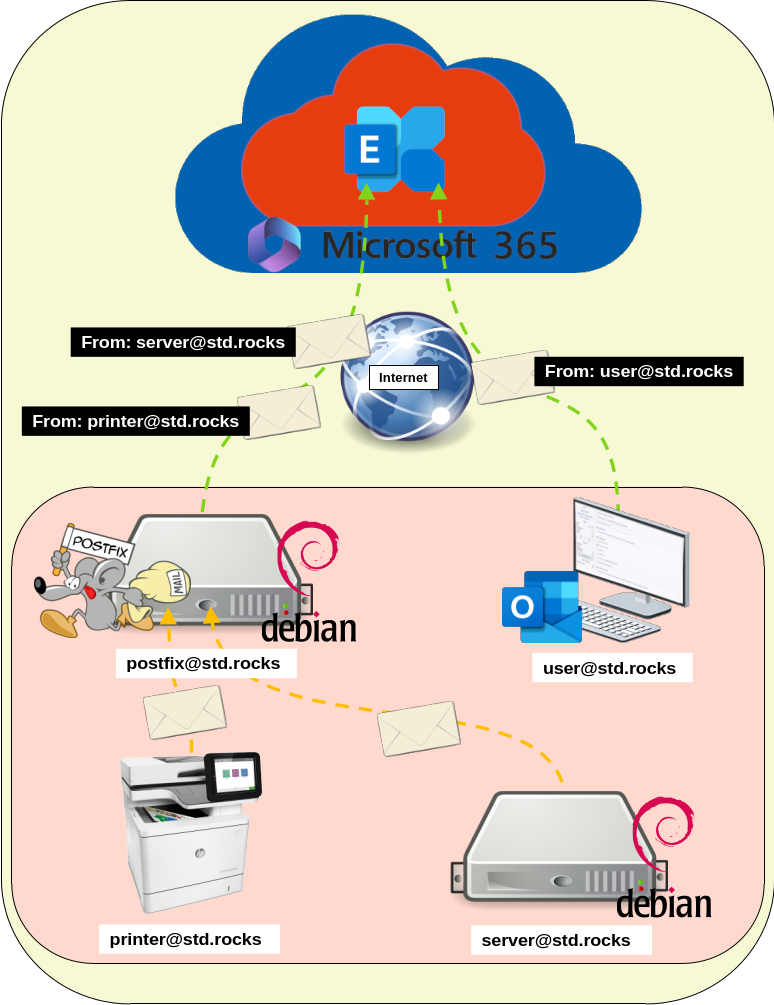
As previously mentioned, the Postfix server will act as a relay for clients that only support basic authentication. Other clients that are compatible with modern authentication will continue using OAuth directly.
The diagram below illustrates how the email relay operates between legacy clients (like printers or applications), the Postfix relay server, and Microsoft 365 using OAuth2.
Configure Microsoft Entra for OAuth2 Authentication
Create the M365 User and Enable Authenticated SMTP
First, you need to create a licensed Microsoft 365 user account that will be used to send emails. This account is the one that will request the OAuth token. In my case, I created a user named postfix@std.rocks.
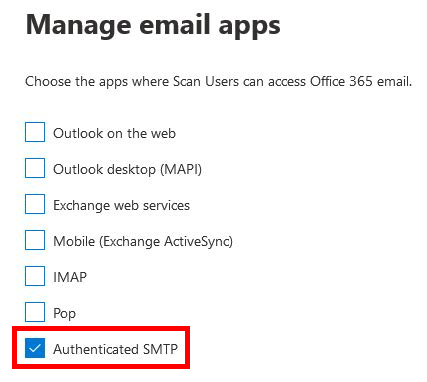
It’s important to enable Authenticated SMTP for this account via the Microsoft 365 admin portal. Without this setting enabled, OAuth authentication will not work.
Next, we’ll create an application with the necessary permissions to send emails. This is the application that the Postfix server will connect to in order to obtain the OAuth token.
Register an Application in Microsoft Entra
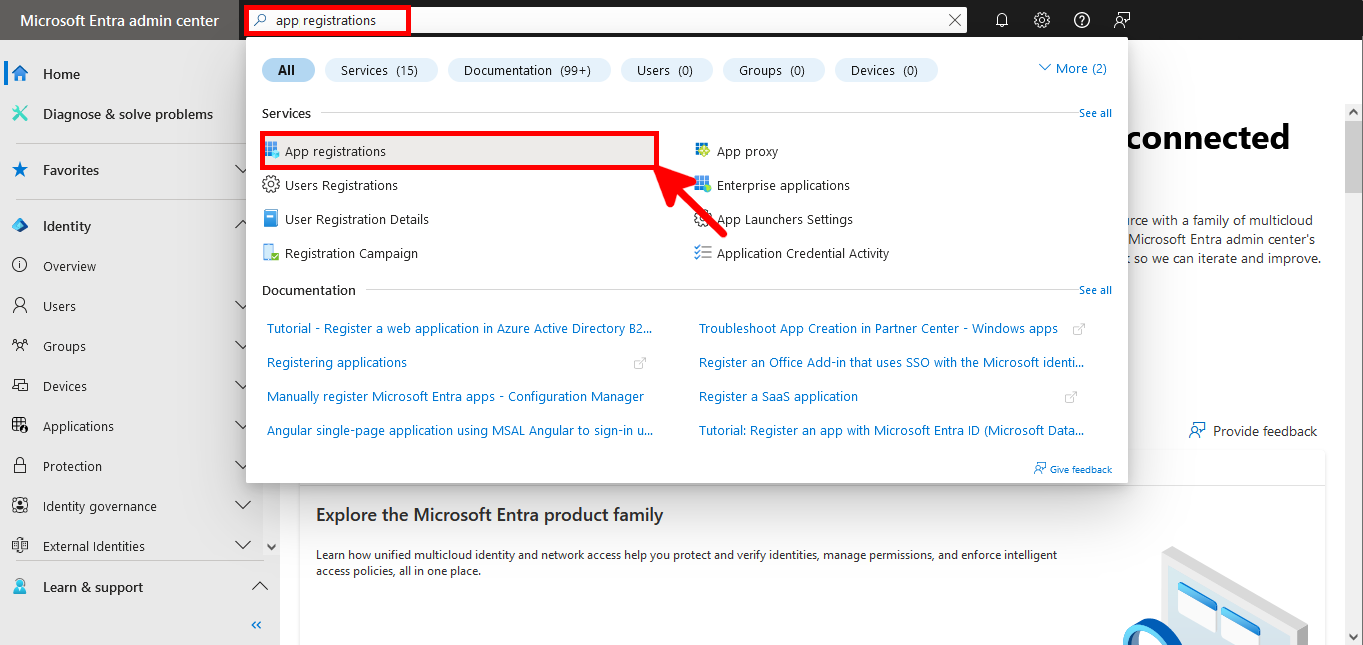
- In the search bar at the top of the Microsoft Entra admin center, type App registrations and select it from the results:
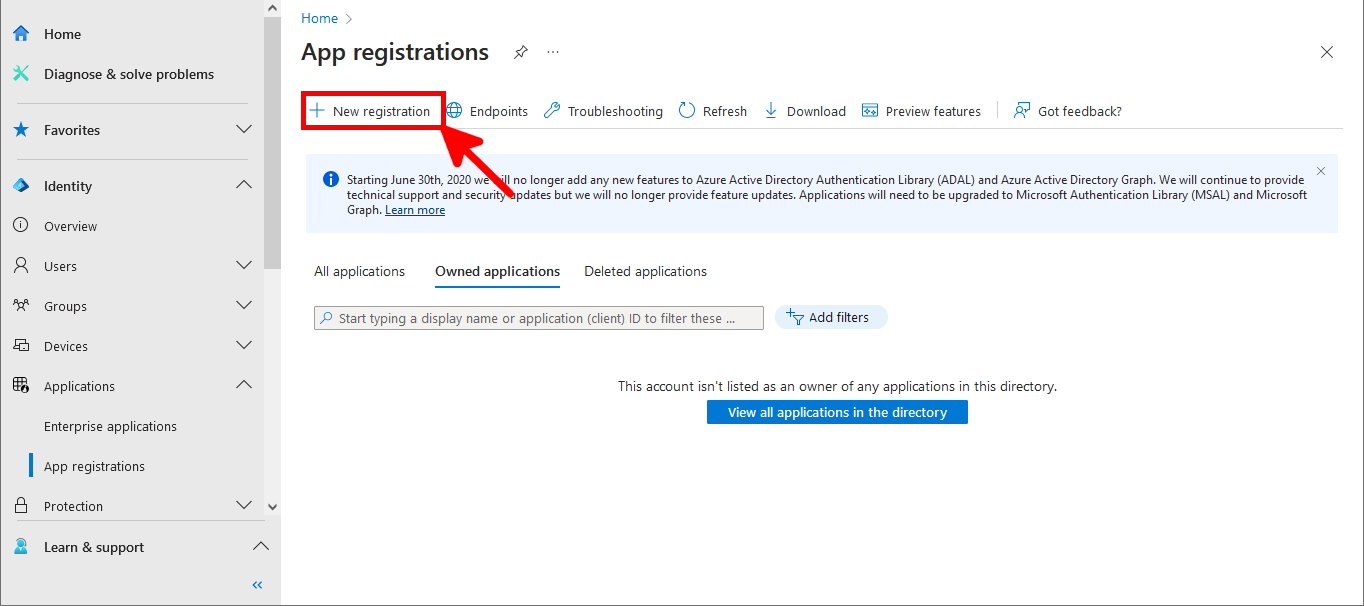
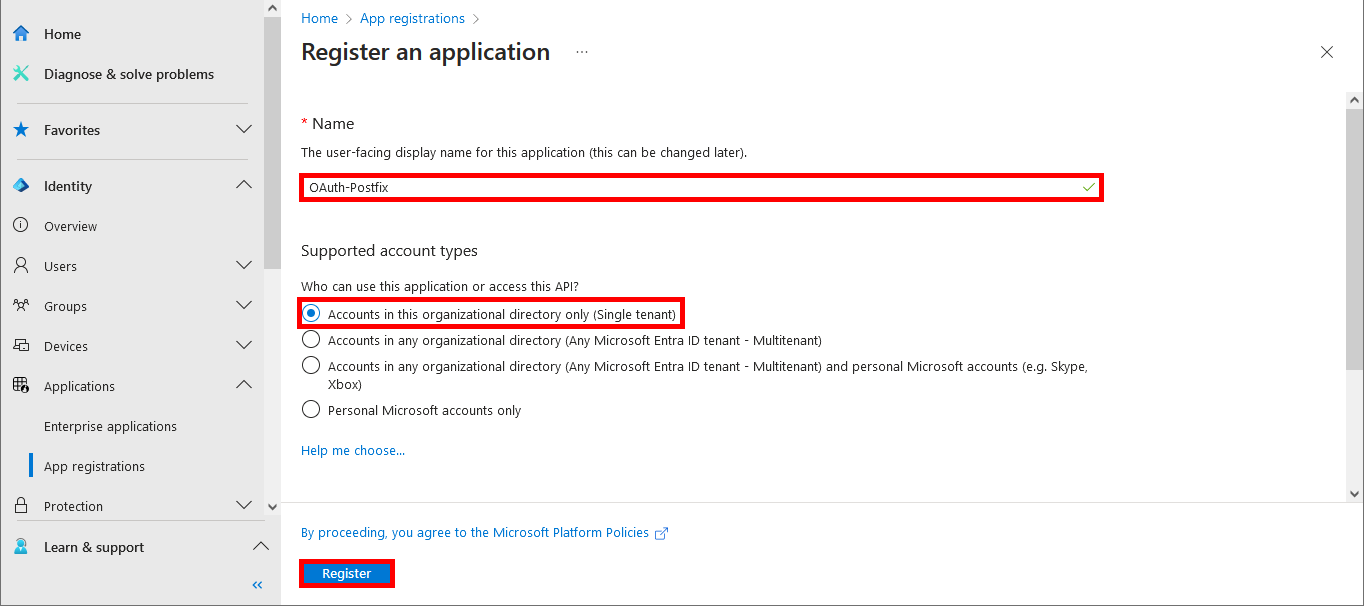
- Click on the New registration button to start creating your application:
- Give the application a name that clearly identifies its purpose (e.g. OAuth-Postfix):
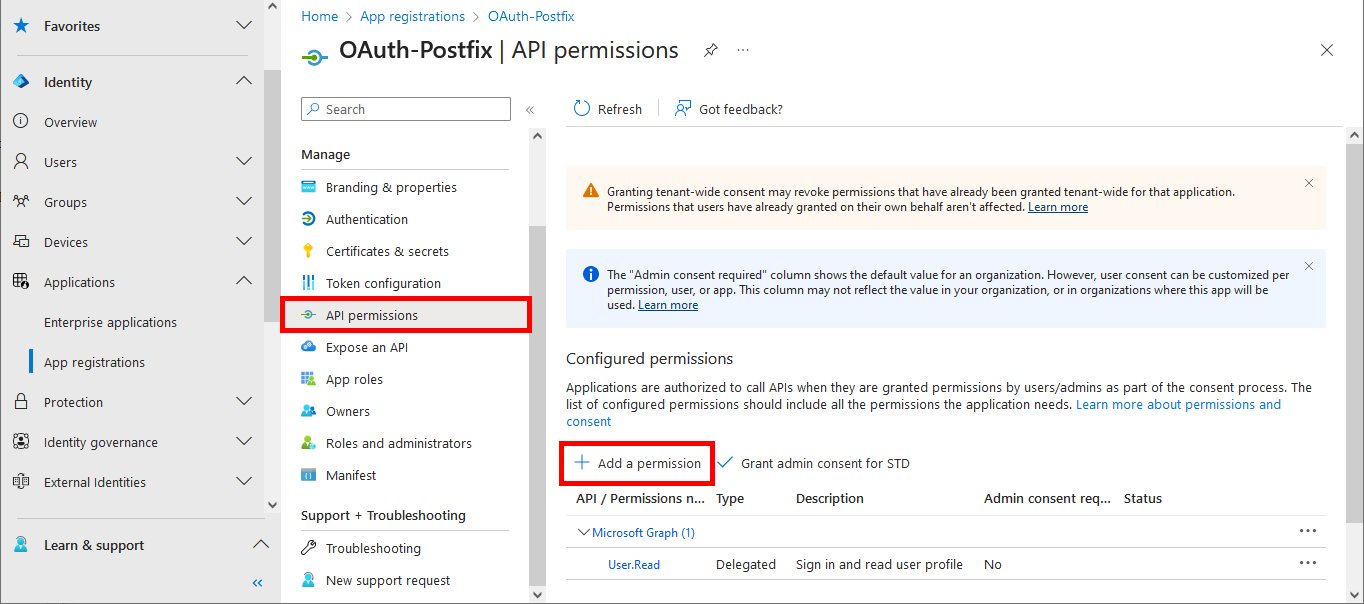
- Go to the API permissions menu, then click on Add a permission:
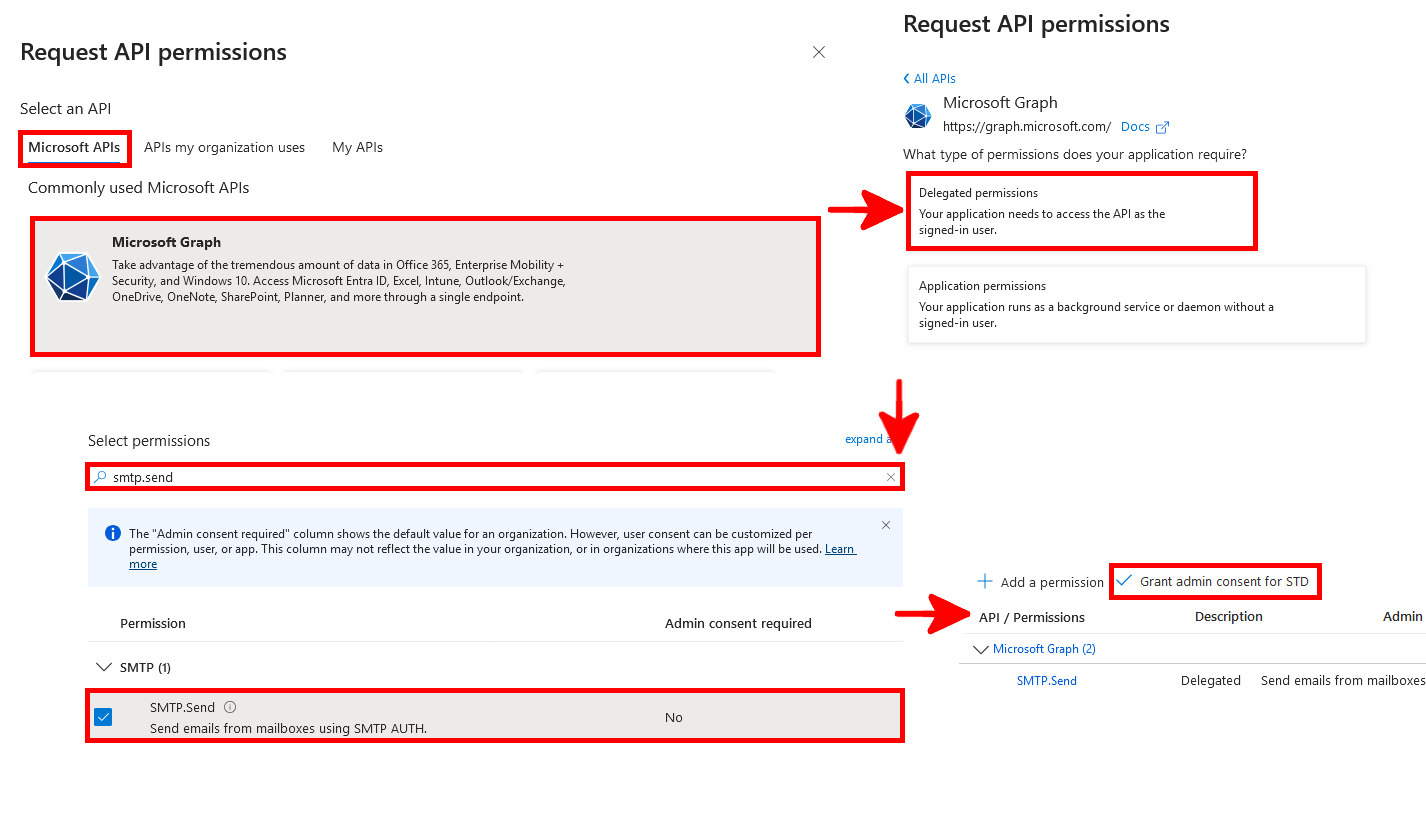
- Add the
SMTP.Sendpermission, then click on Grant admin consent to authorize it for the tenant:
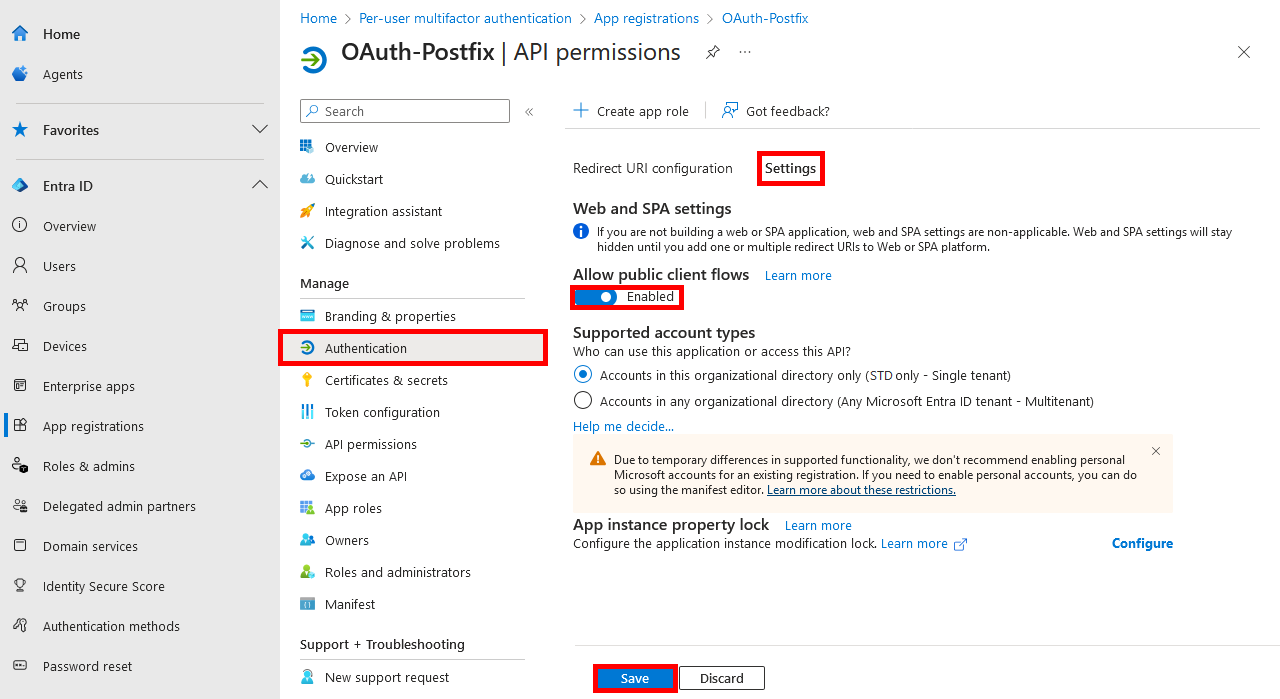
- In the Authentication menu, enable Allow public client flows by toggling the switch to Enabled:
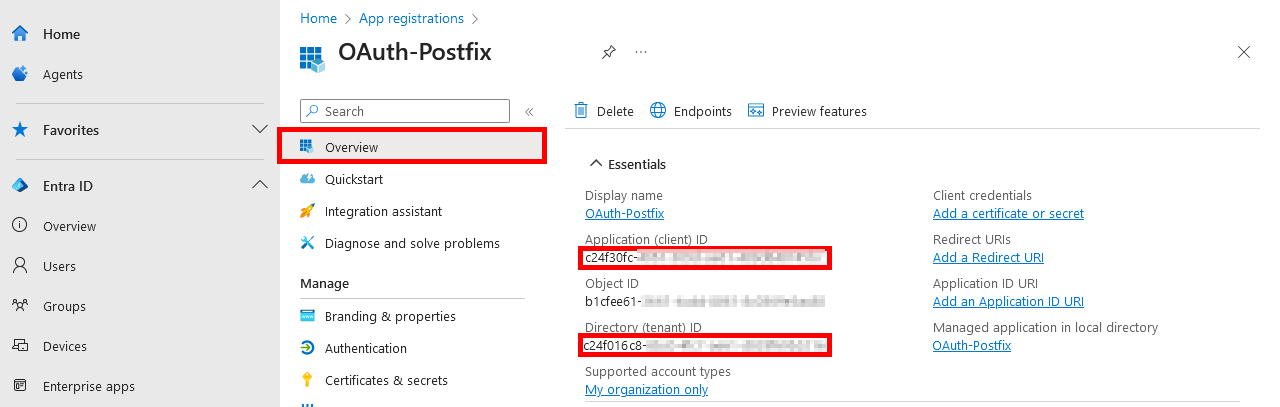
Retrieve Client ID and Tenant ID
From the Microsoft Entra portal, you also need to retrieve some key information for later configuration.
- Go to the Overview tab of your registered application to copy the following values:
Client ID— also known as Application IDTenant ID— also known as Directory ID
Install Postfix and sasl-xoauth2 on Debian
Now, on your Debian 12 server that will act as the mail relay, start by installing the sasl-xoauth2 plugin, followed by the Postfix mail server.
Install sasl-xoauth2 Plugin
The sasl-xoauth2 plugin is not yet available as a package in the official Debian repositories, so we’ll build it from source.
- From a root terminal, install the required dependencies to build the plugin:
root@host:~# apt update && apt install build-essential cmake debhelper libcurl4-openssl-dev libjsoncpp-dev libsasl2-dev pandoc pkg-config python3-argparse-manpage python3-msal python3-distutils- Go to the official GitHub release page and download the latest release using
wget. In this example, we’ll use version 0.25:
root@host:~# wget https://github.com/tarickb/sasl-xoauth2/archive/refs/tags/release-0.25.tar.gz- Extract the downloaded
.tar.gzarchive:
root@host:~# tar xzvf release-0.25.tar.gz- Build and install the plugin:
root@host:~# cd sasl-xoauth2-release-0.25/root@host:~# mkdir build && cd buildroot@host:~# cmake .. -DCMAKE_INSTALL_PREFIX=/usr -DCMAKE_INSTALL_SYSCONFDIR=/etcroot@host:~# makeroot@host:~# make install- Check the default configuration to confirm that the plugin is working correctly:
root@host:~# sasl-xoauth2-tool test-config --config-file /etc/sasl-xoauth2.conf
Config check passed.
Install and Configure Postfix
- Install Postfix (choose "No configuration" when prompted):
root@host:~# apt update && apt install postfix- Create the
/etc/mailnamefile to define the default domain name:
root@host:~# echo "std.rocks" > /etc/mailname- Edit the
/etc/postfix/main.cffile to configure Postfix.
Note: Add your local network IPs in themynetworksdirective if you plan to relay mail from other machines.
Below is a sample configuration to enable Postfix as a relay using OAuth2 and the sasl-xoauth2 mechanism:
# See /usr/share/postfix/main.cf.dist for a commented, more complete version


# Debian specific:  Specifying a file name will cause the first
# line of that file to be used as the name.  The Debian default
# is /etc/mailname.
myorigin = /etc/mailname

smtpd_banner = $myhostname ESMTP $mail_name (Debian/GNU)
biff = no

# appending .domain is the MUA's job.
append_dot_mydomain = no

# Uncomment the next line to generate "delayed mail" warnings
# delay_warning_time = 4h

readme_directory = no

# See http://www.postfix.org/COMPATIBILITY_README.html -- default to 3.6 on
# fresh installs.
compatibility_level = 3.6

# TLS parameters
## SMTPD
smtpd_tls_cert_file=/etc/ssl/certs/ssl-cert-snakeoil.pem
smtpd_tls_key_file=/etc/ssl/private/ssl-cert-snakeoil.key
smtpd_tls_security_level=may

## SMTP
smtp_tls_CApath=/etc/ssl/certs
smtp_always_send_ehlo = yes
smtp_tls_security_level = encrypt
smtp_tls_CAfile = /etc/ssl/certs/ca-certificates.crt
smtp_tls_session_cache_database = btree:${data_directory}/smtp_scache


smtpd_relay_restrictions = permit_mynetworks permit_sasl_authenticated defer_unauth_destination
myhostname = postfix.std.local
alias_maps = hash:/etc/aliases
alias_database = hash:/etc/aliases
mydestination = $myhostname, localhost.std.local, localhost
relayhost = [smtp.office365.com]:587
mynetworks = 127.0.0.0/8
mailbox_size_limit = 0
recipient_delimiter = +
inet_interfaces = all
inet_protocols = ipv4

#XOAUTH2
smtp_sasl_auth_enable = yes
smtp_sasl_password_maps = hash:/etc/postfix/sasl_passwd
smtp_sasl_security_options =
smtp_sasl_mechanism_filter = xoauth2
Note: In Debian, Postfix runs in a chroot environment by default. This means that any path like /etc/tokens/ must be accessible under /var/spool/postfix.
- Create the directory where the OAuth token will be stored:
root@host:~# mkdir -p /var/spool/postfix/etc/tokens- Set permissions so that Postfix can read the token:
root@host:~# chown -R postfix:postfix /var/spool/postfix/etc/tokens- Restart the Postfix service:
root@host:~# systemctl restart postfix- Copy the CA certificates into the chroot environment (⚠️ this file is cleared on each Postfix restart):
root@host:~# cp /etc/ssl/certs/ca-certificates.crt /var/spool/postfix/etc/ssl/certs/ca-certificates.crt- Create the
/etc/postfix/sasl_passwdfile and set permissions:
[smtp.office365.com]:587 postfix@std.rocks:/etc/tokens/postfix@std.rocksroot@host:~# chmod 600 /etc/postfix/sasl_passwd- Generate the hashed SASL password database:
root@host:~# postmap /etc/postfix/sasl_passwd(Optional) Automate Certificate Copy with systemd
As we've seen, every time the Postfix service starts, it clears the file /var/spool/postfix/etc/ssl/certs/ca-certificates.crt. Instead of copying it manually each time, you can edit the systemd service to do this automatically on startup.
- (Optional) Set your preferred text editor (e.g. to use
vim):
root@host:~# export EDITOR=vim- Edit the
postfix.serviceoverride configuration:
root@host:~# systemctl edit postfix.service- Add the following override to copy the certificate after Postfix starts:
### Editing /etc/systemd/system/postfix.service.d/override.conf
### Anything between here and the comment below will become the new contents of the file

[Service]
ExecStart=/usr/bin/cp /etc/ssl/certs/ca-certificates.crt /var/spool/postfix/etc/ssl/certs/ca-certificates.crt

### Lines below this comment will be discarded

### /lib/systemd/system/postfix.service
# [Unit]
# Description=Postfix Mail Transport Agent
# Documentation=man:postfix(1)
# Conflicts=sendmail.service exim4.service
# ConditionPathExists=/etc/postfix/main.cf
#
# [Service]
# Type=oneshot
# RemainAfterExit=yes
# ExecStart=/bin/true
# ExecReload=/bin/true
#
# [Install]
# WantedBy=multi-user.target
Note: Don’t forget to run systemctl daemon-reload after editing if it's not done automatically.
Generate an OAuth Token
- Edit the
/etc/sasl-xoauth2.conffile with the following parameters:client_id: Application (Client) IDclient_secret: Leave this field empty<TENANT_ID>: Tenant IDlog_full_trace_on_failure: (Optional) enable detailed logging on failurelog_to_syslog_on_failure: (Optional) log errors to syslog
Here is an example configuration for /etc/sasl-xoauth2.conf using your application and tenant IDs:
{
  "client_id": "<CLIENT_ID>",
  "client_secret": "",
  "log_full_trace_on_failure": "no",
  "log_to_syslog_on_failure": "no",
  "token_endpoint": "https://login.microsoftonline.com/<TENANT_ID>/oauth2/v2.0/token"
}- Generate the OAuth token using the following command:
postfix@std.rocks: outlook 365 account--client-id: Application ID--tenant: Tenant ID
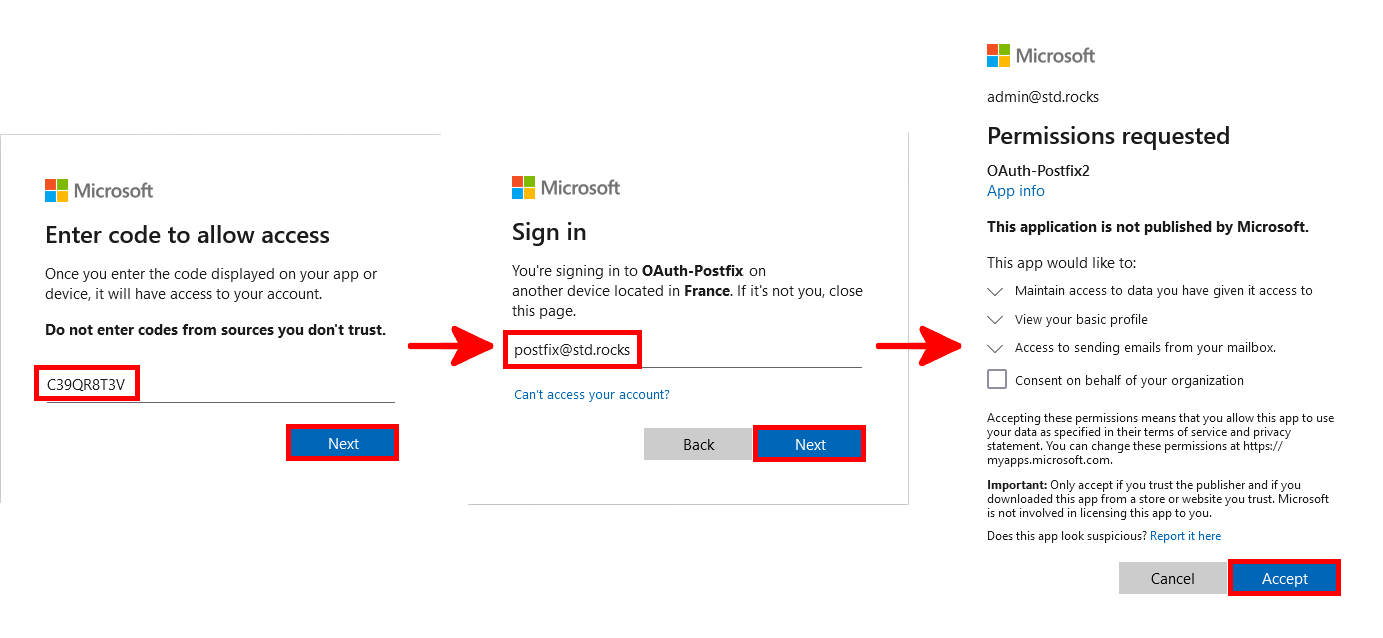
root@host:~# sasl-xoauth2-tool get-token outlook /var/spool/postfix/etc/tokens/postfix@std.rocks --client-id="<CLIENT_ID>" --use-device-flow --tenant="<TENANT_ID>"The command will prompt you to authenticate via browser. You will see a message like this:
To sign in, use a web browser to open the page https://microsoft.com/devicelogin and enter the code XXXXXXXXX to authenticate.- Follow the instructions: open https://microsoft.com/devicelogin in your browser and enter the provided code. Log in using the dedicated Postfix account. An administrator will need to approve the permission request. (⚠️Make sure to sign in with your Office 365 Postfix account, otherwise the token you receive will not allow you to send emails.⚠️)
- If everything is successful, the tool will return:
Acquired token.- You should now see a token file created in the configured directory:
root@host:~# ls -lh /var/spool/postfix/etc/tokens/
total 4,0K
-rw-r--r-- 1 root root 3,5K 13 juil. 15:31 postfix@std.rocks- Test your OAuth token file using the
test-token-refreshoption:
root@host:~# sasl-xoauth2-tool test-token-refresh /var/spool/postfix/etc/tokens/postfix@std.rocks- If the token is valid and refreshable, the tool will return:
Config check passed.
Token refresh succeeded.
Test and Debug
Test the Email Relay with sendmail
Your relay should now be operational. To test the setup from the relay host, you can use the sendmail command directly from the terminal.
- Create a test message file:
From: postfix@std.rocks
To: administrator@std.rocks
Subject: Test message

Does it work?- Send the email using
sendmail:
root@host:~# cat /tmp/test.txt | sendmail -F postfix@std.rocks administrator@std.rocksEnable Debugging for OAuth and Postfix
- Enable detailed logging in
/etc/sasl-xoauth2.conf:
{
  "client_id": "<CLIENT_ID>",
  "client_secret": "",
  "log_full_trace_on_failure": "yes",
  "log_to_syslog_on_failure": "yes",
  "token_endpoint": "https://login.microsoftonline.com/<TENANT_ID>/oauth2/v2.0/token"
}- Edit
/etc/postfix/master.cfand make the SMTP process verbose by adding-vto the smtp service line:
[…]
smtp      unix  -       -       y       -       -       smtp -v
[…]- Restart Postfix and copy the CA certificates again into the chroot environment:
root@host:~# systemctl restart postfix; cp /etc/ssl/certs/ca-certificates.crt /var/spool/postfix/etc/ssl/certs/ca-certificates.crt- Use
journalctlto monitor logs in real time:
root@host:~# journalctl -u postfix@- -fThen resend your test email and check the logs for any errors or confirmation of delivery.