How to change the WiFi password on Windows stations via GPO
- Last updated: Dec 1, 2024
Nowadays, companies frequently use WiFi to connect their users to the network. Recent protocols such as WPA2 and now WPA3 offer fairly good security, but what happens if the password has been compromised, or if you simply want to renew it periodically? This can quickly become a headache, especially when you're managing several hundred machines.
As far as I know, there is no native tool in group policies to manage this. So we have to be cunning. Here's how to change the WiFi password for a specific SSID using a batch script. This script will be executed when the user logs on (and managed via GPO).
- What we'll be doing:
- Preparatory phase:
- Create a new SSID with a new password
- Connect to the new SSID with Windows and extract the WiFi configuration into an xml file
- Create a GPO script that will run at login to:
- Connect computers to the new SSID with the new password
- Delete old SSID with old password
- Once all users have migrated to the new SSID with the new password, the old SSID can be deleted.
- Preparatory phase:
The WiFi management commands:
To understand the script properly, it may be useful to be familiar with the main Windows WiFi management commands.
- List of WiFi commands:
C:\WINDOWS\system32>netsh wlan
The following commands are available:

Commands in this context:
?              - Displays a list of commands.
add            - Adds a configuration entry to a table.
connect        - Connects to a wireless network.
delete         - Deletes a configuration entry from a table.
disconnect     - Disconnects from a wireless network.
dump           - Displays a configuration script.
export         - Saves WLAN profiles to XML files.
help           - Displays a list of commands.
IHV            - Commands for IHV logging.
refresh        - Refresh hosted network settings.
reportissues   - Generate WLAN smart trace report.
set            - Sets configuration information.
show           - Displays information.
start          - Start hosted network.
stop           - Stop hosted network.

To view help for a command, type the command, followed by a space, and then type ?.- Displays complete information on wireless networks and devices:
C:\WINDOWS\system32>netsh wlan show all- Display Wi-Fi profiles:
C:\WINDOWS\system32>netsh wlan show profiles

Profiles on interface Wi-Fi:

Group policy profiles (read only)
---------------------------------
    <None>

User profiles
-------------
    All User Profile     : FFBOXE
All User Profile : STD_ROCKS- Display STD_ROCKS profile:
C:\WINDOWS\system32>netsh wlan show profiles "STD_ROCKS"

Profile STD_ROCKS on interface Wi-Fi:
=======================================================================

Applied: All User Profile

Profile information
-------------------
    Version                : 1
    Type                   : Wireless LAN
    Name                   : STD_ROCKS
    Control options        :
        Connection mode    : Connect automatically
        Network broadcast  : Connect only if this network is broadcasting
        AutoSwitch         : Do not switch to other networks
        MAC Randomization  : Disabled

Connectivity settings
---------------------
    Number of SSIDs        : 1
    SSID name              : "STD_ROCKS"
    Network type           : Infrastructure
    Radio type             : [ Any Radio Type ]
    Vendor extension          : Not present

Security settings
-----------------
    Authentication         : WPA2-Personal
    Cipher                 : CCMP
    Authentication         : WPA2-Personal
    Cipher                 : GCMP
    Security key           : Present

Cost settings
-------------
    Cost                   : Unrestricted
    Congested              : No
    Approaching Data Limit : No
    Over Data Limit        : No
    Roaming                : No
Cost Source : Default- Export WiFi profile to
c:\Users\user\Desktop\Wi-Fi-STD_ROCKS.xmlfile:
C:\WINDOWS\system32>netsh wlan Export Profile Name="STD_ROCKS" key=clear folder=c:\Users\user\Desktop\- Import WiFi profile for all users from
c:\Users\user\Desktop\STD_ROCKS.xmlfile:
C:\WINDOWS\system32>netsh add profile filename="c:\Users\user\Desktop\STD_ROCKS.xml" user=all- Set the preference order of the STD_ROCKS wireless network to the highest priority:
C:\WINDOWS\system32>netsh wlan set profileorder name="STD_ROCKS" interface="Wi-Fi" priority=1- Remove the STD_ROCKS wireless network:
C:\WINDOWS\system32>netsh wlan delete profile name="STD_ROCKS" interface="Wi-Fi"Creating a new SSID
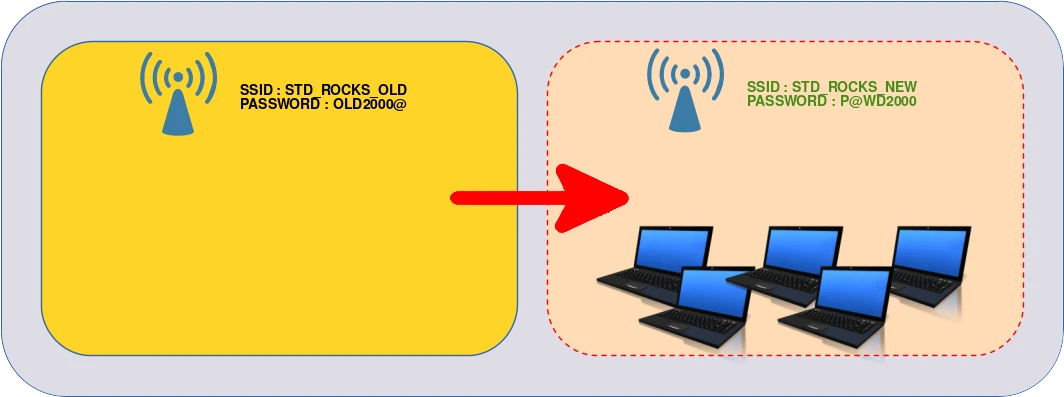
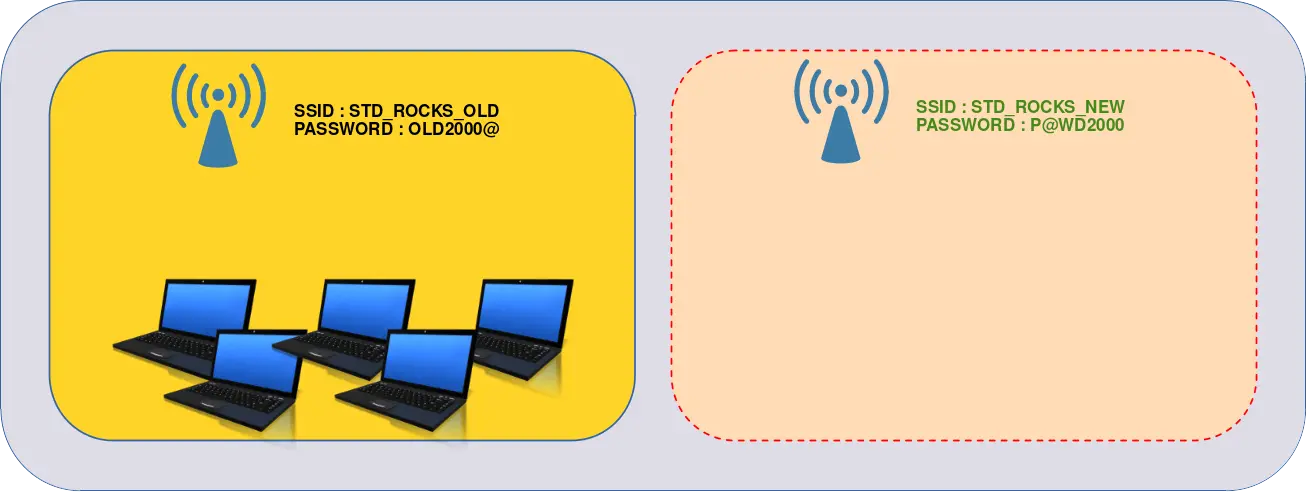
To prevent users from being cut off the network, we need to make two Wi-Fi networks coexist. The old one: «STD_ROCKS_OLD»; in the diagram below; whose password we want to replace, and the new one: «STD_ROCKS_NEW»; in the diagram below; on which the new password will be associated. Once all users have been migrated to the new network, the old one can be deleted.
Export Wi-Fi profile to xml file
- From a Windows computer, manually connect to the new wireless network: «STD_ROCKS_NEW»:
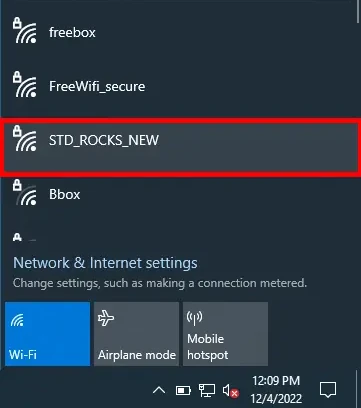
- Once connected, export the Wi-Fi profile to an xml file:
C:\WINDOWS\system32>netsh wlan Export Profile Name="STD_ROCKS_NEW" key=clear folder=c:\Users\user\Desktop\- You should have the xml file on your Desktop:

- Open the xml file and check the following informations:
- Wireless Network: STD_ROCKS_NEW (here)
- Password: P@WD2000 (here)
<?xml version="1.0"?>
<WLANProfile xmlns="http://www.microsoft.com/networking/WLAN/profile/v1">
	<name>STD_ROCKS_NEW</name>
	<SSIDConfig>
		<SSID>
			<hex>535444524F434B5342414259</hex>
			<name>STD_ROCKS_NEW</name>
		</SSID>
	</SSIDConfig>
	<connectionType>ESS</connectionType>
	<connectionMode>auto</connectionMode>
	<MSM>
		<security>
			<authEncryption>
				<authentication>WPA2PSK</authentication>
				<encryption>AES</encryption>
				<useOneX>false</useOneX>
			</authEncryption>
			<sharedKey>
				<keyType>passPhrase</keyType>
				<protected>false</protected>
				<keyMaterial>P@WD2000</keyMaterial>
			</sharedKey>
		</security>
	</MSM>
	<MacRandomization xmlns="http://www.microsoft.com/networking/WLAN/profile/v3">
		<enableRandomization>false</enableRandomization>
		<randomizationSeed>1592637002</randomizationSeed>
	</MacRandomization>
</WLANProfile>
Batch script
- What the script does:
- Create the file
C:\WirelessSet.txton first run, deleting the old SSID profile if the file has already been created (meaning the script has already been run once). - Add a new wireless profile.
- Set the new wireless profile as the default profile.
- Create the file
- Create a
wifi.batfile:
REM Remove REM if you want to reset GPO :
REM DEL C:\WirelessSet.txt

REM If the file C:\WirelessSet.txt exists, it means the script has already been executed once, so jump to _END switch
IF EXIST C:\WirelessSet.txt GOTO _END
REM Otherwise add wireless profile from STD_ROCKS_NEW.xml file
netsh wlan add profile filename="\\std.local\netlogon\Wi-Fi-STD_ROCKS_NEW.xml" user=all >> C:\WirelessSet.txt
REM Set new profile (STD_ROCKS_NEW) with best priority
netsh wlan set profileorder name="STD_ROCKS_NEW" interface="Wi-Fi" priority=1

REM exit script
GOTO :EOF

REM _END SWITCH
:_END
REM Delete old (STD_ROCKS_OLD) wireless profile
netsh wlan delete profile name="STD_ROCKS_OLD" interface="Wi-Fi"- Then, from an Active Directory server, copy the xml and
wifi.batfiles intoC:\Windows\SYSVOL\sysvol\YOUR_DOMAIN\scripts:

Create a Group Policy Object
We can now create a GPO that will execute the above script when our computers start up.
- Open the Group Policy Manager console:
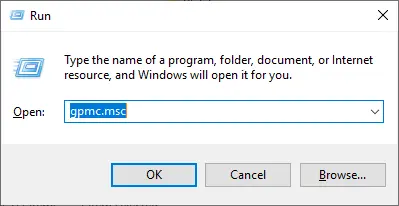
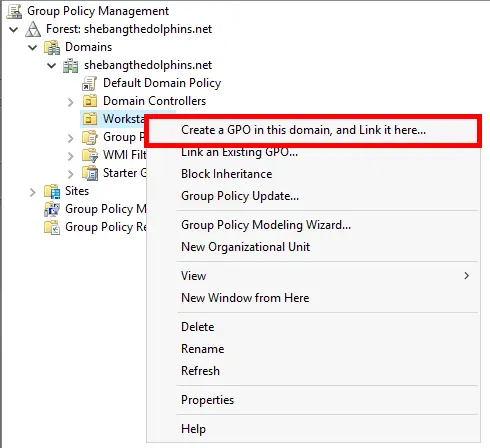
- Create a new GPO and link it to the OU where your computers objects are located:
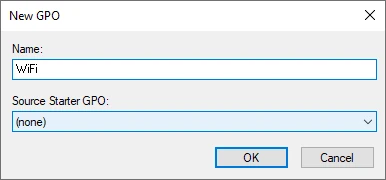
- Give a name to the new GPO:
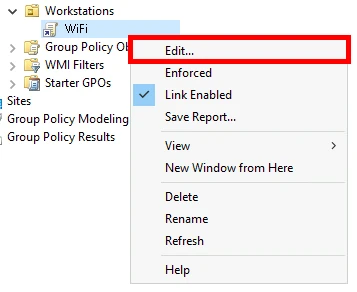
- Edit the GPO:
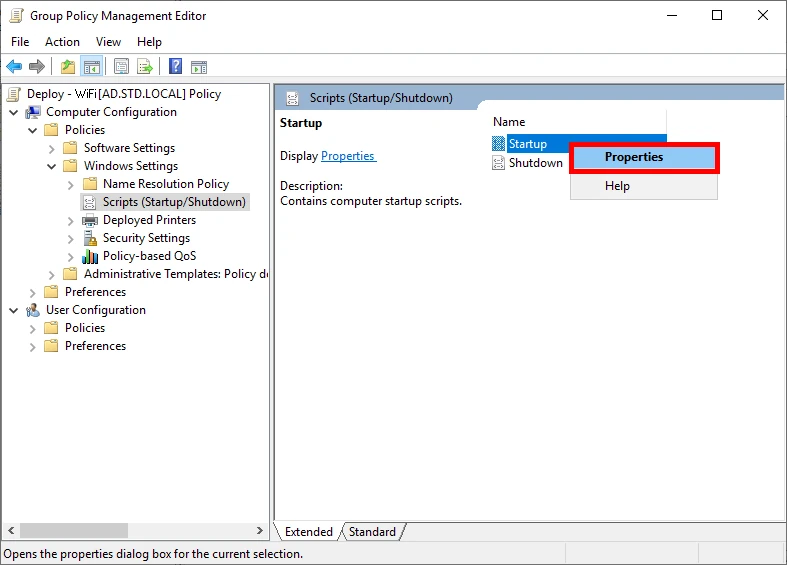
- Go to Computer Configuration > Policies > Windows Settings > Scripts (Startup/Shutdown). Do a Right click on Startup then click to Properties
- Click on Add… and on Browse button, then select the
wifi.batfile:

- Once the computers have been rebooted, they will be automatically migrated to the new wireless network, the old one can now be deleted:
