GNU/Linux - How to create a NAS on Debian with mdadm, and Samba
- Last updated: Nov 29, 2025

This guide explains how to build your own NAS (Network-Attached Storage) using Debian GNU/Linux.
The goal is to set up a network-accessible storage system with multiple disks, offering high capacity, low cost (for example by reusing an old computer), strong flexibility, redundancy, and full configurability.
We will use the Debian Linux distribution together with the mdadm utility to manage RAID, and Samba to provide file sharing over the SMB protocol. All configuration will be carried out from the command line.
- The objectives are to:
- Make the NAS accessible to different devices on the network
- Use RAID 5 for redundancy and high storage capacity
- Provide a scalable solution (with the ability to add disks later)
- Use standard, widely supported tools compatible with other Linux distributions (mdadm and Samba)
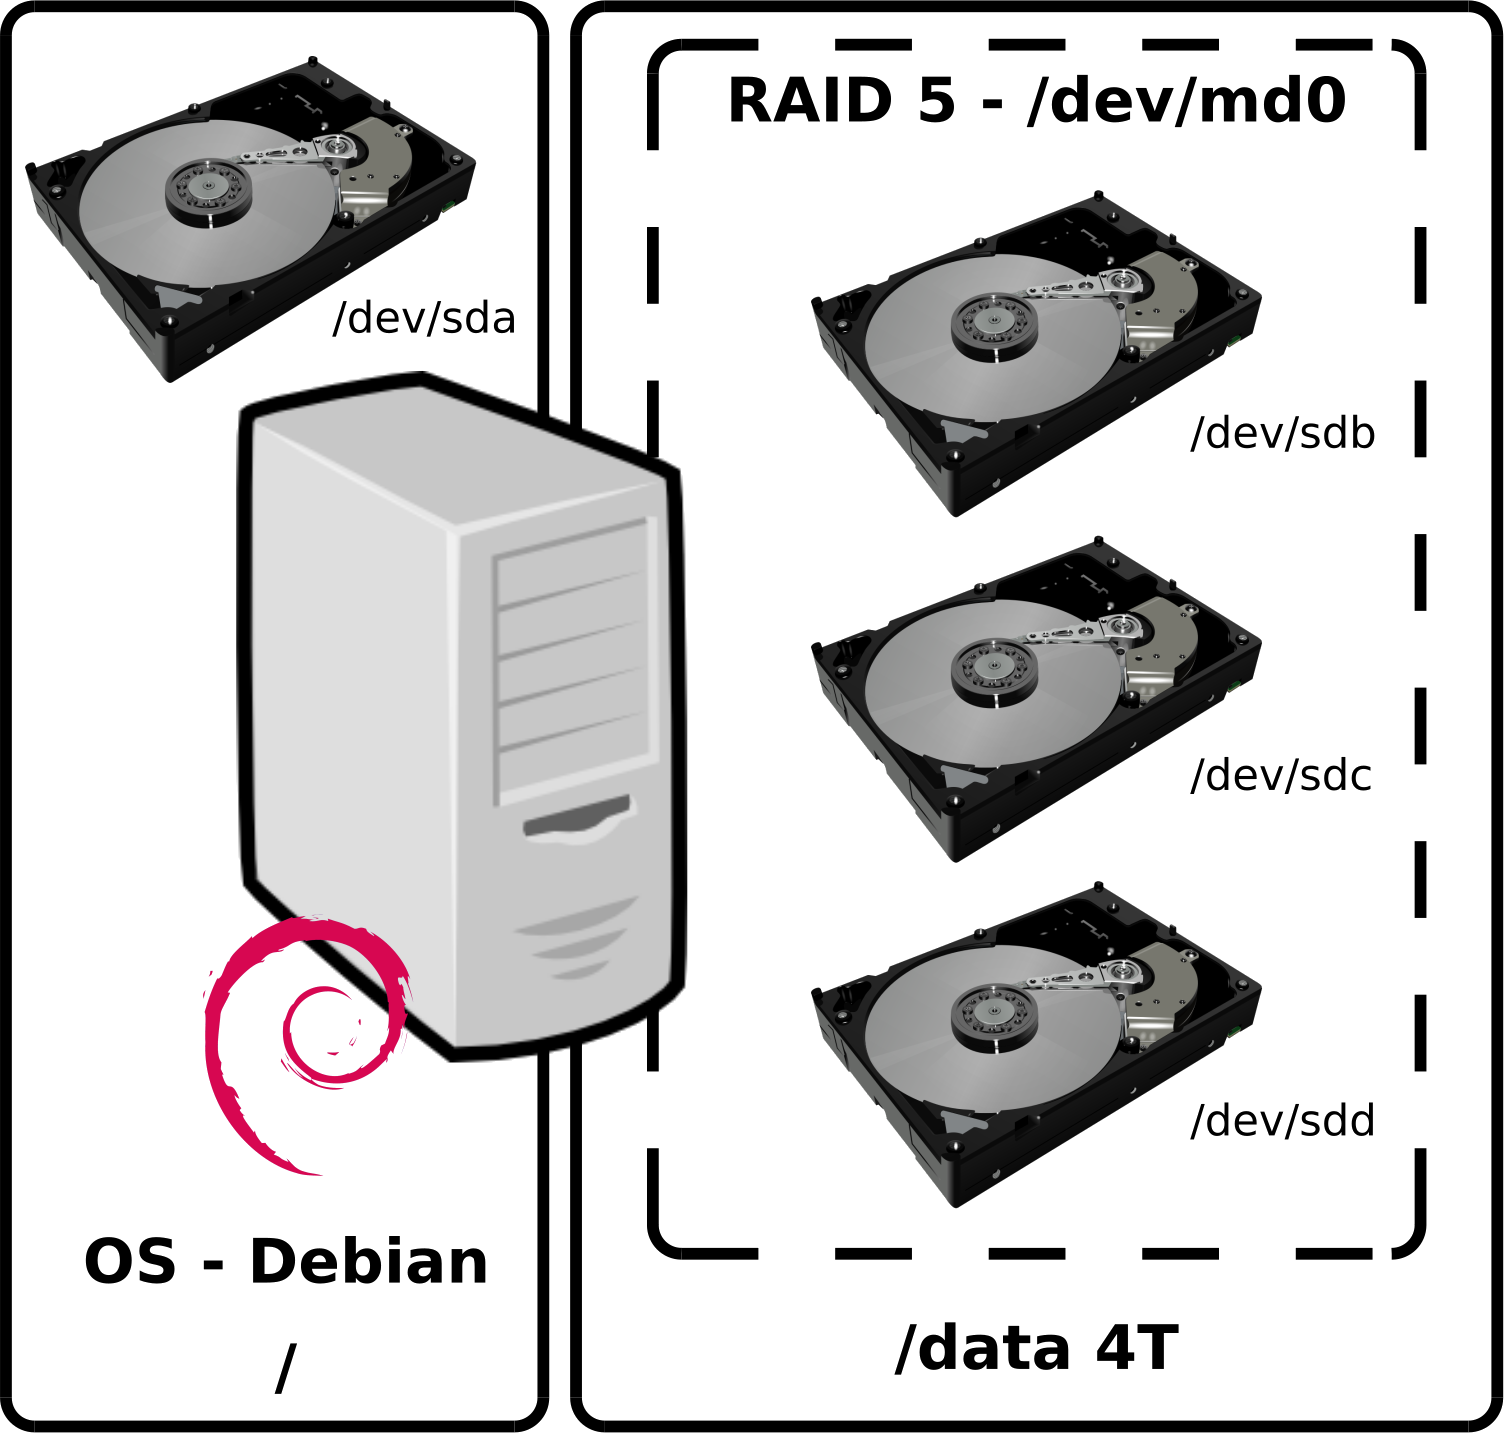
Target Architecture
The final architecture looks like this:

Configuration
Hardware Requirements
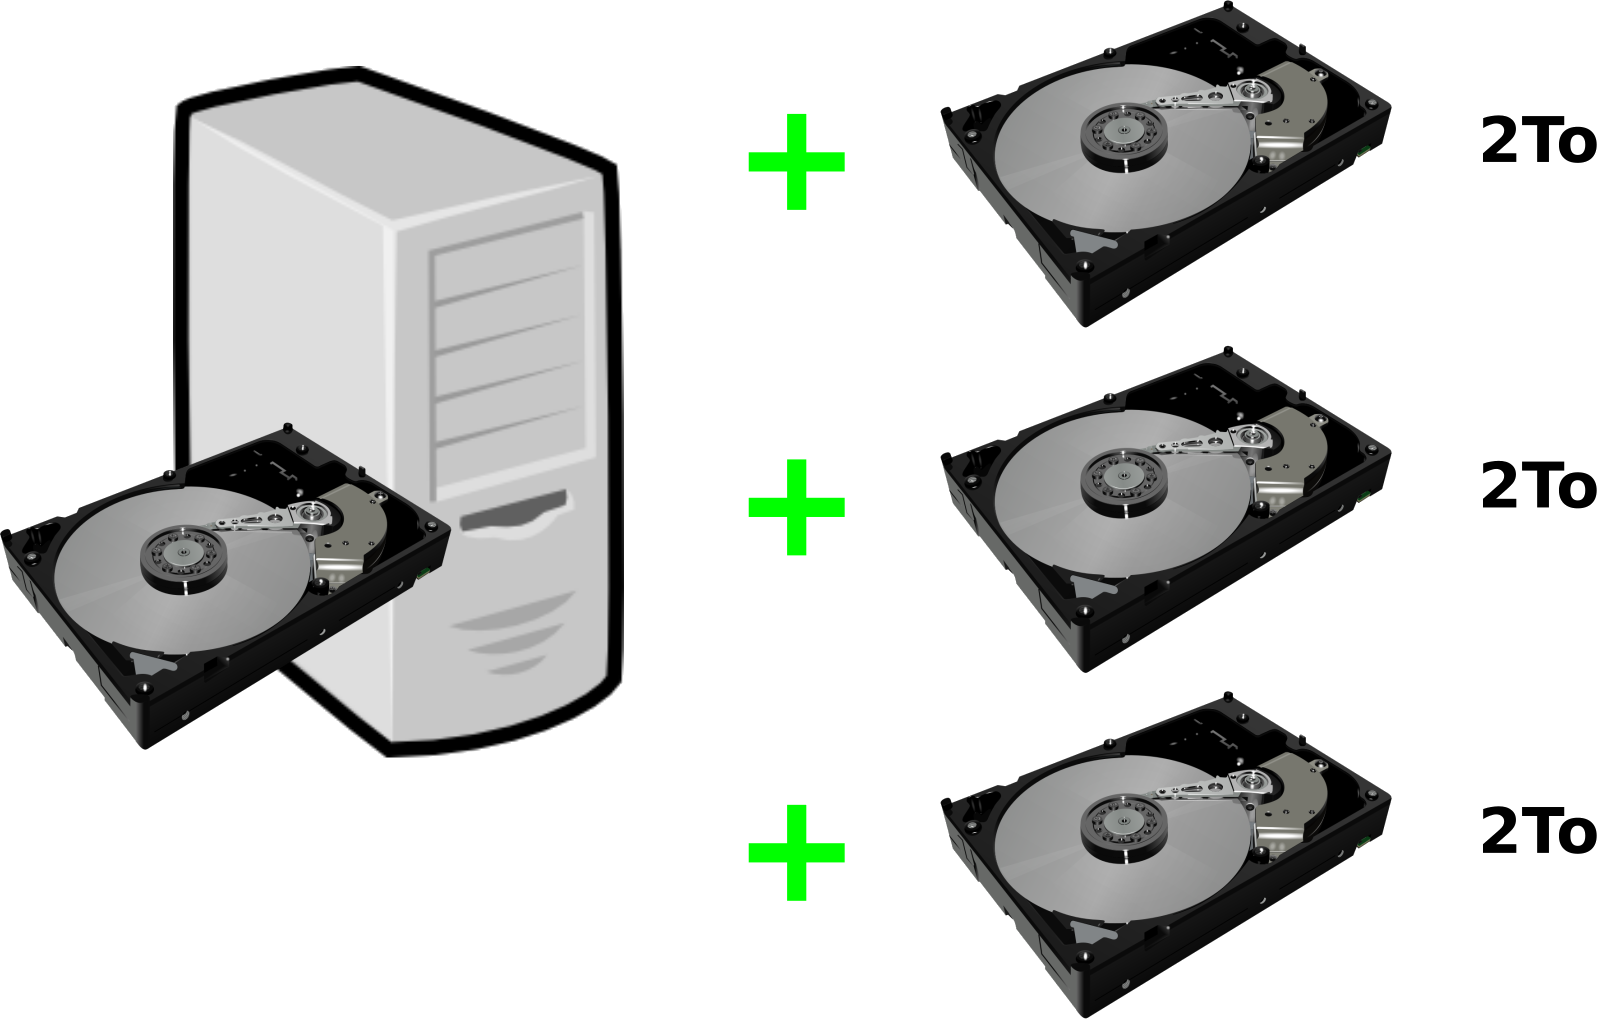
As shown earlier, it's possible to create a low-cost NAS by recycling old computer hardware.
- Here is an example of hardware configutation:
- CPU: > intel dual core
- RAM: 512 MB
- HDD: 1x 500 GB (OS) + 3x 2TB (data)
Software Configuration
We're going to install Debian on our first hard disk (/dev/sda) and then create a RAID 5 with our three 2TB disks (sdb, sdc and sdd).
Settings
First of all, we need to install Debian, as brilliantly explained here.
Network Configuration
- Edit the
/etc/network/interfacesfile (replaceens192by your own interface):
allow-hotplug ens192
iface ens192 inet static
        address 192.168.1.100
        netmask 255.255.255.0
        gateway 192.168.1.254
dns-nameservers 192.168.1.254- Restart the system or the networking service:
root@host:~# systemctl restart networkingPartition Table
- Install the
gdisktool, which is the gpt version of fdisk:
root@host:~# apt update && apt install mdadm gdisk- Clean partition table for
/dev/sdb:
root@host:~# wipefs -a /dev/sdb[1-9]*root@host:~# wipefs -a /dev/sdb- Create a partition table for
/dev/sdb:
root@host:~# gdisk /dev/sdb
GPT fdisk (gdisk) version 1.0.3

Partition table scan:
  MBR: not present
  BSD: not present
  APM: not present
  GPT: not present

Creating new GPT entries.

Command (? for help): n
Partition number (1-128, default 1):
First sector (34-4194270, default = 2048) or {+-}size{KMGTP}:
Last sector (2048-3907028991, default = 3907028991) or {+-}size{KMGTP}:
Current type is 'Linux filesystem'
Hex code or GUID (L to show codes, Enter = 8300): FD00
Changed type of partition to 'Linux RAID'

Command (? for help): w

Final checks complete. About to write GPT data. THIS WILL OVERWRITE EXISTING PARTITIONS!!

Do you want to proceed? (Y/N): Y
OK; writing new GUID partition table (GPT) to /dev/sdb.
The operation has completed successfully.- Copy the partition table from
/dev/sdbto/dev/sdcand/dev/sdd:
root@host:~# sgdisk /dev/sdb -R /dev/sdcroot@host:~# sgdisk /dev/sdb -R /dev/sddroot@host:~# sfdisk -d /dev/sdb | sfdisk --force /dev/sdcroot@host:~# sfdisk -d /dev/sdb | sfdisk --force /dev/sdd- Randomize the GUID disk and all partitions to avoid having the same GUID on all disks:
root@host:~# sgdisk -G /dev/sdcroot@host:~# sgdisk -G /dev/sddmdadm
mdadm is a utility used to create, manage and monitor software RAID devices on GNU/Linux.
- Install the
mdadmtool:
root@host:~# apt install mdadm- Create a RAID 5 with our three disks:
root@host:~# mdadm --create --level=5 --raid-devices=3 /dev/md0 /dev/sdb1 /dev/sdc1 /dev/sdd1- Check RAID status:
root@host:~# cat /proc/mdstat
Personalities : [raid6] [raid5] [raid4]
md0 : active raid5 sdd1[3] sdc1[1] sdb1[0]
      418713600 blocks super 1.2 level 5, 512k chunk, algorithm 2 [3/3] [UUU]

unused devices: <none>- Create a file system on
/dev/md0:
root@host:~# mkfs.ext4 /dev/md0- Create a mount folder:
root@host:~# mkdir /data- Mount the file system located on the
/dev/md0device in the/datadirectory:
root@host:~# mount /dev/md0 /data- Show mount points:
root@host:~# df -h
Filesystem      Size  Used Avail Use% Mounted on
udev            983M     0  983M   0% /dev
tmpfs           200M  5.6M  194M   3% /run
/dev/sda2        14G  1.5G   12G  12% /
tmpfs           998M     0  998M   0% /dev/shm
tmpfs           5.0M     0  5.0M   0% /run/lock
tmpfs           998M     0  998M   0% /sys/fs/cgroup
/dev/sda1       511M  3.3M  508M   1% /boot/efi
tmpfs           200M     0  200M   0% /run/user/0
tmpfs           200M     0  200M   0% /run/user/1000
/dev/md0        3.8T   16M  3.7T   1% /data
- Save the RAID configuration so that it is automatically reassembled on system startup:
root@host:~# mdadm --detail --scan >> /etc/mdadm/mdadm.conf- Update the initramfs to take this into account:
root@host:~# update-initramfs -u- Add an fstab entry to mount the RAID at startup:
root@host:~# echo "/dev/md0 /data ext4 rw,nofail,relatime,x-systemd.device-timeout=20s,defaults 0 2" >> /etc/fstabSamba
We're now going to install and configure the samba service, which will enable Windows machines to access file sharing.
- Install the samba service:
root@host:~# apt install samba- Creating a samba user:
root@host:~# adduser --home /data --system samba- Set rights:
root@host:~# chown samba: /data- Create a password to access the share:
root@host:~# smbpasswd -a samba- Edit the
/etc/samba/smb.conffile:
[global]
   workgroup = WORKGROUP
   server string = nas
[share]
   path = /data
   read only = no
valid users = samba- Restart samba services:
root@host:~# systemctl restart smbd; systemctl restart nmbd- From a Windows computer, check that you can access your share:
