Mettre en place un serveur de déploiement Clonezilla
- Mise à jour le 02 févr. 2025


Nous allons voir ici comment mettre en place un serveur Clonezilla sur une distribution Debian.
- Que voulons nous?
- Un serveur de déploiement pour sauvegarder et restorer un grand nombre de machines
- Une compatibilité Multi-OS, capable de restorer des images Linux et Windows
- Une solution gratuite et OpenSource
- Compatible UEFI et BIOS
Pour se faire nous allons utiliser le couple DRBL (https://drbl.org/) / Clonezilla (https://clonezilla.org/).
- Definition :
- DRBL (Diskless Remote Boot in Linux) est un serveur fournissant un environnement de démarrage sans disque ou sans système à des machines clientes.
- Clonezilla est un programme de restauration de données, de clonage de disque, et de création d'image de disque.
Donc pour résumer, le serveur DRBL va donner la possibilités à nos machines clientes de booter sur Clonezilla via PXE.
Architecture
Les services tftp, dhcp et nfs seront installés sur le serveur Debian pour permètre de démarrer via PXE.

Prérequis et Configuration

- Il y a quelques prérequis a respecter avant de pouvoir installer DRBL.
- installer Debian sur le serveur
- ⚠️ Activer le mode de démarrage PXE sur les postes clients.⚠️
- Le serveur a besoin de deux cartes réseau
- Configuration :
- Debian : Bullseye 11
- DRBL : 4.5 (DRBL repository) ou 2.32 (official Debian repository)
Réseau
- Obtenir le nom des interfaces réseau :
root@host:~# ip link show
1: lo: <LOOPBACK,UP,LOWER_UP> mtu 65536 qdisc noqueue state UNKNOWN group default qlen 1000
    link/loopback 00:00:00:00:00:00 brd 00:00:00:00:00:00
2: ens192: <BROADCAST,MULTICAST,UP,LOWER_UP> mtu 1500 qdisc mq state UP group default qlen 1000
    link/ether 00:50:56:80:a5:be brd ff:ff:ff:ff:ff:ff
    altname enp11s0
3: ens224: <BROADCAST,MULTICAST,UP,LOWER_UP> mtu 1500 qdisc mq state UP group default qlen 1000
    link/ether 00:50:56:80:e2:ae brd ff:ff:ff:ff:ff:ff
altname enp19s0- Éditer le fichier
/etc/network/interfaces:
# This file describes the network interfaces available on your system
# and how to activate them. For more information, see interfaces(5).

source /etc/network/interfaces.d/*

# The loopback network interface
auto lo
iface lo inet loopback

allow-hotplug ens192
iface ens192 inet static
        address 192.168.1.10
        netmask 255.255.255.0
        gateway 192.168.1.254
        dns-nameservers 80.67.169.40

# The primary network interface
allow-hotplug ens224
iface ens224 inet static
        address 192.168.10.1
netmask 255.255.255.0- Redémarrer pour appliquer la configuration :
root@host:~# rebootInstaller les logiciels de base
- Installer les paquets nécessaires :
root@host:~# apt-get install rsync gawk gnupg curlInstallation de DRBL
Il y a deux façons de procéder. La première est d'utiliser les dépôts officiel de Debian, l'autre est d'ajouter les dépôts DRBL.
Je recommanderais personnellement d'utiliser les dépôts DRBL dans le but de disposer de la dernière version de DRBL et Clonezilla, également car il y a moins d'actions à réaliser…
Mais étant un gentleman, je détaillerai ici les deux méthodes.
Solution 1 - dépôts DRBL (recommandé)
Ajouter la clé DRBL (voir ici) :
Prérequis
- L'ancienne méthode avec
apt-key:
root@host:~# wget -q https://drbl.org/GPG-KEY-DRBL -O- | apt-key add -- Nouvelle méthode, étant donné que
apt-keysemble déprécié :
root@host:~# curl -s https://drbl.org/GPG-KEY-DRBL | gpg --no-default-keyring --keyring gnupg-ring:/etc/apt/trusted.gpg.d/GPG-KEY-DRBL.gpg --importroot@host:~# chmod 644 /etc/apt/trusted.gpg.d/GPG-KEY-DRBL.gpg- Ajouter le dépôt drbl dans le fichier
source.list:
root@host:~# echo "deb http://free.nchc.org.tw/drbl-core drbl stable" >> /etc/apt/sources.listInstaller et configurer DRBL
- Installer le paquet DRBL :
root@host:~# apt updateroot@host:~# apt-get install drbl- Éditer le fichier
/etc/drbl/drbl.confpour activer la compatibilité secure boot :
# uEFI network secure boot for clients. This is still in testing.
secure_boot_client="yes"- Installer le serveur DRBL :
root@host:~# drblsrv -i- Pousser la configuration :
root@host:~# drblpush -i
[…]
The public IP address of this server is NOT found.
Which ethernet port in this server is for public Internet accsess, not for DRBL connection?
Available ethernet ports in this server:
ens192 (192.168.1.10), ens224 (192.168.10.1),
[ens192]
[…]
What is the initial number do you want to use in the last set of digits in the IP (i.e. the initial value of d in the IP address a.b.c.d) for DRBL clients connected to this ethernet port ens224.
[1] 10
******************************************************
How many DRBL clients (PC for students) connected to DRBL server's ethernet network interface ens224 ?
Please enter the number:
[12] 50
[…]
------------------------------------------------------
In the system, there are 3 modes for diskless linux services:
[0] Full DRBL mode, every client has its own NFS based /etc and /var.
[1] DRBL SSI (Single system image) mode, every client uses tmpfs based /etc and /var. In this mode, the loading and necessary disk space of server will be lighter. NOTE! (a) The client machine memory is recommended at least 256 MB. (b) The setting and config files of client will not be saved to the DRBL server! They are just used once and will vanish after the machine shutdowns! Besides, if you modify any file in the template client (located in /tftpboot/nodes), you have to run drbl-gen-ssi-files to create the template tarball in /tftpboot/node_root/drbl_ssi/. (c) If you want to provide some file to overwrite the setting in the template tarball when client boots, check /tftpboot/node_root/drbl_ssi/clients/00_README for more details.
[2] I do NOT want to provide diskless Linux service to client.
Which mode do you prefer?
[0] 2
No diskless Linux for client is the system.
******************************************************
------------------------------------------------------
In the system, there are 4 modes available for clonezilla:
[0] Full Clonezilla mode, every client has its own NFS based /etc and /var.
[1] Clonezilla box mode, every client uses tmpfs based /etc and /var. In this mode, the loading and necessary disk space of server will be lighter than that in Full Clonezilla mode. Note! In Clonezilla box mode, the setting and config files of client will not be saved to the DRBL server! They just use once and will vanish after the machine shutdowns!
[2] I do NOT want clonezilla.
[3] Use Clonezilla live as the OS (Operating System) of clients.
Which mode do you prefer?
[0] 3
Use Clonezilla live as the OS (Operating System) of clients when running Clonezilla job.
******************************************************
******************************************************
What's the Clonezilla live release branch for the clients?
[0]: stable (Debian-based)
[1]: testing (Debian-based)
[2]: alternative stable (Ubuntu-based)
[3]: alternative testing (Ubuntu-based)
If unsure, choose [2]: alternative stable.
[2]
From Ubuntu 19.10, only amd64 (x86-64) release of Clonezilla live is available.
******************************************************
The CPU arch for clients when running Clonezilla job: amd64
------------------------------------------------------
Solution 2 - dépôts officiels Debian
Installation des prérequis
- Installer le service nfs :
root@host:~# apt updateroot@host:~# apt install nfs-kernel-server- Installer le service dhcp :
root@host:~# apt install isc-dhcp-server- Installer le service tftp :
root@host:~# apt install tftpd-hpa- Installer les autres paquets qui seront nécessaires :
root@host:~# apt install iptables syslinux-common pxelinux grub-efi-amd64 grub-efi-ia32-binInstaller et configurer DRBL
- Installer le paquer DRBL :
root@host:~# apt install drbl- Éditer le fichier
/etc/drbl/drbl.confpour activer la compatibilité secure boot :
# uEFI network secure boot for clients. This is still in testing.
secure_boot_client="yes"- Installer le serveur DRBL :
root@host:~# drblsrv -i- Push config :
root@host:~# drblpush -i
[…]
The public IP address of this server is NOT found.
Which ethernet port in this server is for public Internet accsess, not for DRBL connection?
Available ethernet ports in this server:
ens192 (192.168.1.10), ens224 (192.168.10.1),
[ens192]
[…]
What is the initial number do you want to use in the last set of digits in the IP (i.e. the initial value of d in the IP address a.b.c.d) for DRBL clients connected to this ethernet port ens224.
[1] 10
******************************************************
How many DRBL clients (PC for students) connected to DRBL server's ethernet network interface ens224 ?
Please enter the number:
[12] 50
[…]
------------------------------------------------------
In the system, there are 3 modes for diskless linux services:
[0] Full DRBL mode, every client has its own NFS based /etc and /var.
[1] DRBL SSI (Single system image) mode, every client uses tmpfs based /etc and /var. In this mode, the loading and necessary disk space of server will be lighter. NOTE! (a) The client machine memory is recommended at least 256 MB. (b) The setting and config files of client will not be saved to the DRBL server! They are just used once and will vanish after the machine shutdowns! Besides, if you modify any file in the template client (located in /tftpboot/nodes), you have to run drbl-gen-ssi-files to create the template tarball in /tftpboot/node_root/drbl_ssi/. (c) If you want to provide some file to overwrite the setting in the template tarball when client boots, check /tftpboot/node_root/drbl_ssi/clients/00_README for more details.
[2] I do NOT want to provide diskless Linux service to client.
Which mode do you prefer?
[0] 2
No diskless Linux for client is the system.
******************************************************
------------------------------------------------------
In the system, there are 4 modes available for clonezilla:
[0] Full Clonezilla mode, every client has its own NFS based /etc and /var.
[1] Clonezilla box mode, every client uses tmpfs based /etc and /var. In this mode, the loading and necessary disk space of server will be lighter than that in Full Clonezilla mode. Note! In Clonezilla box mode, the setting and config files of client will not be saved to the DRBL server! They just use once and will vanish after the machine shutdowns!
[2] I do NOT want clonezilla.
[3] Use Clonezilla live as the OS (Operating System) of clients.
Which mode do you prefer?
[0] 3
Use Clonezilla live as the OS (Operating System) of clients when running Clonezilla job.
******************************************************
******************************************************
What's the Clonezilla live release branch for the clients?
[0]: stable (Debian-based)
[1]: testing (Debian-based)
[2]: alternative stable (Ubuntu-based)
[3]: alternative testing (Ubuntu-based)
If unsure, choose [2]: alternative stable.
[2]
******************************************************
What's the CPU arch for the clients when running Clonezilla job with Clonezilla live?
[0]: i386
[1]: amd64
If unsure, choose i386.
[0] 1Corriger les fichiers de configuration UEFI et BIOS
Peu importe la méthode utiliser pour installer DRBL, les fichiers de configuration de démarrage devront être modifiés, sinon il ne sera pas possible de démarrer sur Clonezilla.
Paramétrage du menu de boot UEFI
- Éditer le fichier
/tftpboot/nbi_img/grub/grub.cfg:
# Created by gen-grub-efi-nb-menu! Do NOT edit unless you know what you are doing!
set default=clonezilla-se-client
set timeout_style=menu
set timeout=10
set hidden_timeout_quiet=false
set graphic_bg=yes
# tftpd_opt can be tftpd_opt=tftp or tftpd_opt="tftp,$tftp_server_ip", e.g., tftpd_opt=tftp,192.168.66.254
set tftpd_opt=tftp
# "run_load_netboot" is the flag to avoid load_netboot to be run more than once.
#
function load_netboot {
  set prefix=($tftpd_opt)/grub
  echo "Grub CPU and platform: $grub_cpu, $grub_platform"
  echo 'Network status: '
  net_ls_cards
  net_ls_addr
  net_ls_routes
  # sleep 5
}
#
function load_gfxterm {
  set gfxmode=auto
  insmod efi_gop
  insmod efi_uga
  insmod gfxterm
  terminal_output gfxterm
}

load_netboot

# Somehow the grub2 from CentOS 7 will look for unicode.pf2.pf2 if using "loadfont unicode.pf2". While in Debian/Ubuntu it's OK to use "loadfont unicode.pf2".
if [ x"${graphic_bg}" = xyes ]; then
  if loadfont unicode; then
    load_gfxterm
  elif loadfont unicode.pf2; then
    load_gfxterm
  fi
fi
if background_image drblwp.png; then
  set color_normal=black/black
  set color_highlight=magenta/black
else
  set color_normal=cyan/blue
  set color_highlight=white/blue
fi
# Decide if the commands: linux/initrd (default) or linuxefi/initrdefi
set linux_cmd=linux
set initrd_cmd=initrd
export linux_cmd initrd_cmd
if [ "${grub_cpu}" = "x86_64" -o "${grub_cpu}" = "i386" ];then
  set linux_cmd=linuxefi
  set initrd_cmd=initrdefi
fi

menuentry "Clonezilla-live" --id clonezilla-se-client {
  echo "Enter Clonezilla..."
  echo 'Loading Linux kernel vmlinuz-pxe...'
  #Add live-netdev="eth0" to force eth0 as primary interface and avoid WWAN0 boot priority see : https://sourceforge.net/p/clonezilla/discussion/Help/thread/1f90134ddd/
  $linux_cmd Clonezilla-live-vmlinuz initrd=Clonezilla-live-initrd.img boot=live union=overlay username=user hostname=hirsute config components noswap edd=on nomodeset enforcing=0 locales=fr_FR.UTF-8 keyboard-layouts=fr ocs_live_extra_param= ocs_live_batch=no net.ifnames=0 noeject netboot=nfs nfsroot=192.168.10.1:/tftpboot/node_root/clonezilla-live/ ocs_server="192.168.10.1" ocs_daemonon=\"ssh\" ocs_prerun=\"mount -t nfs 192.168.10.1:/home/partimag /home/partimag/\" ocs_live_run=\"clonezilla -l en_US.UTF-8 -p choose  -k --skip-lite-menu  \"
  echo 'Loading initial ramdisk initrd-pxe.img...'
  $initrd_cmd Clonezilla-live-initrd.img
}

menuentry "Local operating system (if available)" --id local-disk {
  echo "Booting first local disk..."
  # Generate boot menu automatically
  configfile grub/boot-local-efi.cfg
  # If not chainloaded, definitely no uEFI boot loader was found.
  echo "No uEFI boot loader was found!"
  sleep 15
}

menuentry "Reboot" --id reboot {
  echo "System rebooting..."
  reboot
}

menuentry "Shutdown" --id shutdown {
  echo "System shutting down..."
  halt
}

menuentry 'uEFI firmware setup' 'uefi-firmware' {
  echo "Entering uEFI firmware setup..."
  insmod efifwsetup
  fwsetup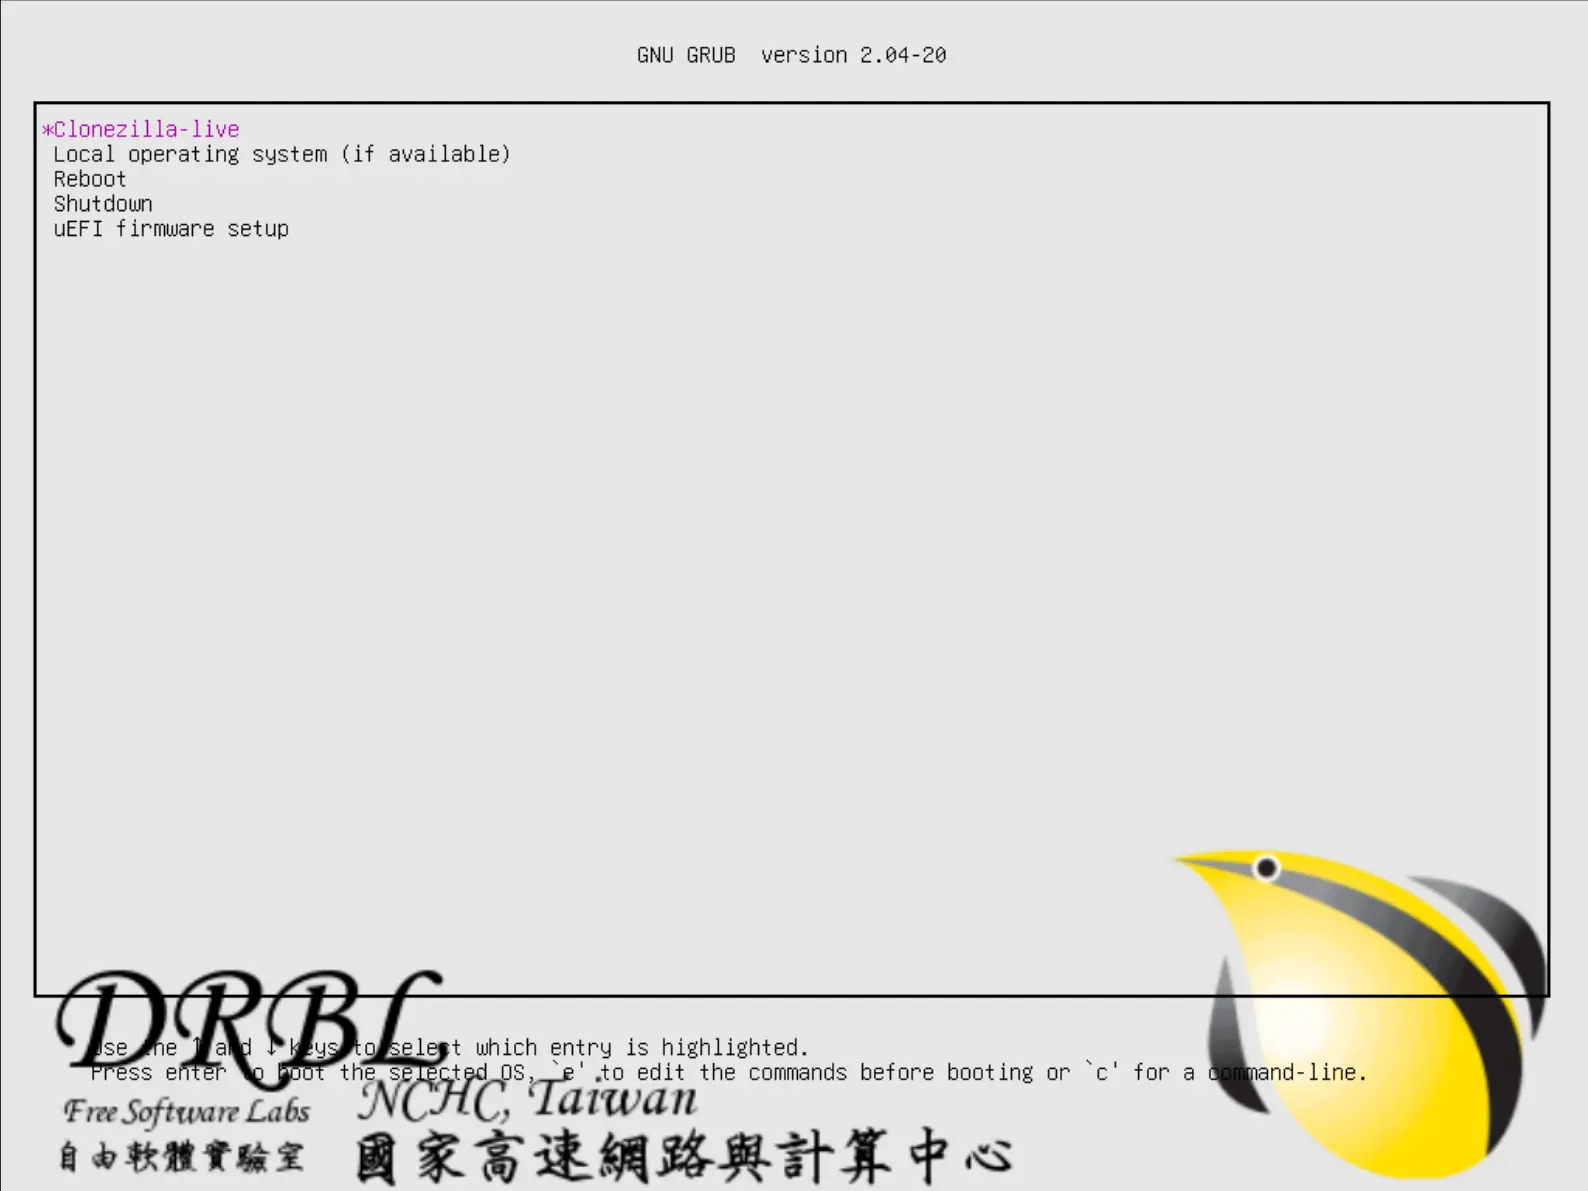
}- Comme résultat l'écran suivant devrait apparaitre lors du démarrage des clients :
Paramétrage du menu de boot BIOS (legacy)
- Éditer le fichier
/tftpboot/nbi_img/pxelinux.cfg/default:
default vesamenu.c32
timeout 100
prompt 0
noescape 1
ENU MARGIN 5
ENU BACKGROUND drblwp.png

# Set the color for unselected menu item and timout message
ENU COLOR UNSEL 7;32;41 #c0000090 #00000000
ENU COLOR TIMEOUT_MSG 7;32;41 #c0000090 #00000000
ENU COLOR TIMEOUT 7;32;41 #c0000090 #00000000
ENU COLOR HELP 7;32;41 #c0000090 #00000000

PATH bios/

say **********************************************
say Welcome to DRBL.
say NCHC Free Software Labs, Taiwan.
say http://drbl.org; http://drbl.nchc.org.tw
say **********************************************

# Allow client to edit boot parameters
ALLOWOPTIONS 1

# simple menu title
ENU TITLE DRBL (http://drbl.org)

label local
  #MENU DEFAULT
  # MENU HIDE
  MENU LABEL Local operating system (if available)
  # MENU PASSWD
  kernel chain.c32
  append hd0
  TEXT HELP
  Boot local OS from first hard disk if it's available
  ENDTEXT

label Clonezilla-live
  MENU DEFAULT
  #MENU HIDE
  MENU LABEL Clonezilla Live
  KERNEL Clonezilla-live-vmlinuz
  #Add live-netdev="eth0" to force eth0 as primary interface and avoid WWAN0 boot priority see : https://sourceforge.net/p/clonezilla/discussion/Help/thread/1f90134ddd/
  APPEND initrd=Clonezilla-live-initrd.img boot=live union=overlay noswap noeject nolocales locales=fr_FR.UTF-8 keyboard-layouts=fr ocs_prerun="mount -t nfs 192.168.10.1:/home/partimag /home/partimag/" vga=788 netboot=nfs nfsroot=192.168.10.1:/tftpboot/node_root/clonezilla-live/ ocs_server="192.168.10.1" ocs_live_run="clonezilla -l en_US.UTF-8 -p choose -k --skip-lite-menu"

  TEXT HELP
  Clonezilla Live runs on RAM
  ENDTEXT
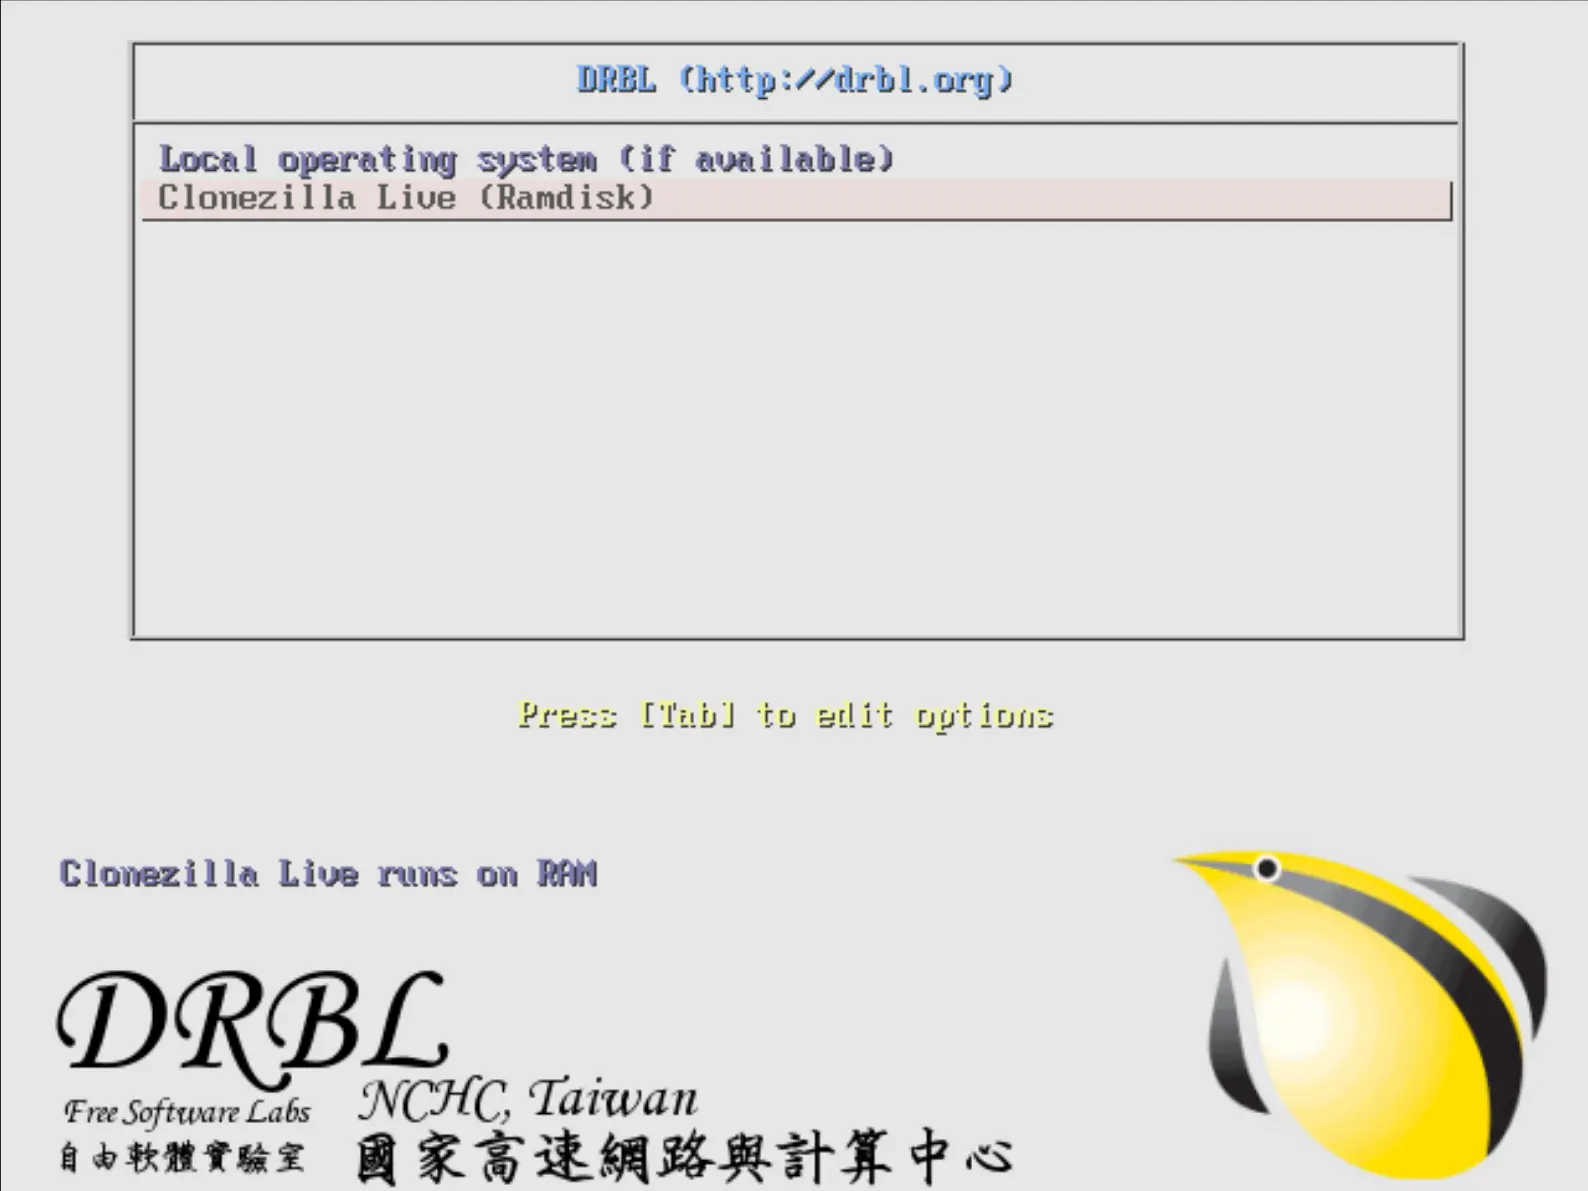
- Comme résultat l'écran suivant devrait apparaitre lors du démarrage des clients :
Sauvegarde et restauration
Maintenant que le plus dur a été fait nous pouvons procéder à la sauvegarde et à la restauration d'images clients.
Nous allons voir ici comment sauvegarder et restaurer un système complet.
Sauvegarde
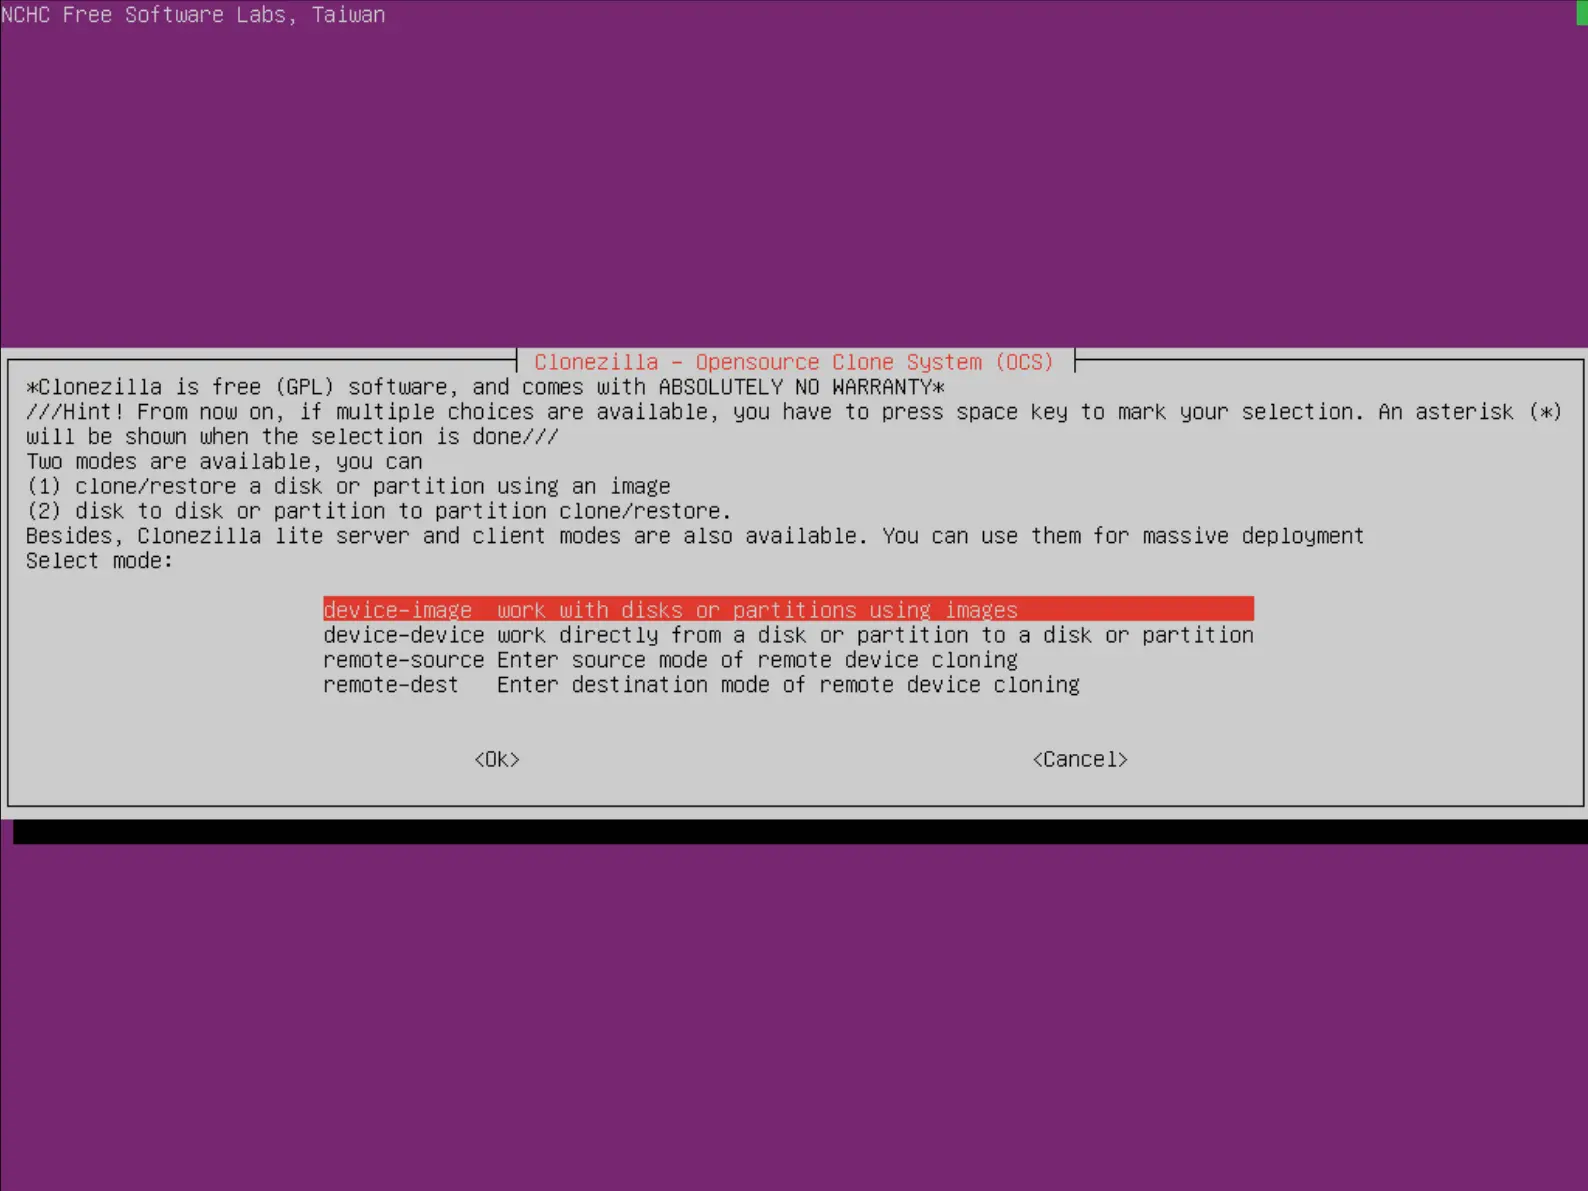
- Choisir device-image :
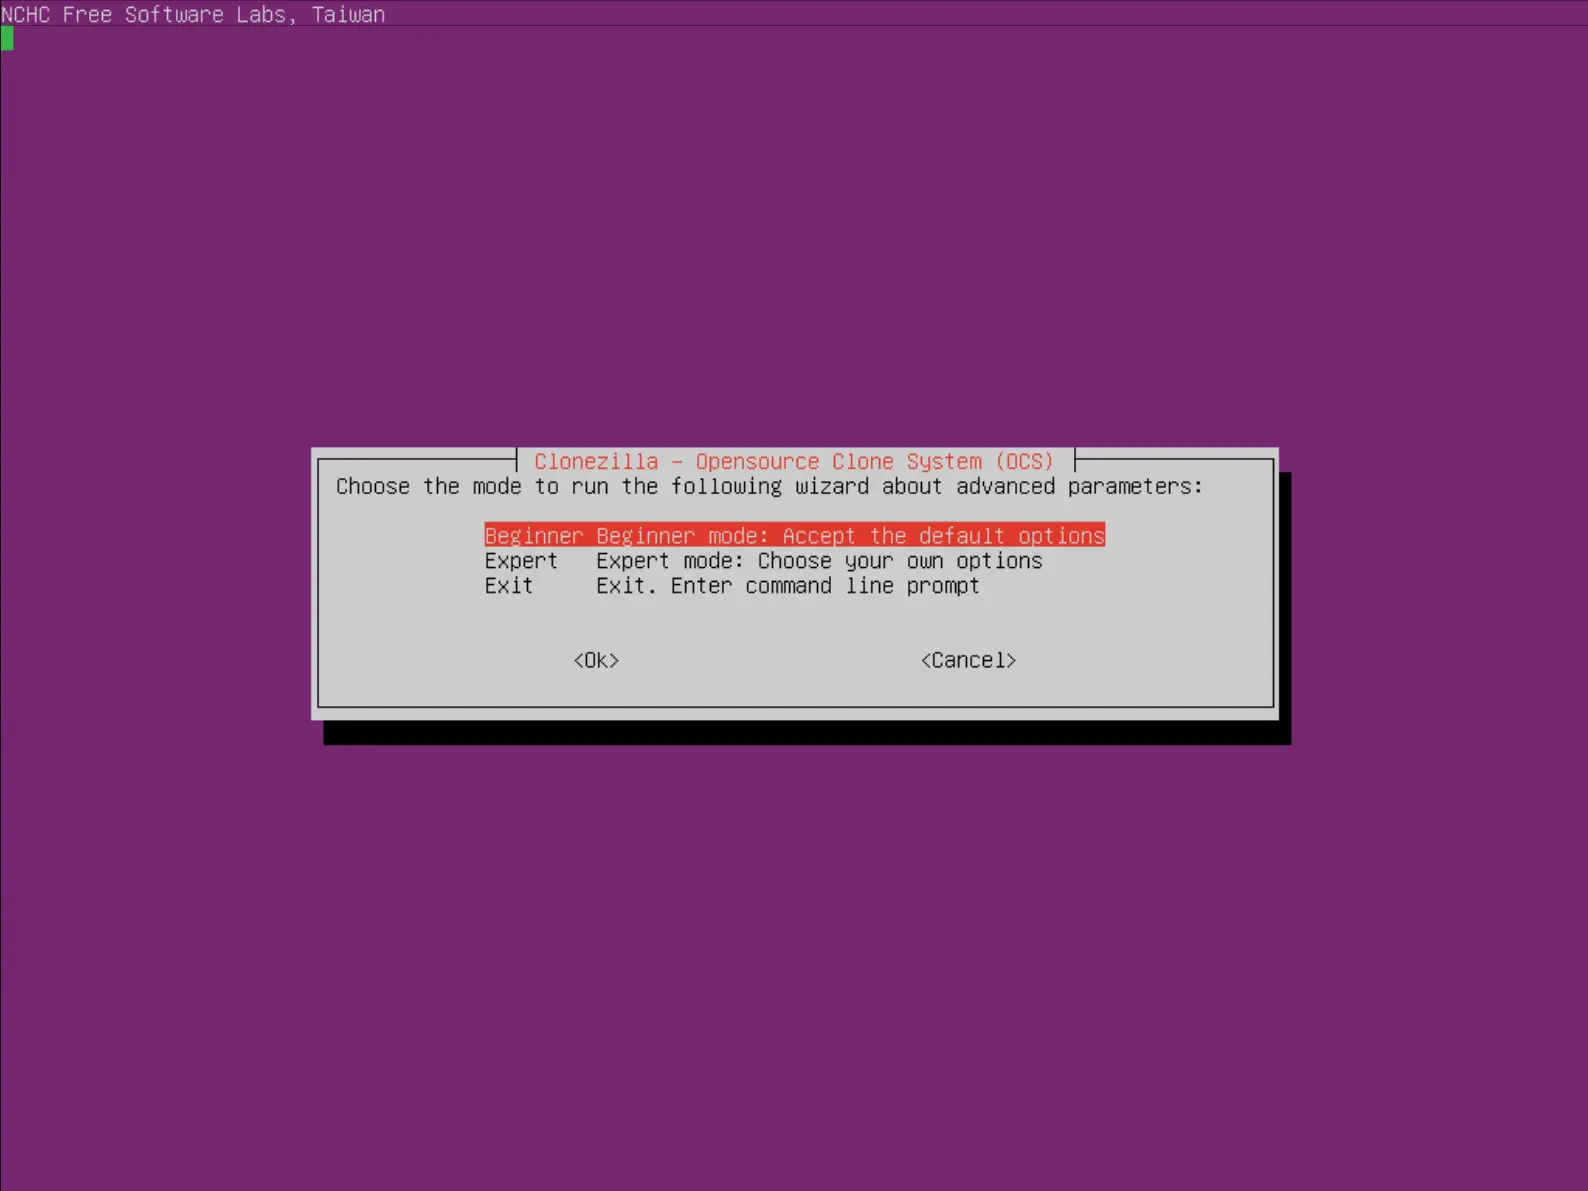
- Choisir Beginner :
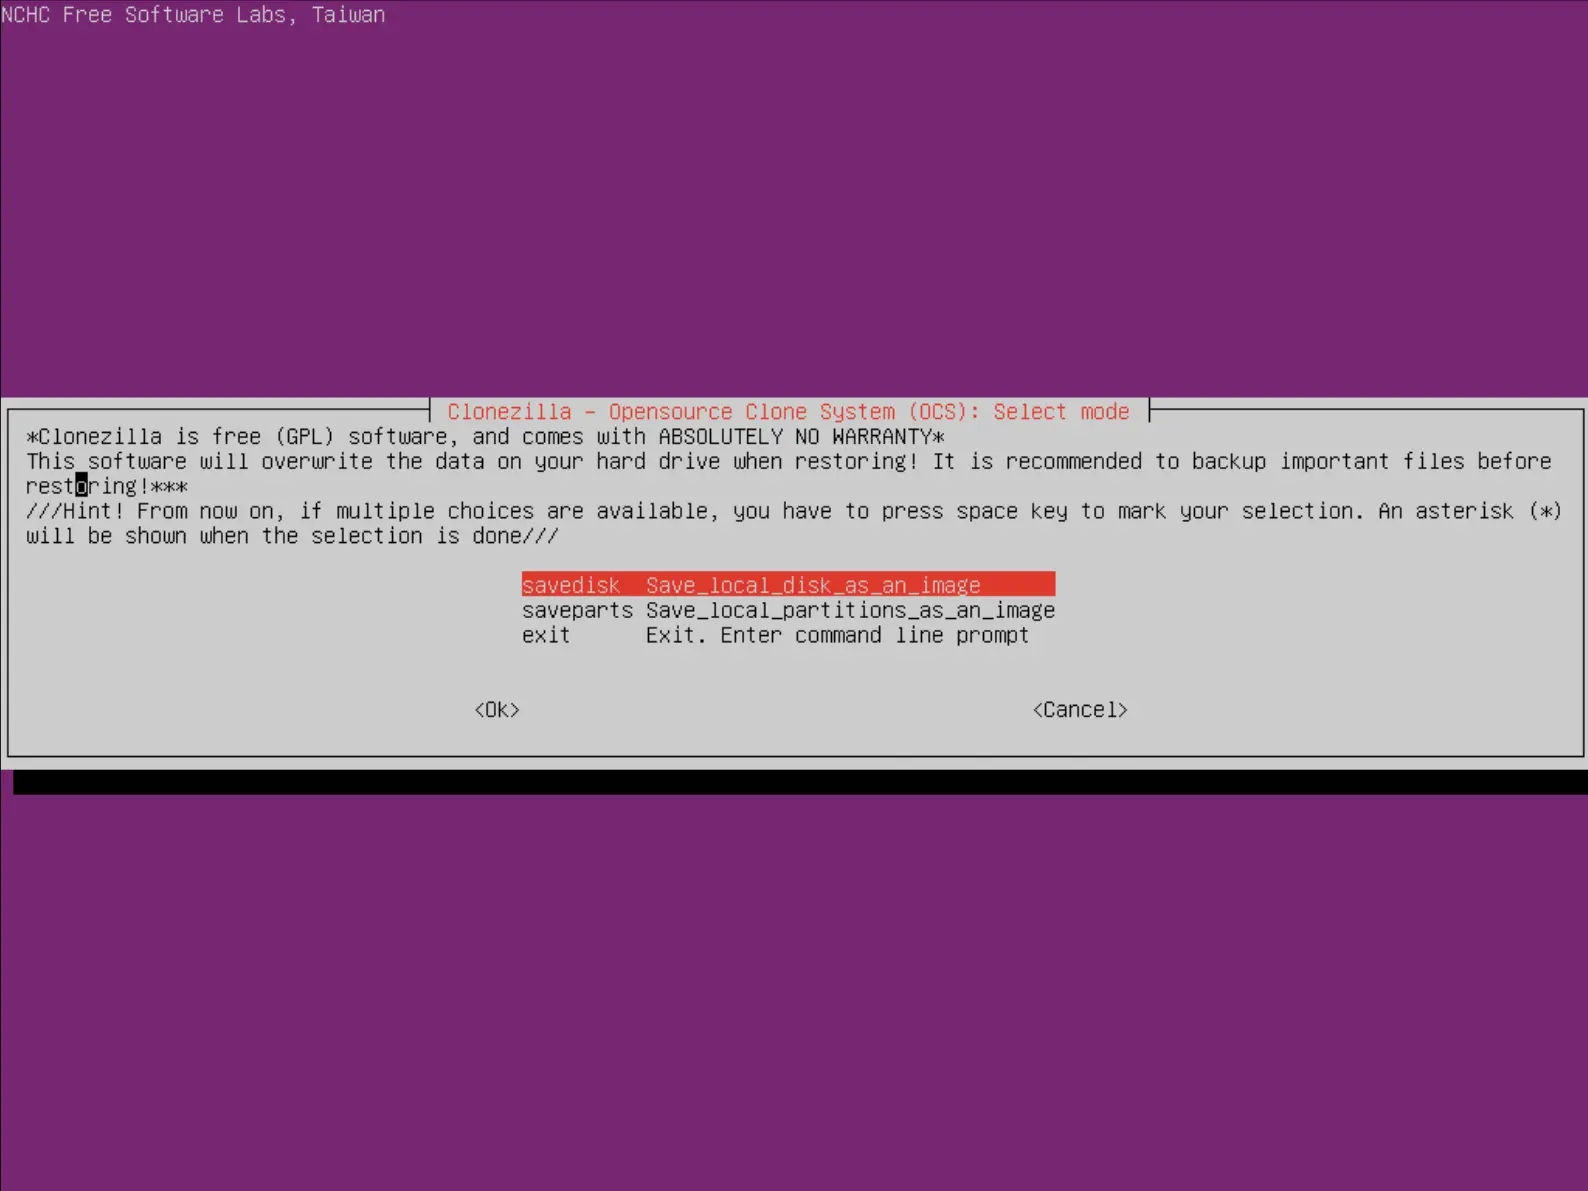
- Choisir savedisk :
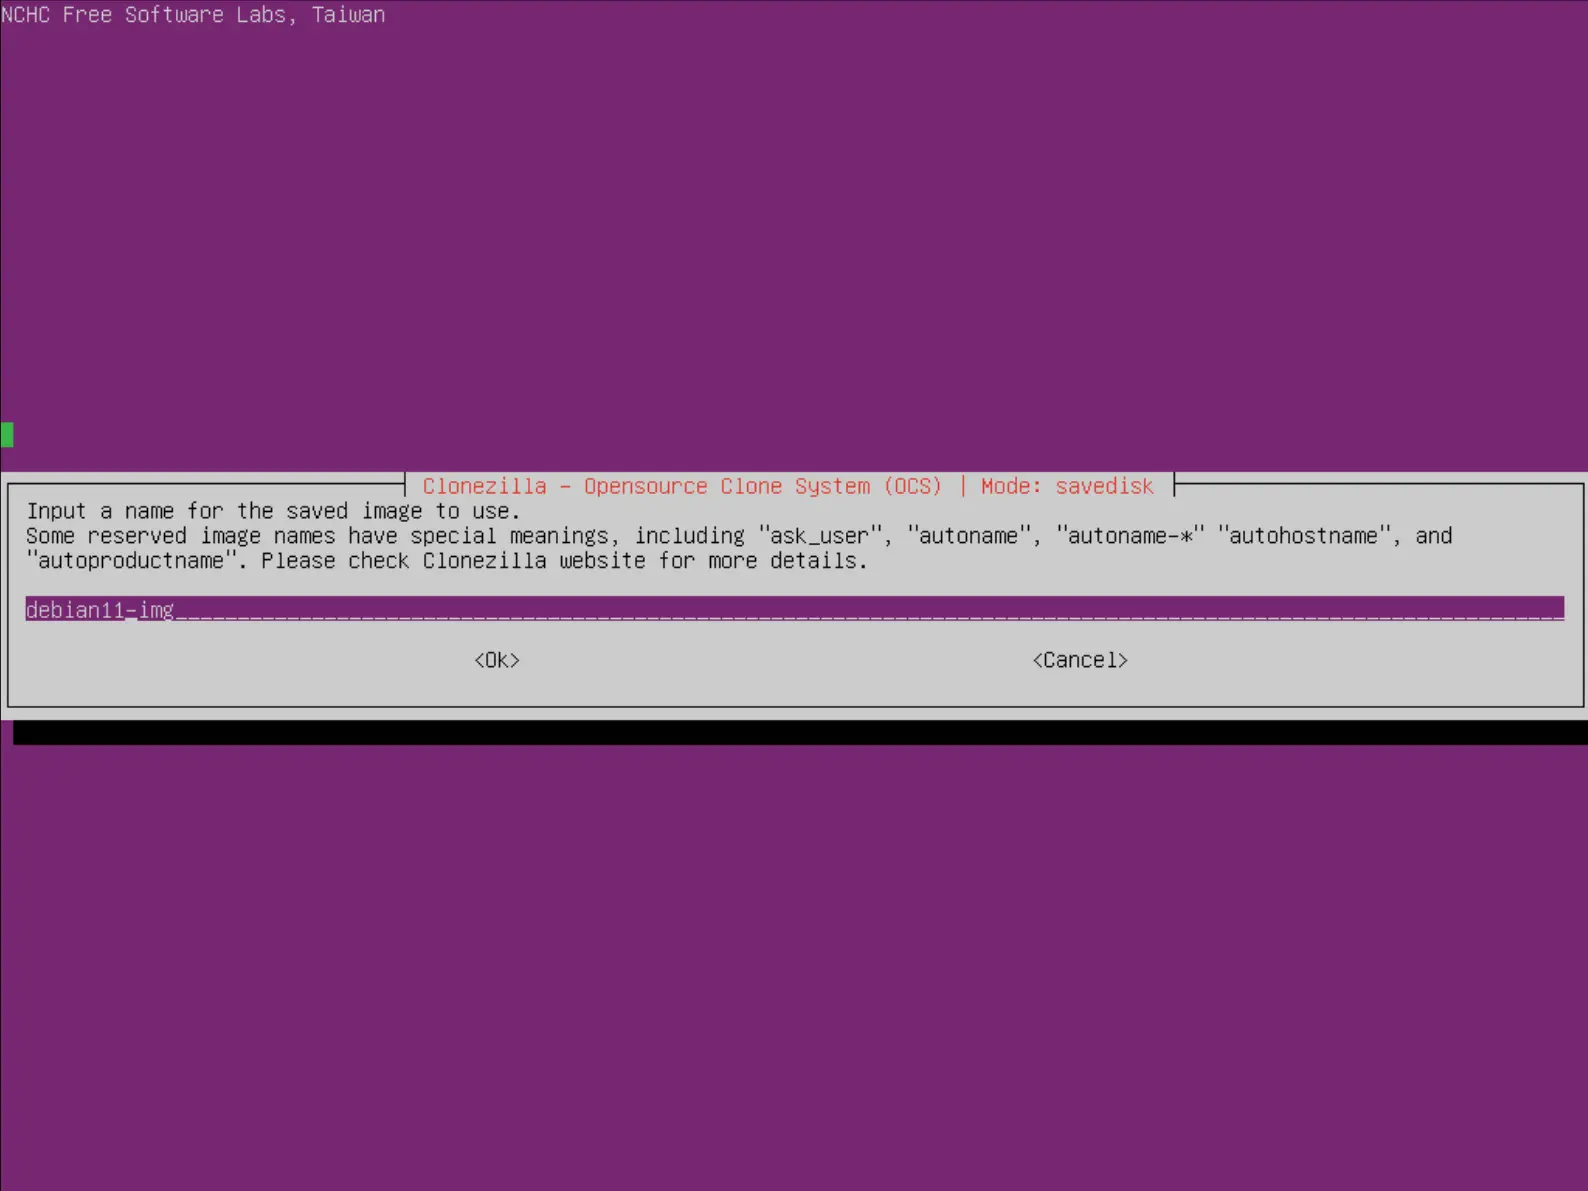
- Donner un nom à l'image :
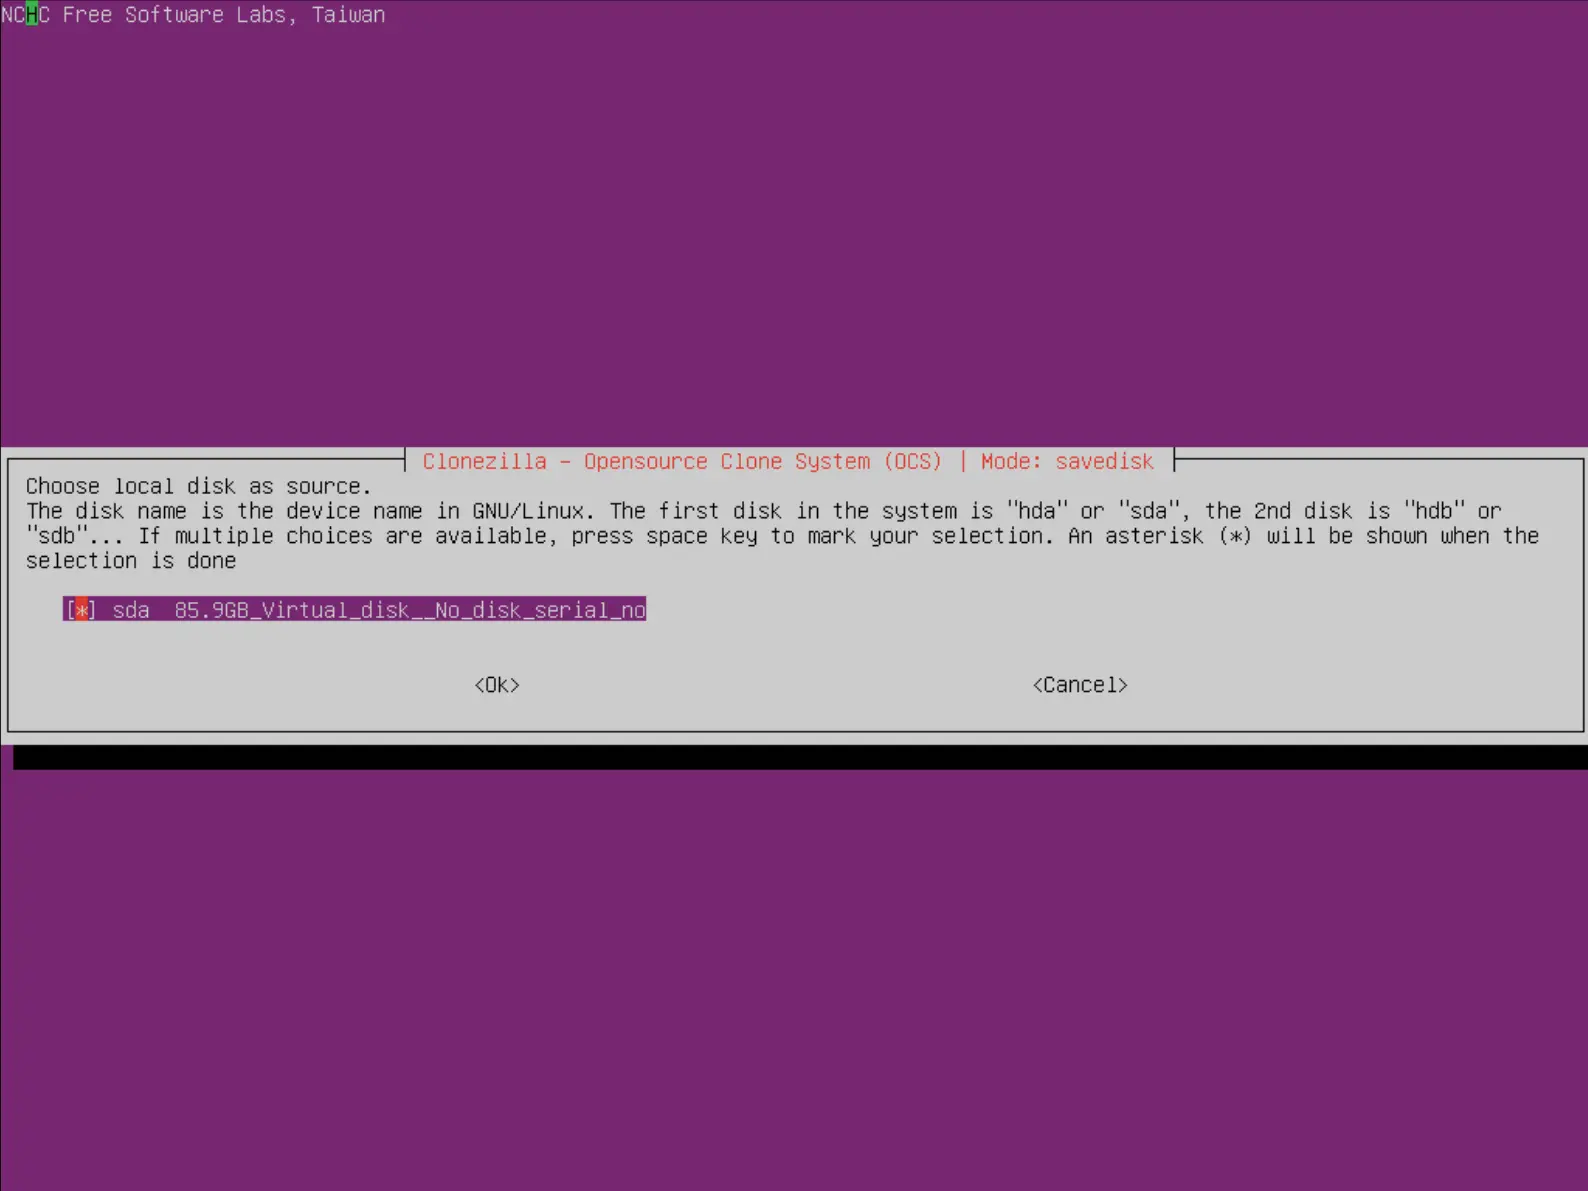
- Choisir le disque à sauvegarder :
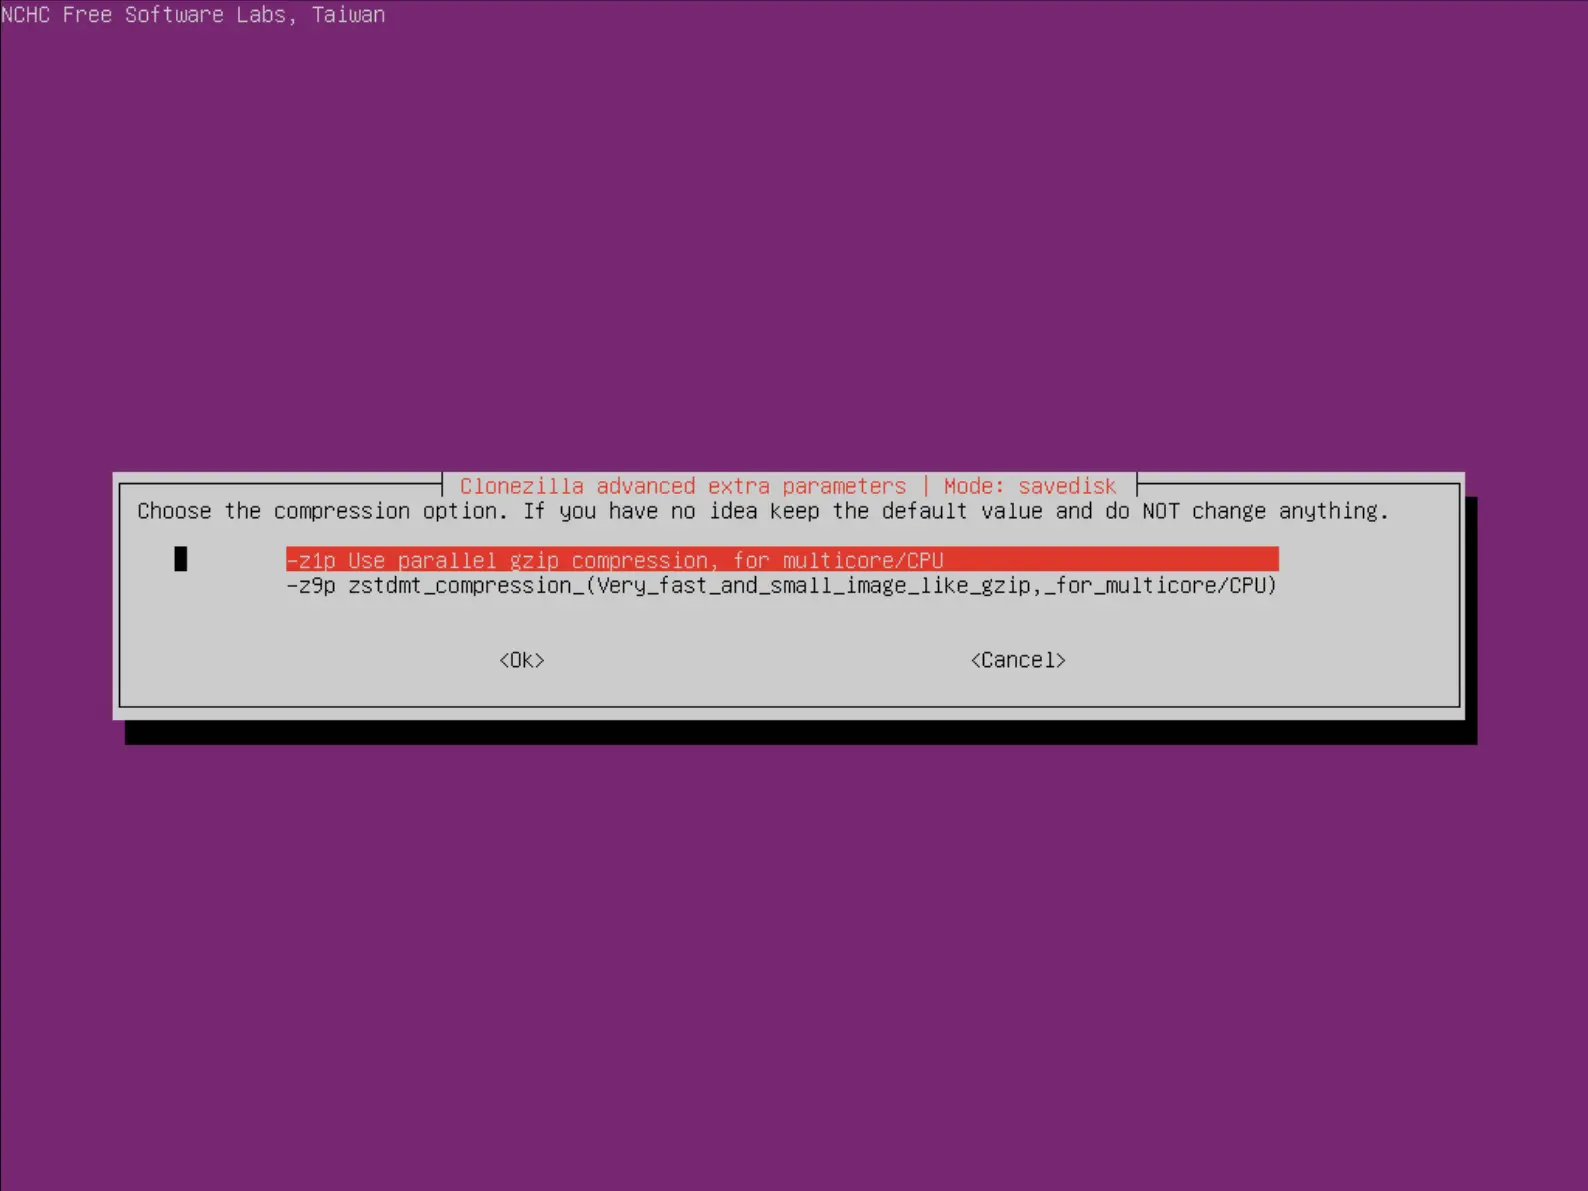
- Choisir l'option de compression :
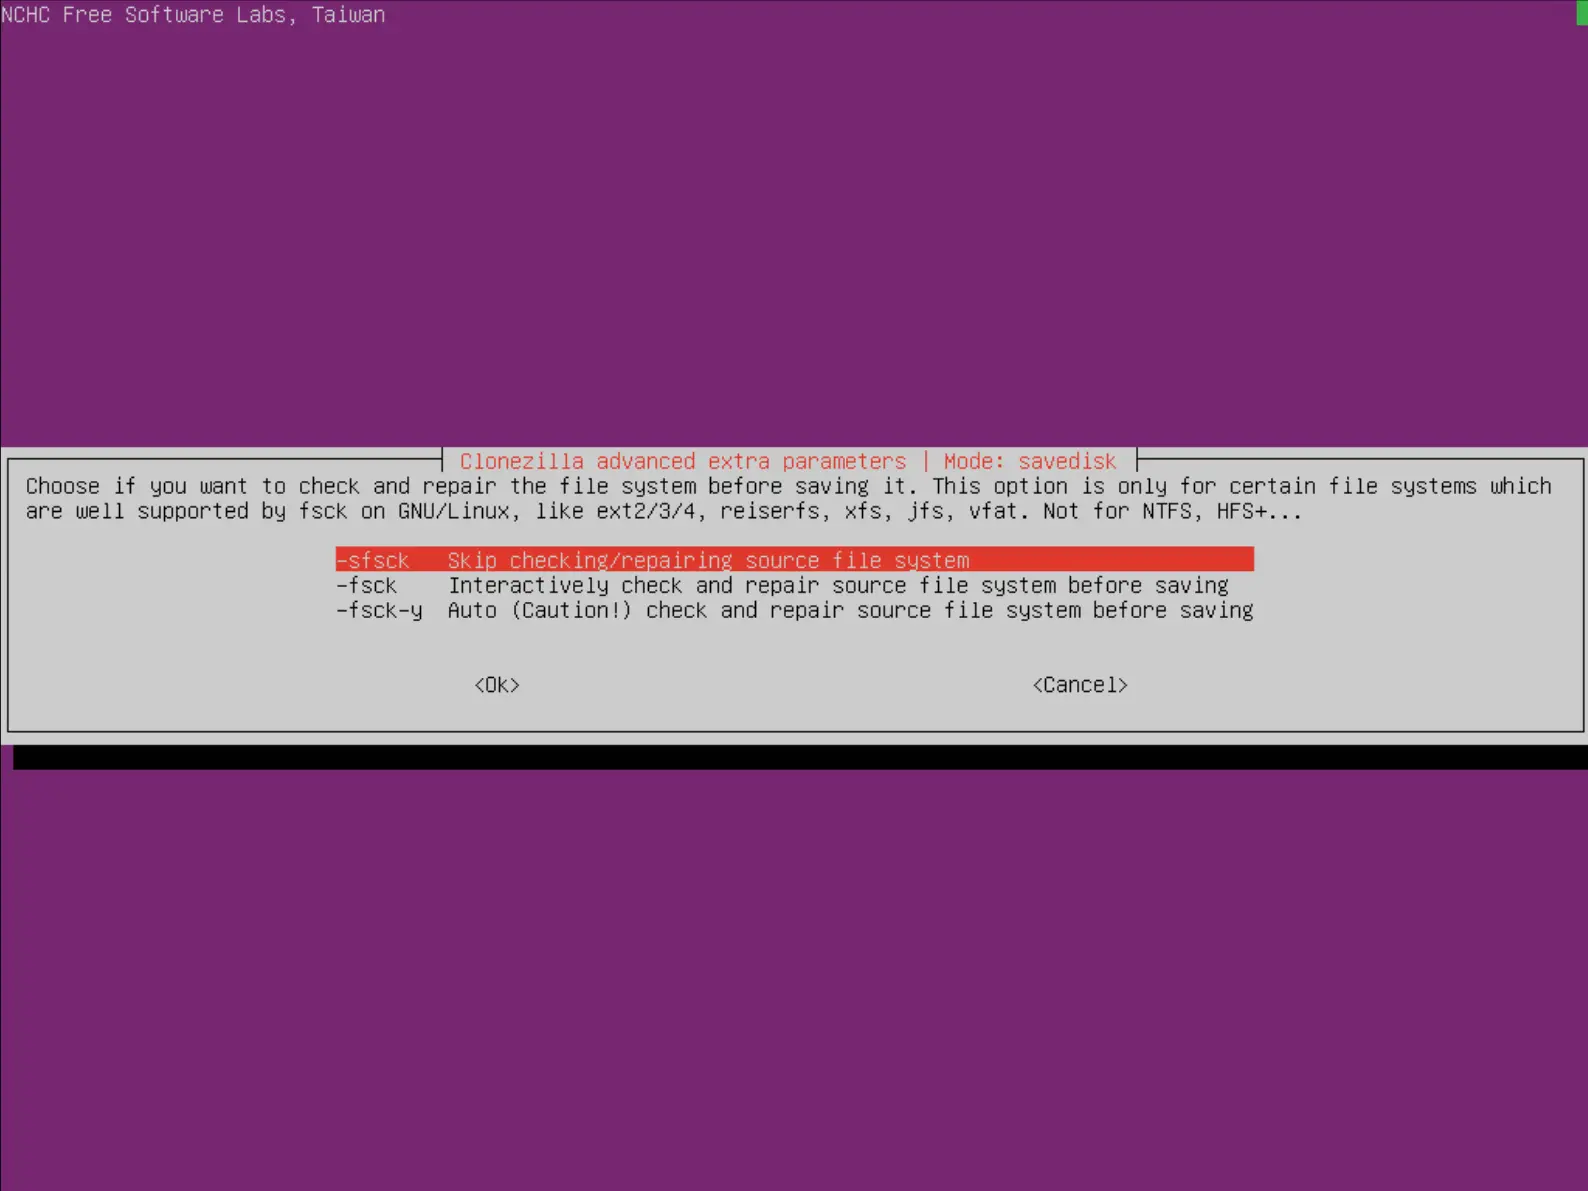
- Choisir ou non de vérifier et réparer le cas échéant le système de fichiers avant la sauvegarde :
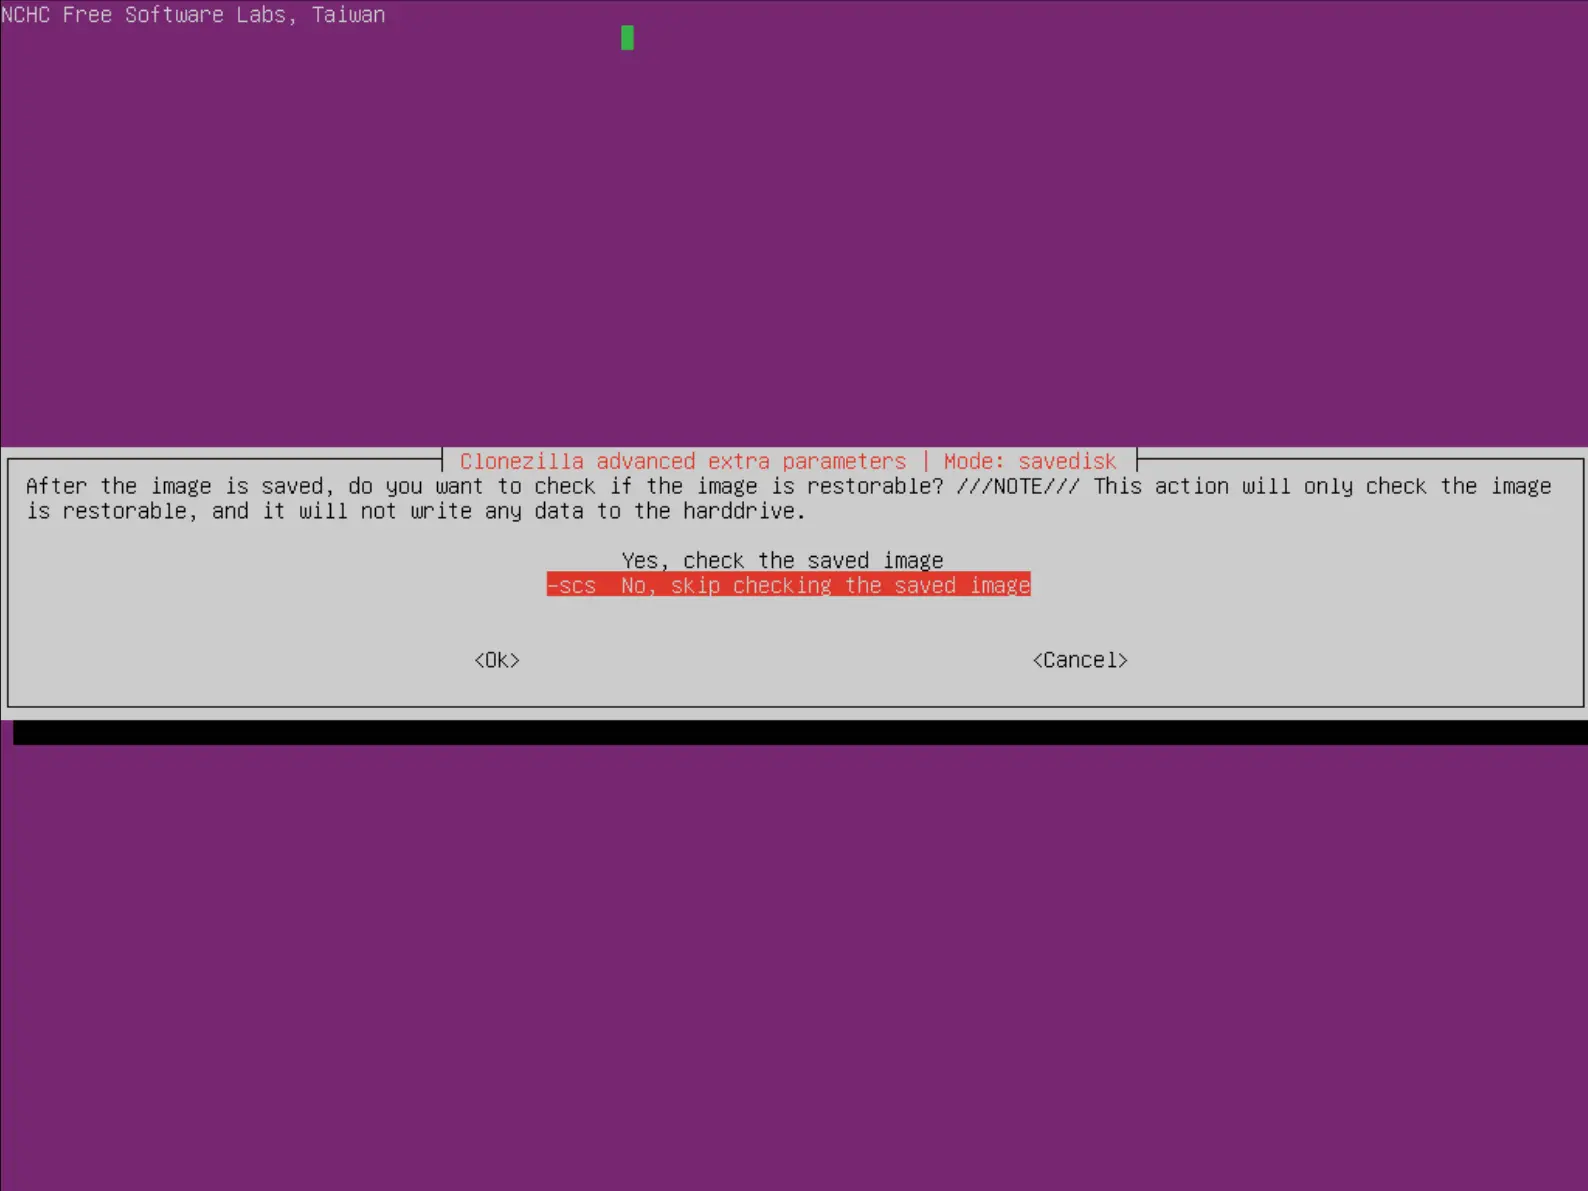
- Choisir ou non de vérifier l'intégrité de l'image de sauvegarde :
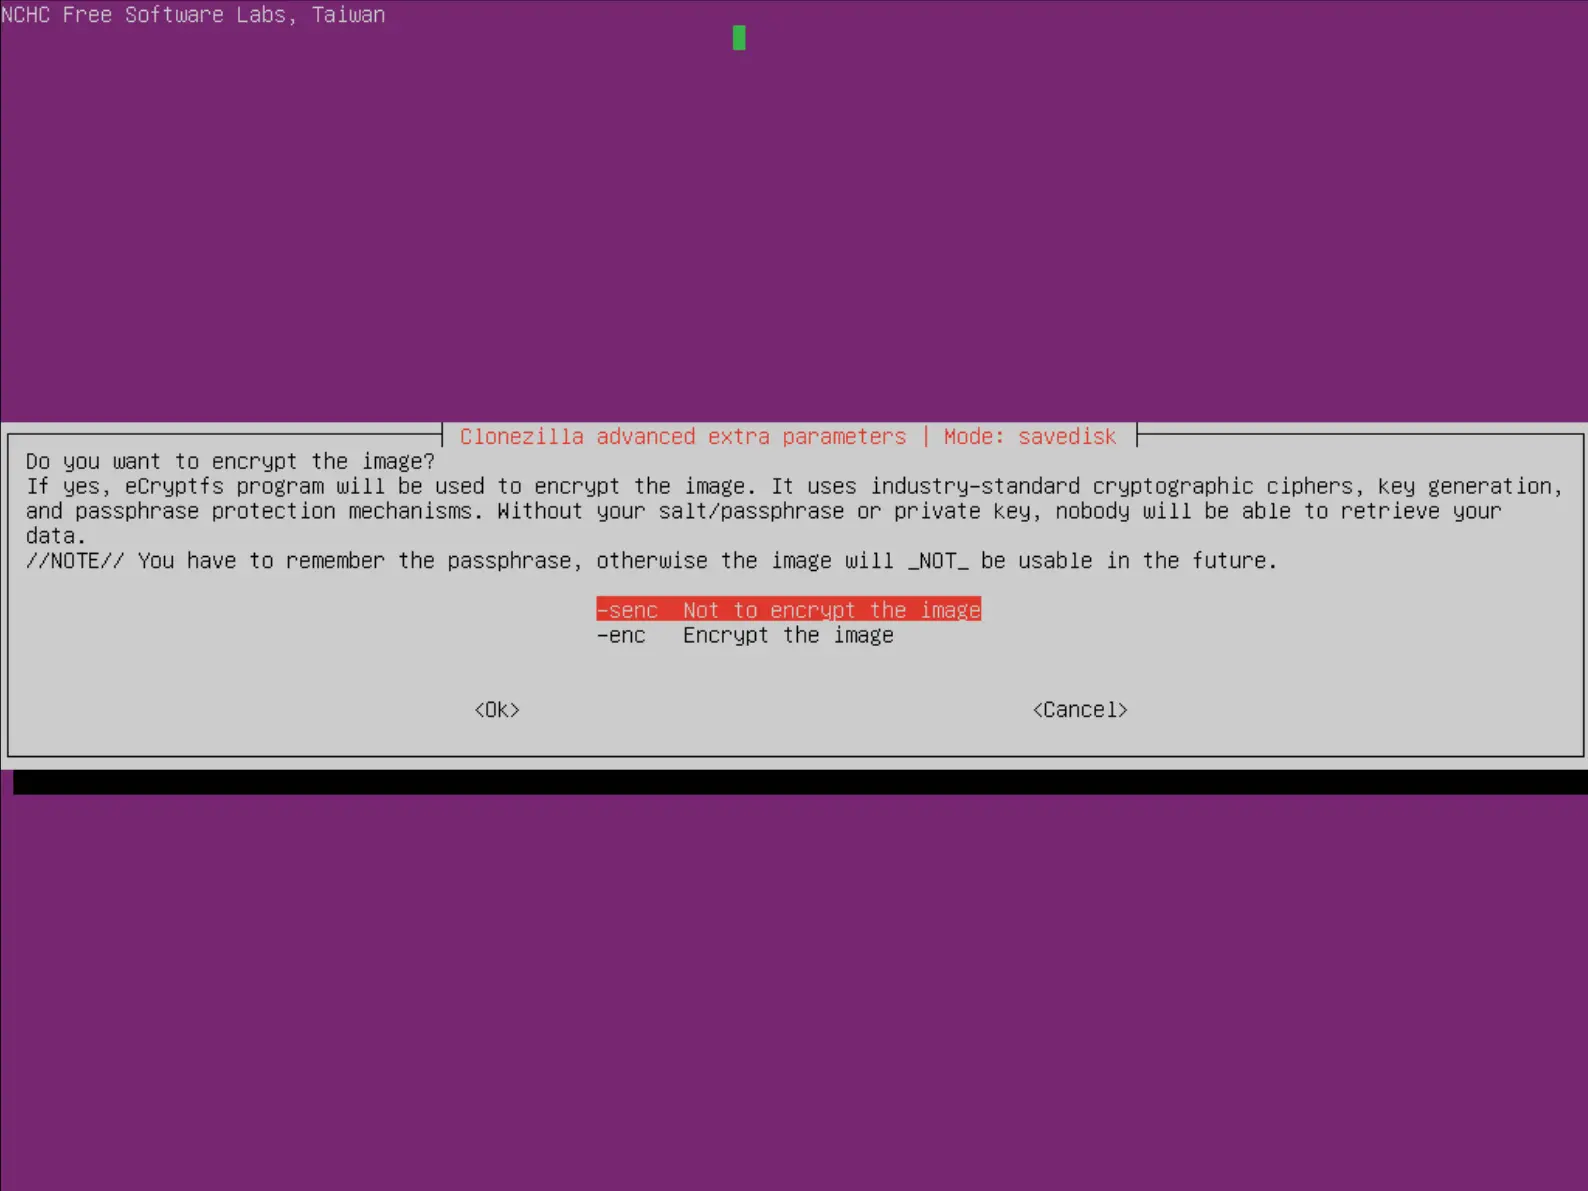
- Choisir ou non de chiffrer l'image :
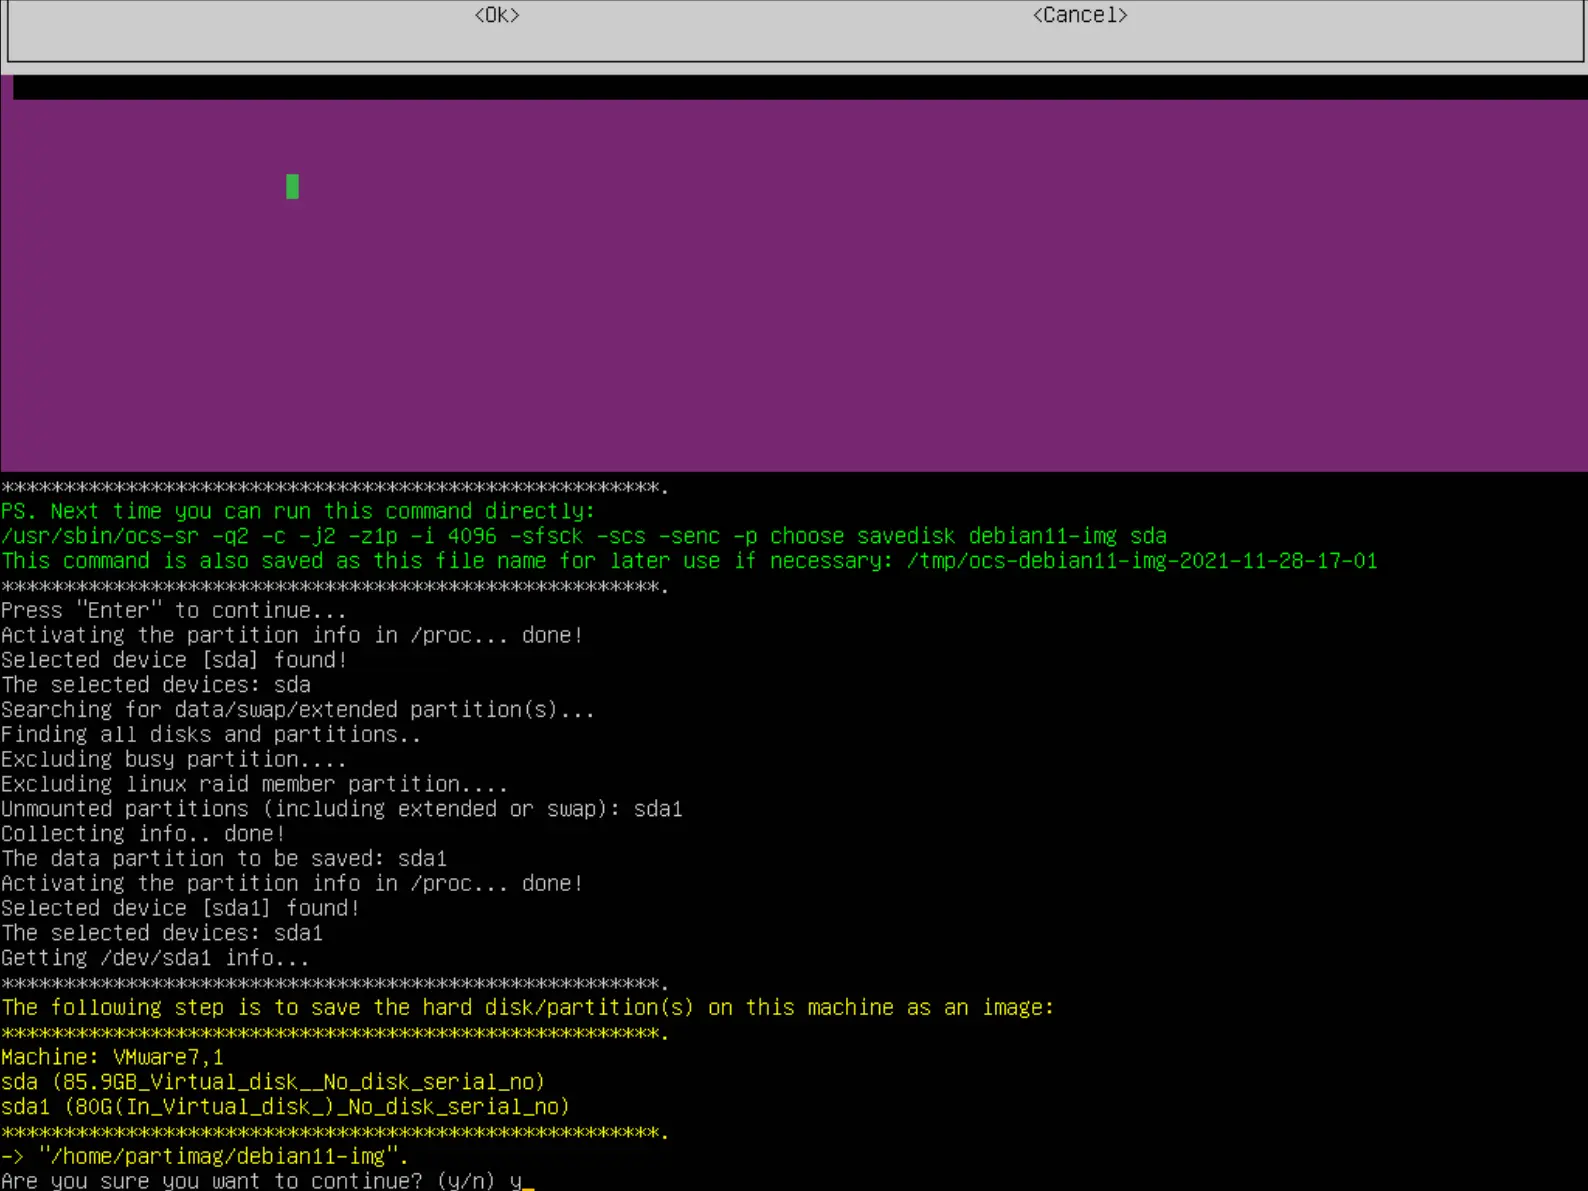
- Enfin appuyer sur entrée et presser la touche y pour lancer la sauvegarde :
- Attendre jusqu'à la fin du processus :
Restauration
- Choisir device-image :
- Choisir le mode Beginner :
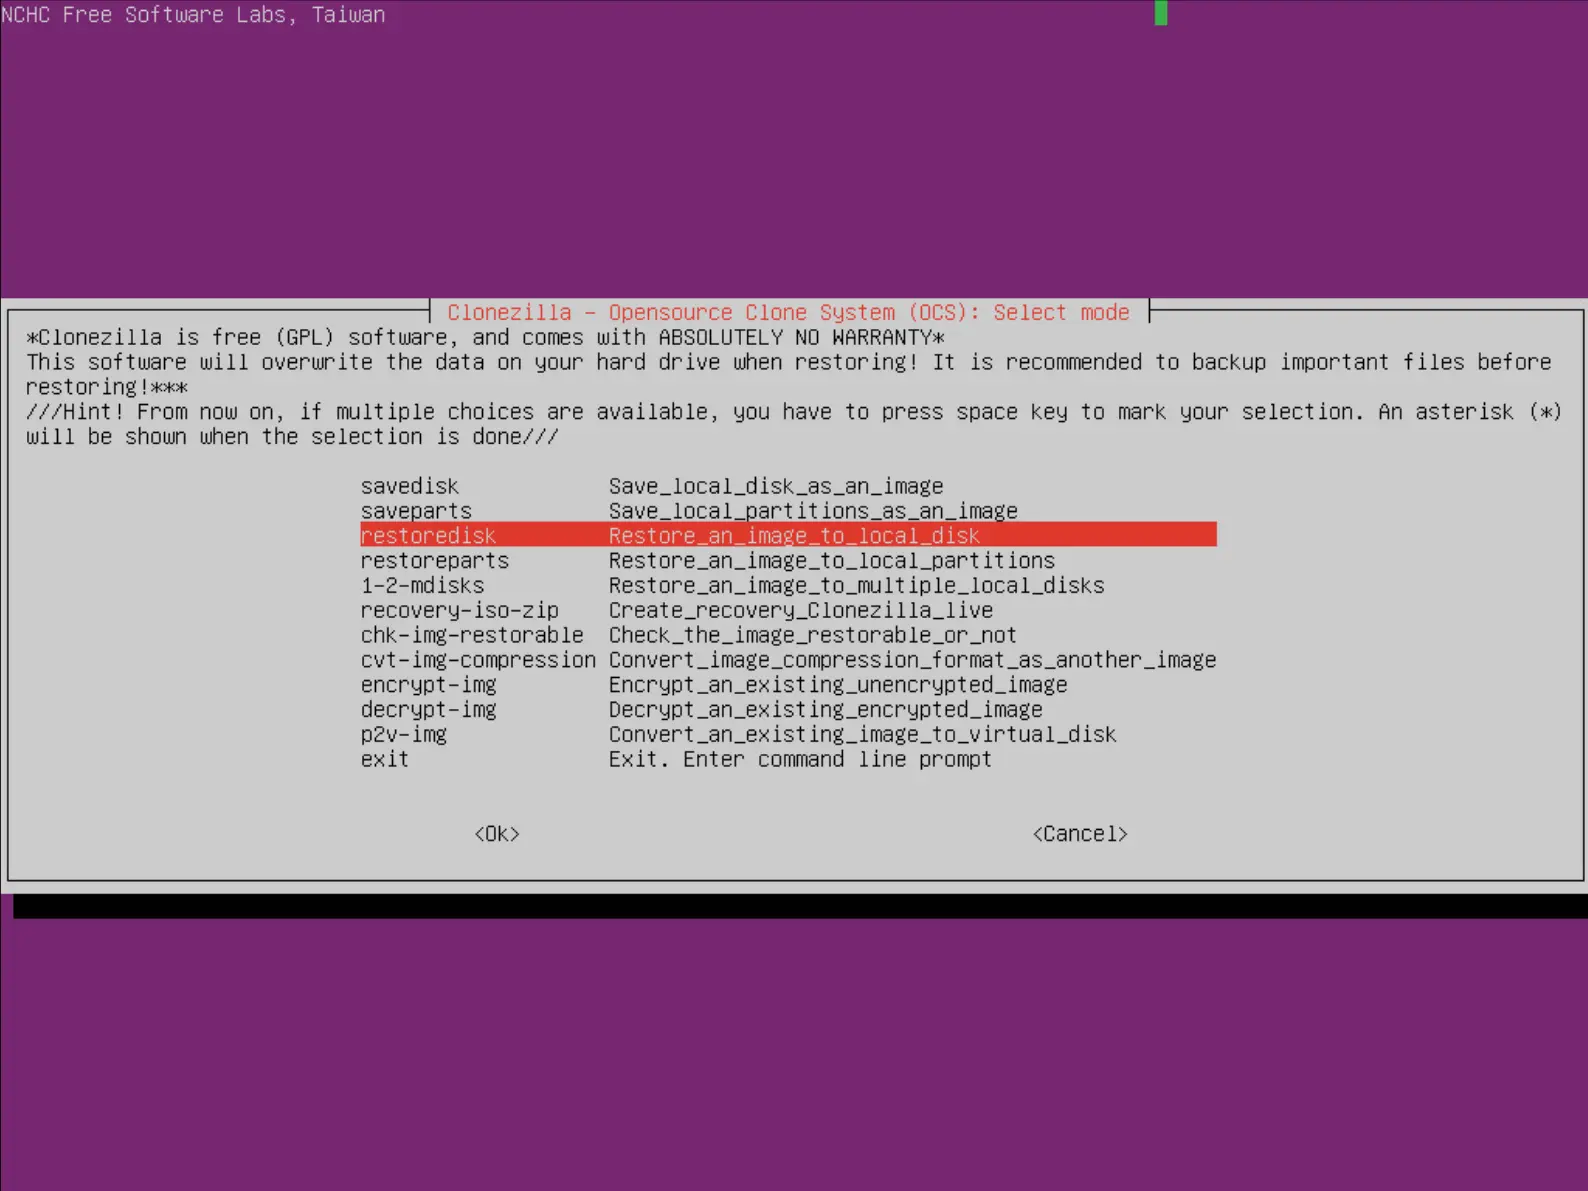
- Choisir restoredisk :
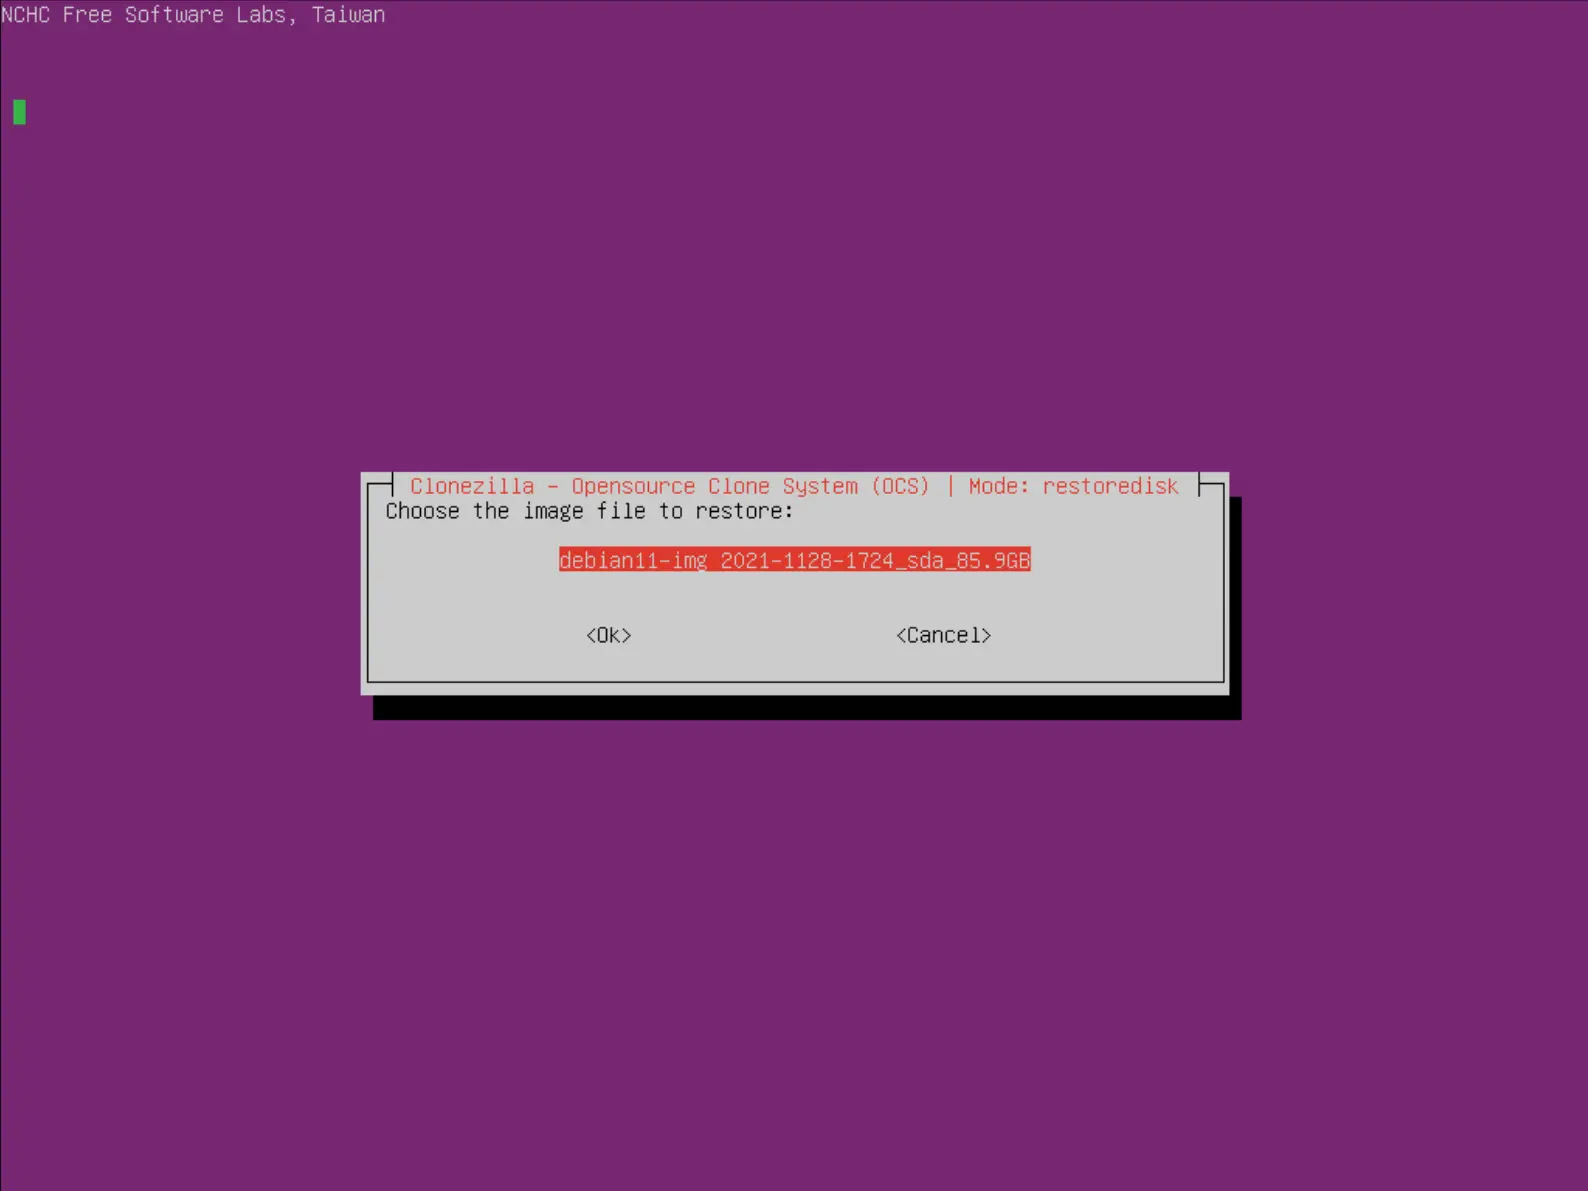
- Choisir l'image à restaurer depuis la liste proposée :
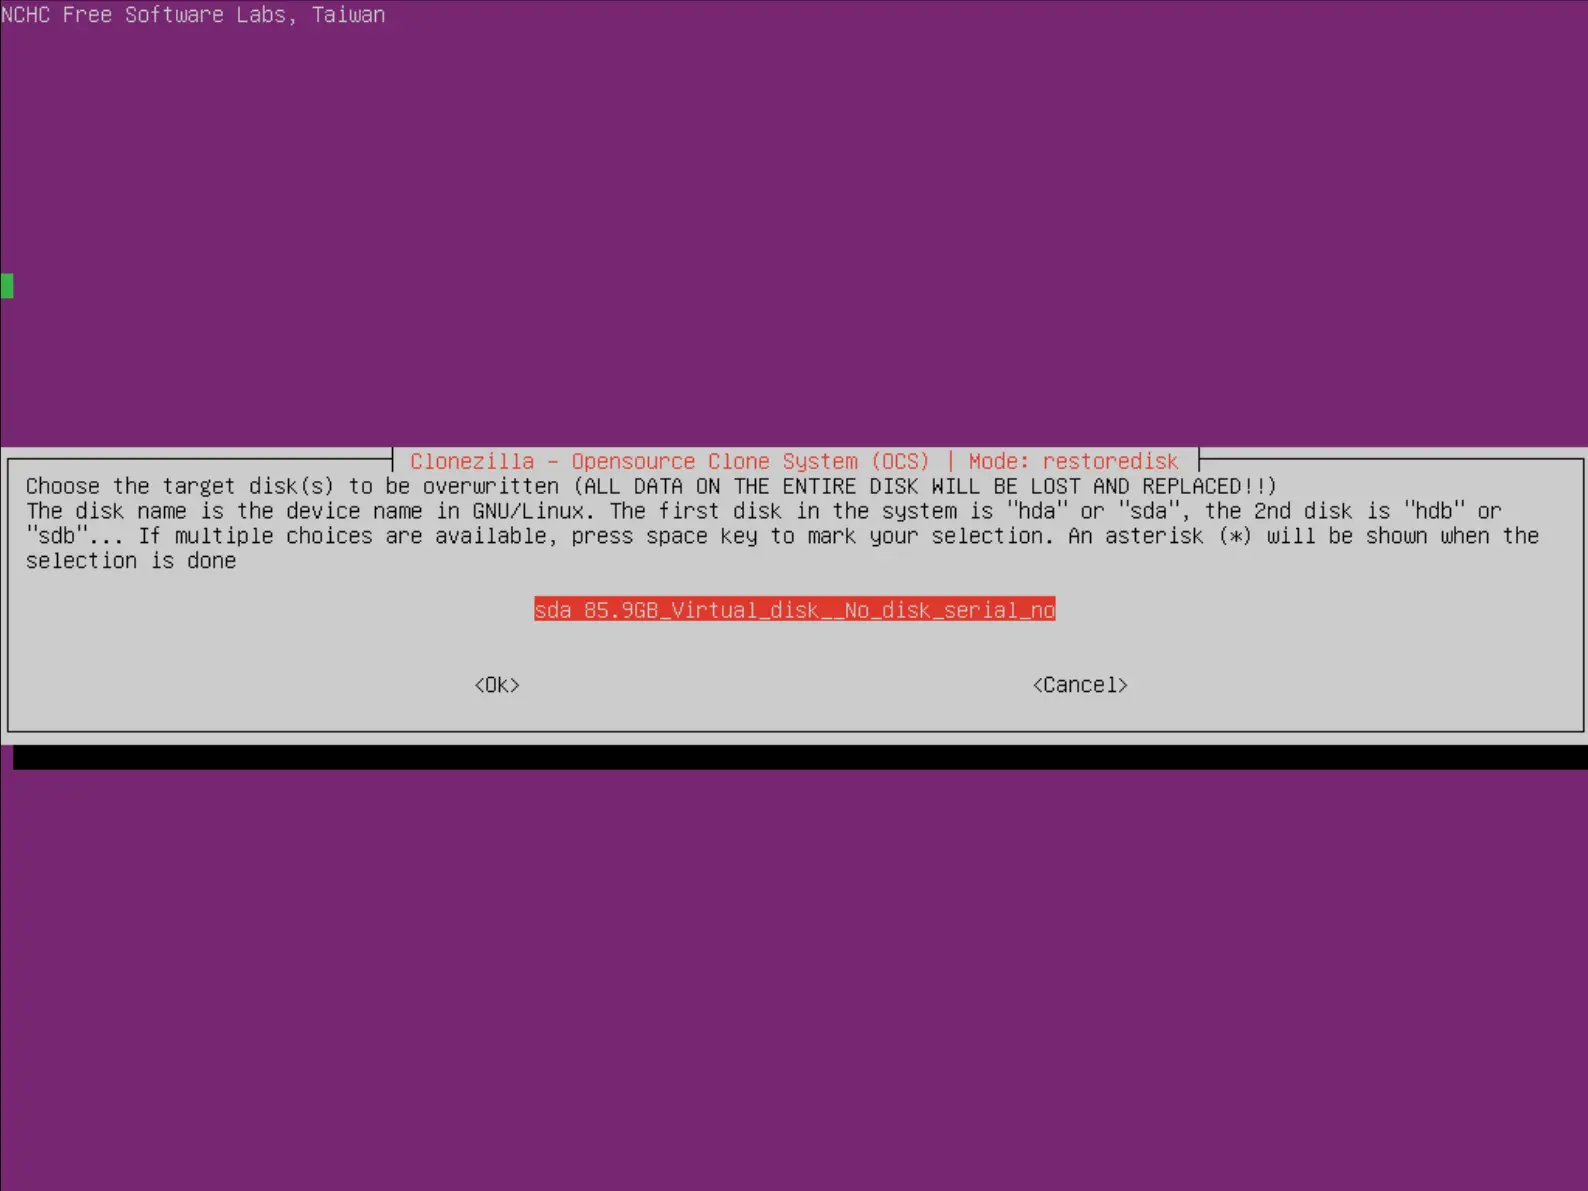
- Choisir le disque de destination :
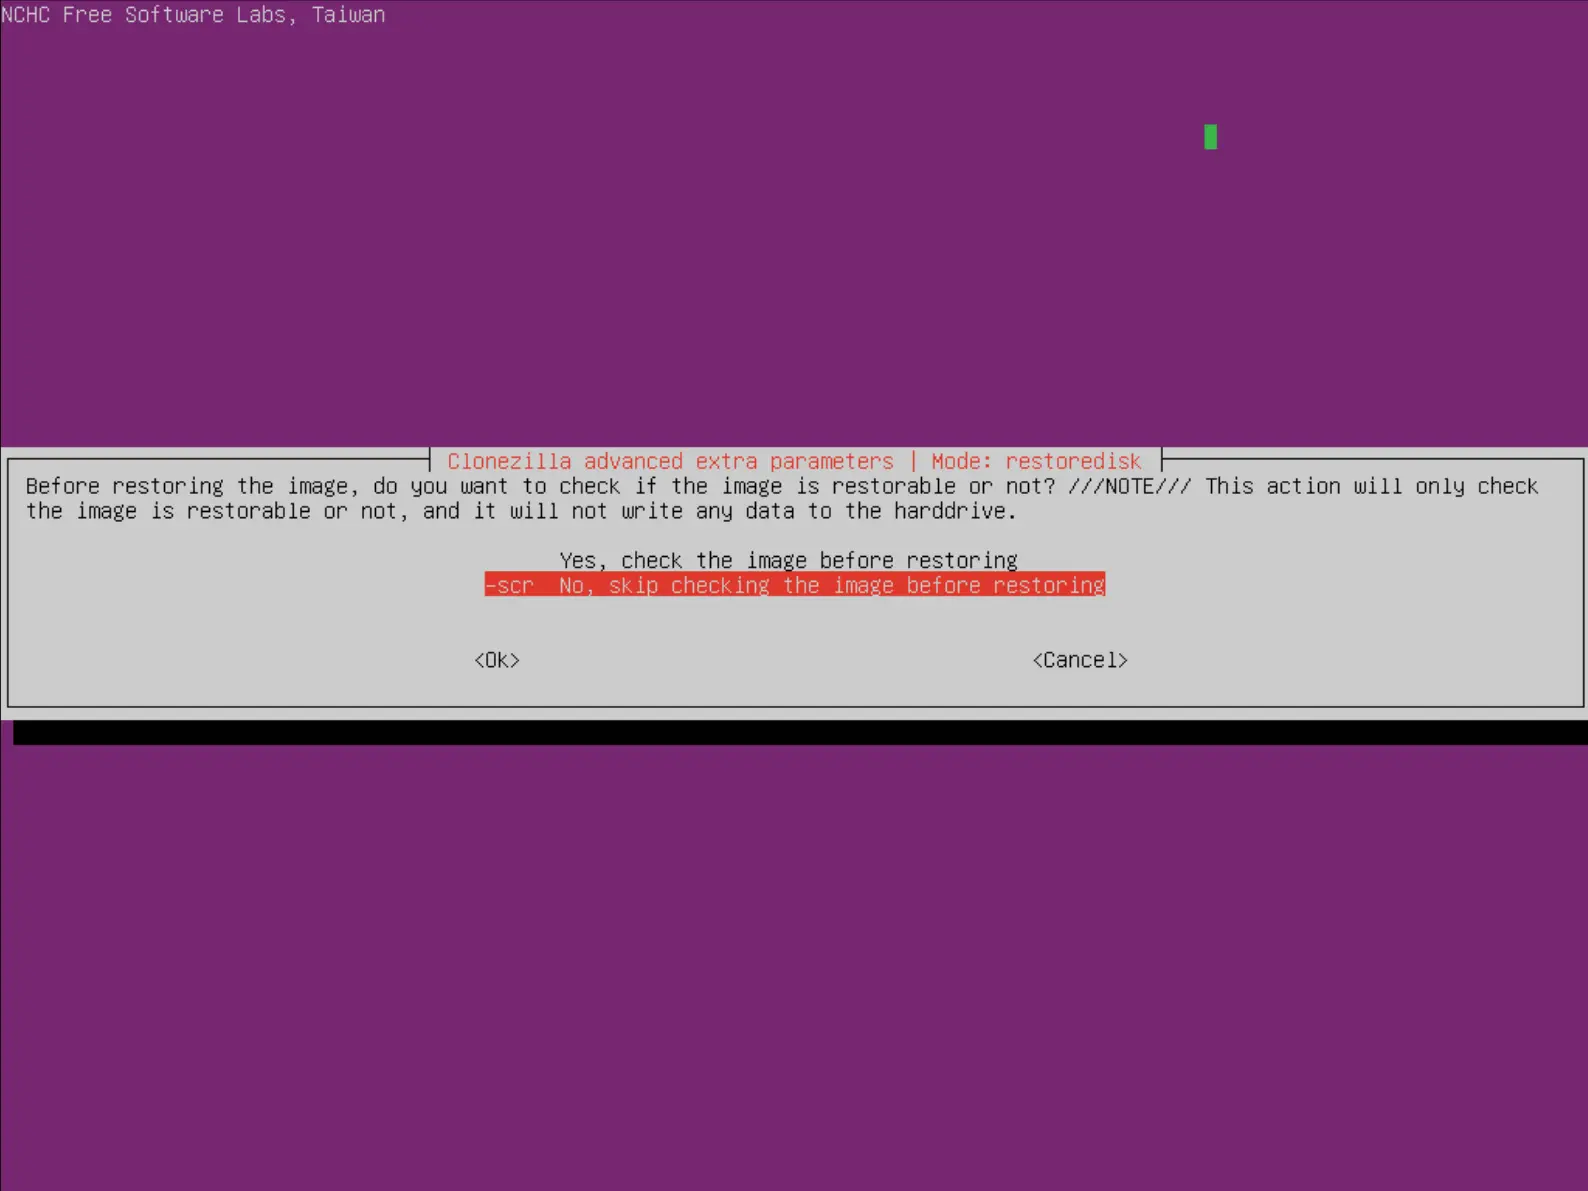
- Choisir ou non de vérifier l'intégrité de l'image avant de procéder à la restauration :
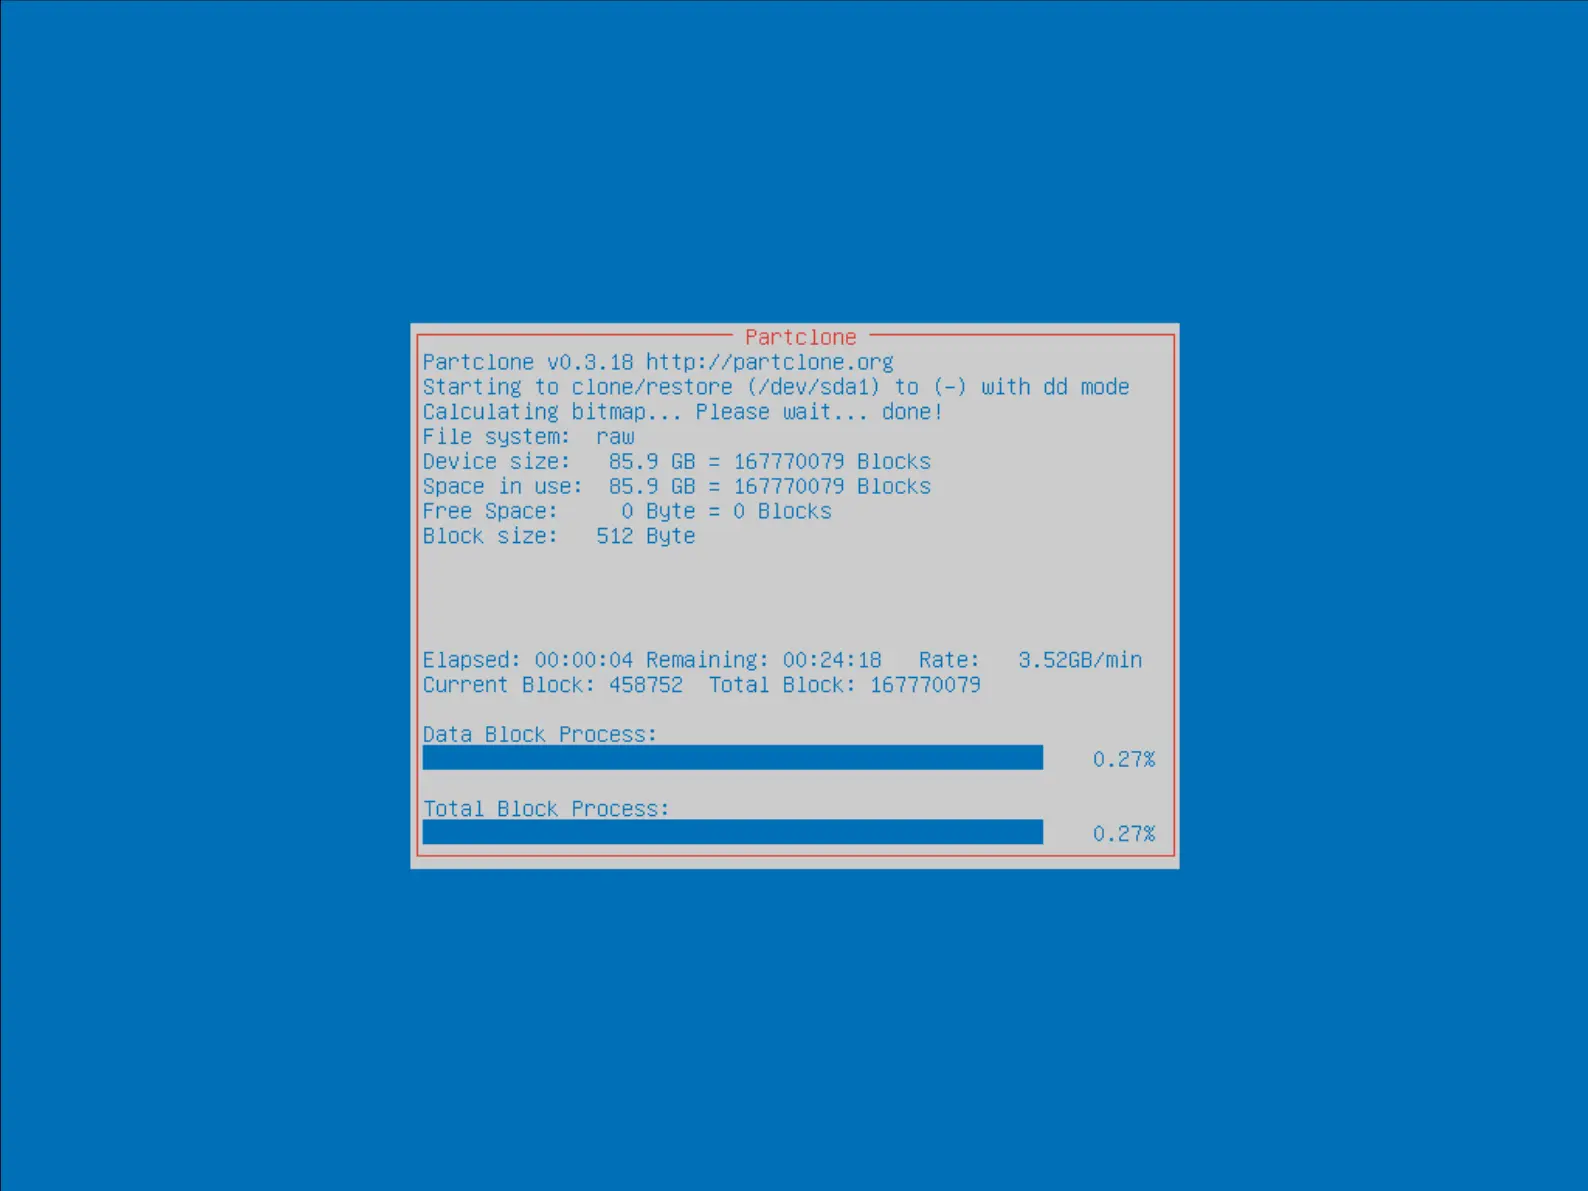
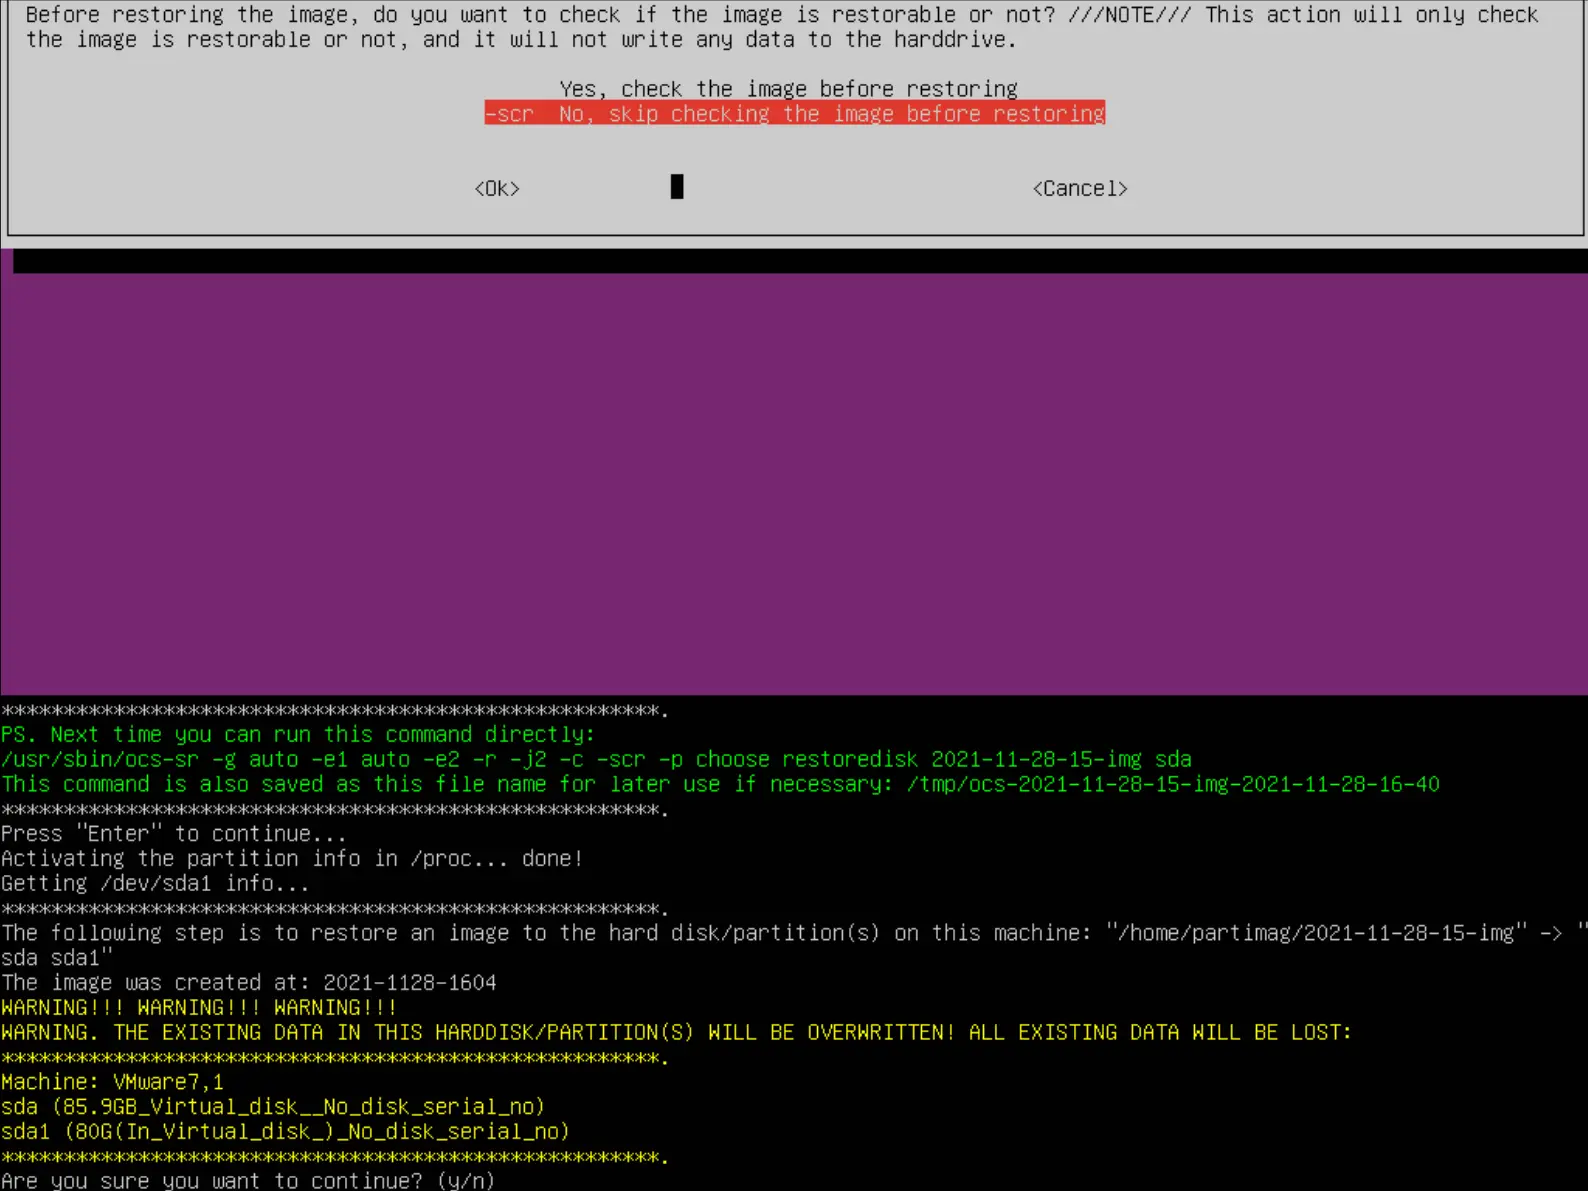
- Enfin appuyer sur la touche Entrée et presser la touche y pour lancer la restauration :
- Attendre jusqu'à la fin du processus :
