GNU/Linux - Comment créer un NAS
- Mise à jour le 29 nov. 2025

Dans cet article, je vais expliquer comment créer son propre NAS (Serveur de stockage en réseau) sous une distribution GNU/Linux Debian.
L'avantage principal est d'avoir un NAS à bas prix (on pourra par exemple recycler un vieux PC), hautement flexible et configurable.
J'utiliserai la distribution Linux Debian avec l'outil mdadm pour gérer notre RAID et le service samba pour le partage de fichiers. Toute la configuration se fera en ligne de commande.
- Le but est de:
- Rendre notre NAS accessible à différents équipements sur notre réseau
- Utiliser un RAID 5 pour la redondance et la haute capacité
- Avoir une solution évolutive avec la possibilité d'ajouter des disques dans le futur
- Solution standard, compatible avec d'autres distributions Linux (mdadm et samba)
Architecture Cible
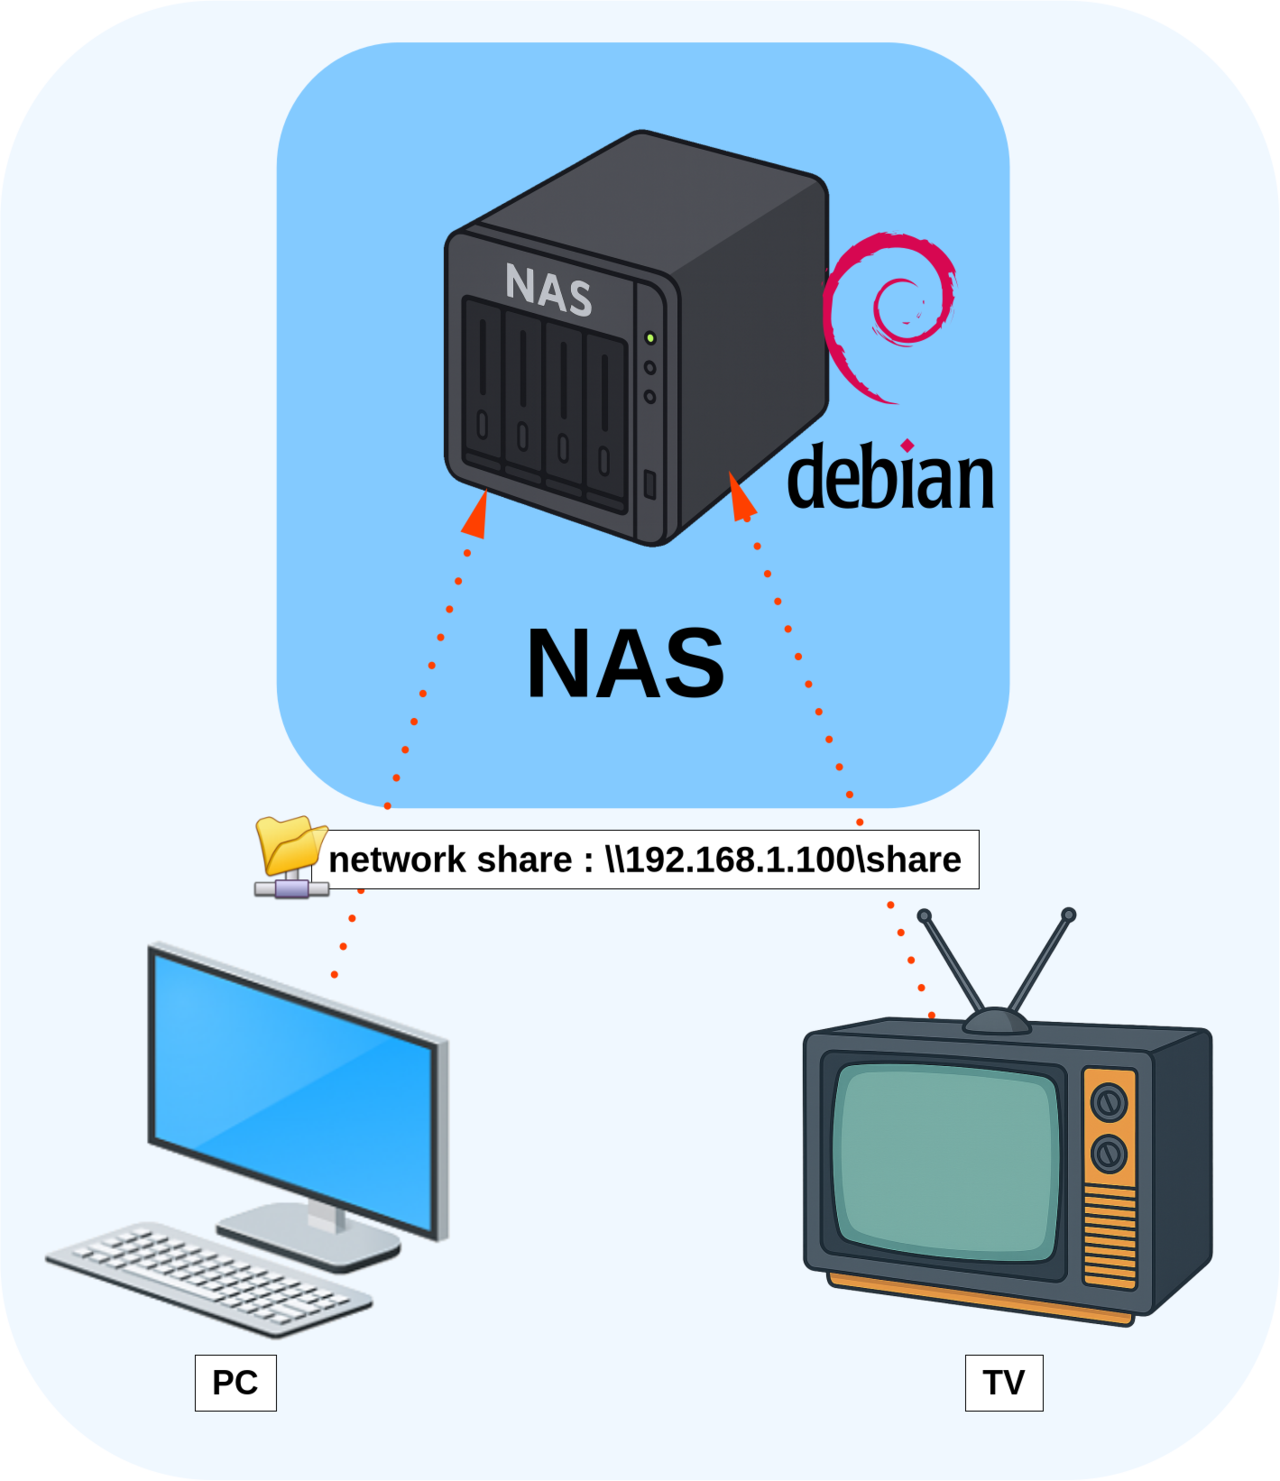
A la fin, notre architecture devrait ressembler à ça.

Configuration
Configuration matérielle
Comme discuté précédemment, on peut créer un NAS à peu de frais en recyclan un vieux PC.
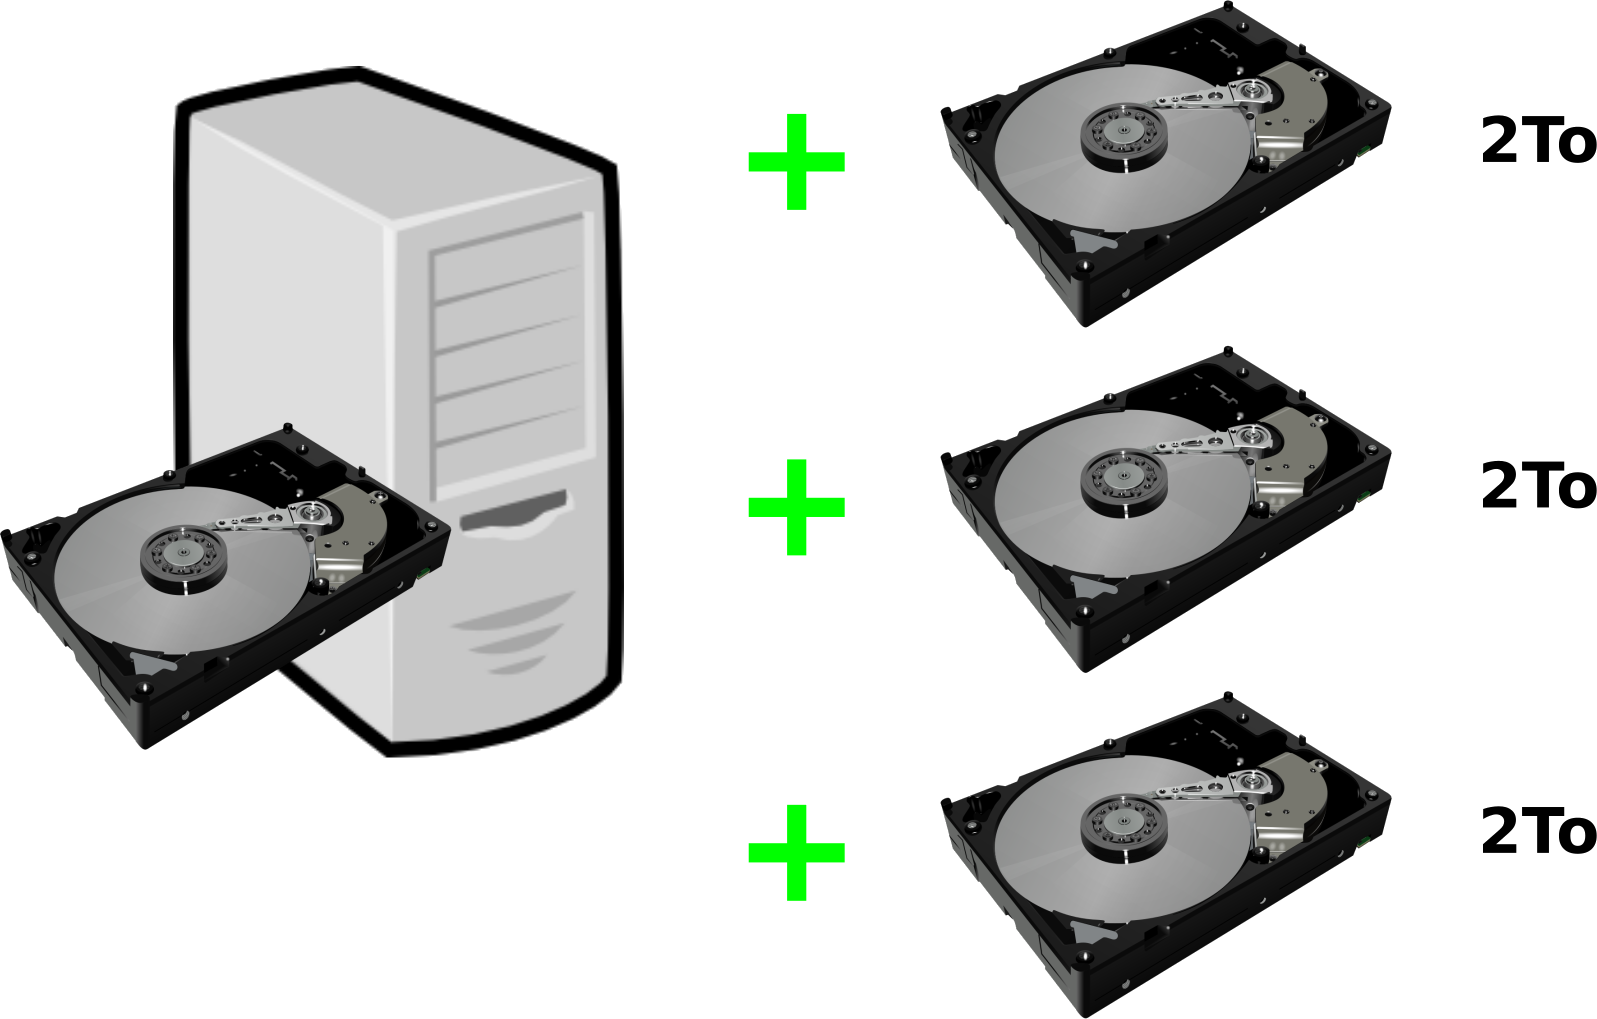
- Voici un exemple de configuration qui pourra être utilisée :
- CPU : > intel dual core
- RAM : 512 MB
- HDD : 1x 500 GB (OS) + 3x 2TB (data)

Configuration
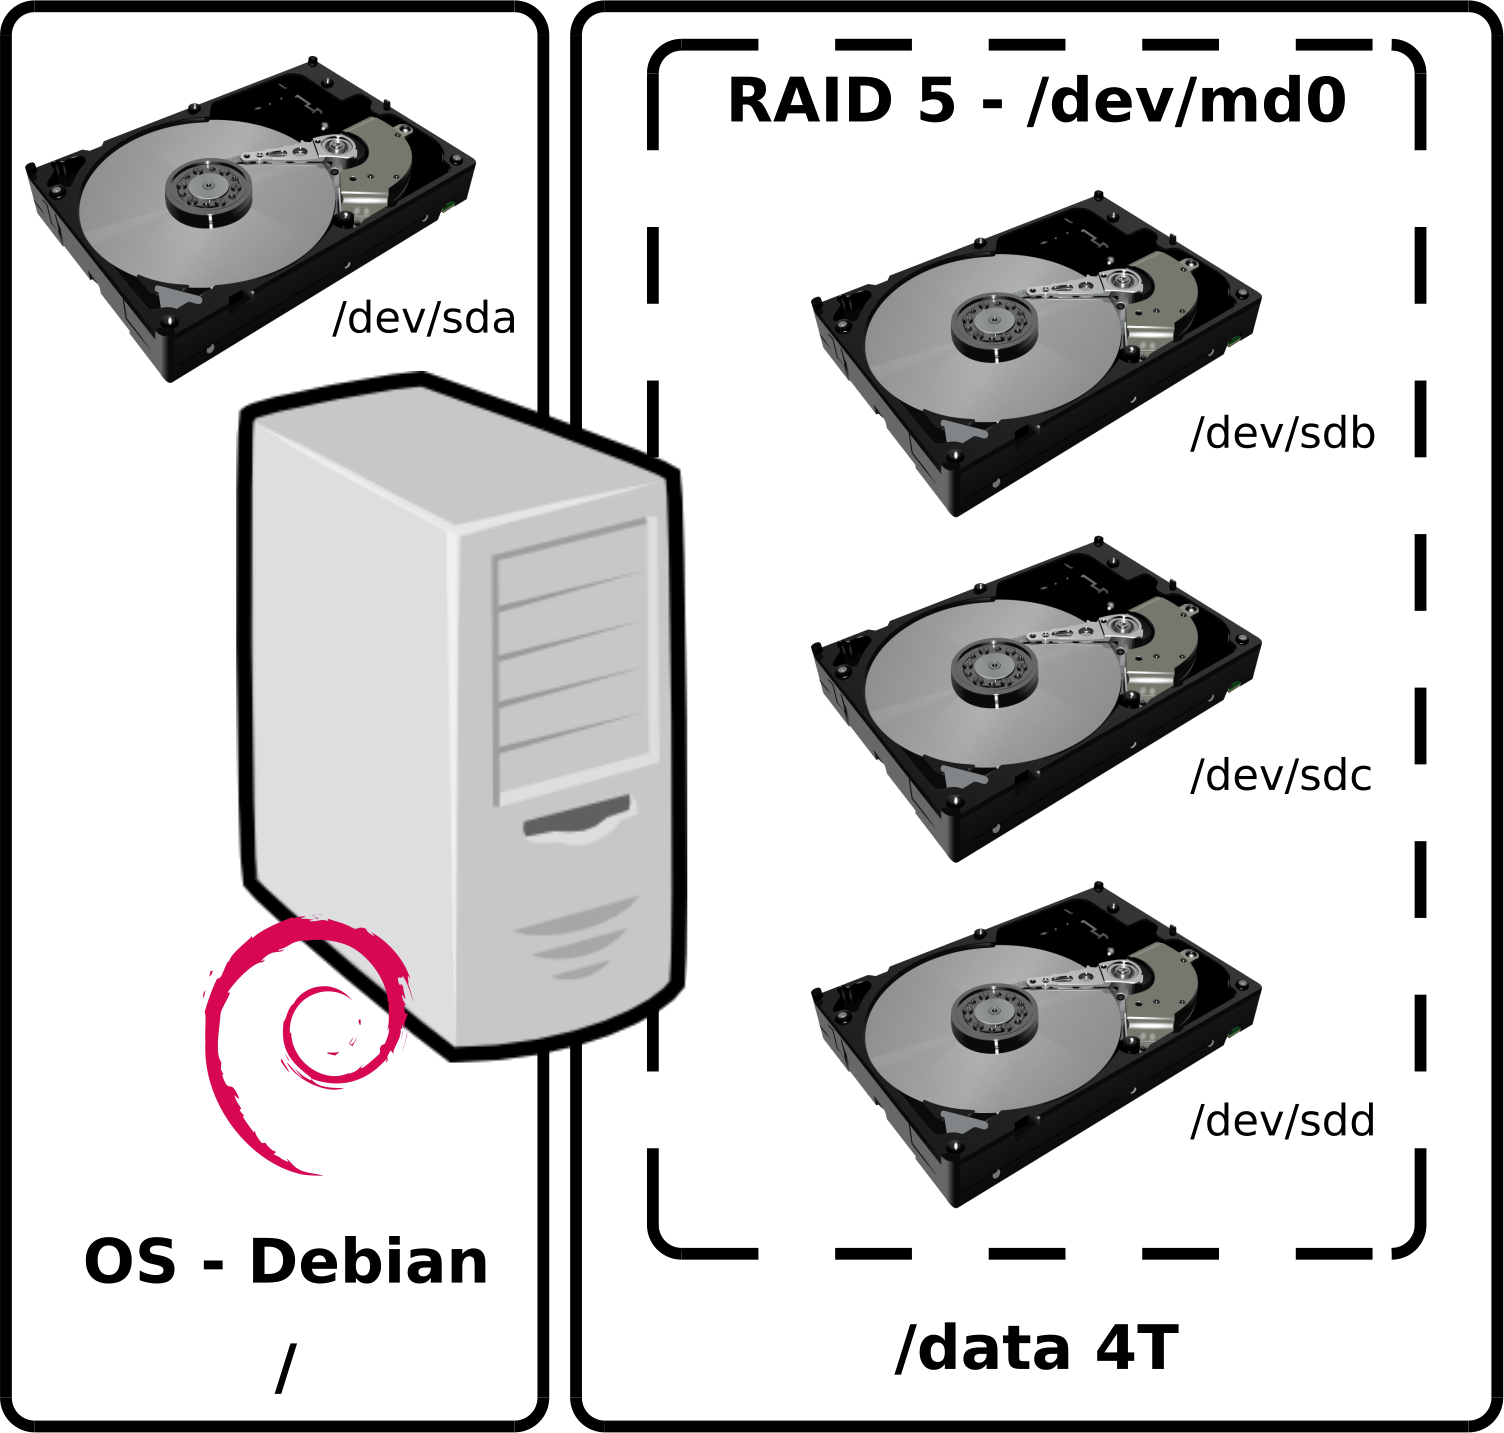
Nous installerons Debian sur notre premier disque dur (/dev/sda) puis créerons un RAID 5 avec nos trois disques de 2 TB (sdb, sdc et sdd). Cela nous donnera une taille de 4TB utile. (Rappel : dans une configuration de type RAID5 on perd la capacité d'un disque pour assurer la redondance)

Paramétrage
Nous avons tout d'abord besoin d'installer Debian comme brillamment expliqué ici.
Configuration Réseau
- Éditer
/etc/network/interfaces(remplacerens192par le nom de l'interface réseau) :
allow-hotplug ens192
iface ens192 inet static
        address 192.168.1.100
        netmask 255.255.255.0
        gateway 192.168.1.254
dns-nameservers 192.168.1.254- Redémarrer le système ou le service réseau :
root@host:~# systemctl restart networkingConfigurer la table de partitionnement
- Installer l'utilitaire
gdisk, qui est la version gpt de fdisk :
root@host:~# apt update && apt install mdadm gdisk- Nettoyer la table de partitionnement du disque
/dev/sdb:
root@host:~# wipefs -a /dev/sdb[1-9]*root@host:~# wipefs -a /dev/sdb- Créer une nouvelle table de partitionnement pour
/dev/sdb:
root@host:~# gdisk /dev/sdb
GPT fdisk (gdisk) version 1.0.3

Partition table scan:
  MBR: not present
  BSD: not present
  APM: not present
  GPT: not present

Creating new GPT entries.

Command (? for help): n
Partition number (1-128, default 1):
First sector (34-4194270, default = 2048) or {+-}size{KMGTP}:
Last sector (2048-3907028991, default = 3907028991) or {+-}size{KMGTP}:
Current type is 'Linux filesystem'
Hex code or GUID (L to show codes, Enter = 8300): FD00
Changed type of partition to 'Linux RAID'

Command (? for help): w

Final checks complete. About to write GPT data. THIS WILL OVERWRITE EXISTING PARTITIONS!!

Do you want to proceed? (Y/N): Y
OK; writing new GUID partition table (GPT) to /dev/sdb.
The operation has completed successfully.- Copier la table de partitionnement de
/dev/sdbvers/dev/sdcet/dev/sdd:
root@host:~# sgdisk /dev/sdb -R /dev/sdcroot@host:~# sgdisk /dev/sdb -R /dev/sddroot@host:~# sfdisk -d /dev/sdb | sfdisk --force /dev/sdcroot@host:~# sfdisk -d /dev/sdb | sfdisk --force /dev/sdd- Randomisez le GUID du disque et de toutes les partitions pour éviter d'avoir le même GUID sur tous les disques :
root@host:~# sgdisk -G /dev/sdcroot@host:~# sgdisk -G /dev/sddmdadm
mdadm est un logiciel qui est utilisé pour créer, gérer et monitorer le RAID logiciel sous GNU/Linux.
- Installer l'utilitaire
mdadm:
root@host:~# apt install mdadm- Créer notre RAID 5 :
root@host:~# mdadm --create --level=5 --raid-devices=3 /dev/md0 /dev/sdb1 /dev/sdc1 /dev/sdd1- Vérifier le statut de notre RAID :
root@host:~# cat /proc/mdstat
Personalities : [raid6] [raid5] [raid4]
md0 : active raid5 sdd1[3] sdc1[1] sdb1[0]
      418713600 blocks super 1.2 level 5, 512k chunk, algorithm 2 [3/3] [UUU]

unused devices: <none>- Créer un système de fichier sur
/dev/md0:
root@host:~# mkfs.ext4 /dev/md0- Créer le dossier de montage :
root@host:~# mkdir /data- Monter le système de fichier de
/dev/md0vers le dossier/data:
root@host:~# mount /dev/md0 /data- Afficher les points de montage :
root@host:~# df -h
Filesystem      Size  Used Avail Use% Mounted on
udev            983M     0  983M   0% /dev
tmpfs           200M  5.6M  194M   3% /run
/dev/sda2        14G  1.5G   12G  12% /
tmpfs           998M     0  998M   0% /dev/shm
tmpfs           5.0M     0  5.0M   0% /run/lock
tmpfs           998M     0  998M   0% /sys/fs/cgroup
/dev/sda1       511M  3.3M  508M   1% /boot/efi
tmpfs           200M     0  200M   0% /run/user/0
tmpfs           200M     0  200M   0% /run/user/1000
/dev/md0 3.8T 16M 3.7T 1% /data- Ajouter la configuration RAID dans le fichier
mdadm.confafin que le RAID soit assemblé au démarrage :
root@host:~# mdadm --detail --scan >> /etc/mdadm/mdadm.conf- Mettre à jour initramfs pour que cela soit pris en compte :
root@host:~# update-initramfs -u- Ajouter le point de montage
/dev/md0dans fstab pour un montage automatique au démarrage :
root@host:~# echo "/dev/md0 /data ext4 rw,nofail,relatime,x-systemd.device-timeout=20s,defaults 0 2" >> /etc/fstabSamba
Nous allons maintenant installer et configurer le service samba qui va permettre aux machines Windows d'accéder au partage de fichiers.
- Installer le service samba :
root@host:~# apt install samba- Créer un utilisateur samba :
root@host:~# adduser --home /data --system samba- Définir les droits sur le dossier de partage
/data:
root@host:~# chown samba: /data- Créer un mot de passe associé au compte utilisateur pour l'accès au partage :
root@host:~# smbpasswd -a samba- Éditer le fichier
/etc/samba/smb.conf:
[global]
   workgroup = WORKGROUP
   server string = nas
[share]
   path = /data
   read only = no
valid users = samba- Redémarrer les services :
root@host:~# systemctl restart smbd; systemctl restart nmbd- Depuis un ordinateur vérifier l'accès au partage :
