How to Block Windows Store and Other Applications Using GPO
- Last updated: Jun 9, 2025
As a system administrator, it's essential to prevent users (yes, they are often poorly educated about security) from installing or running unauthorized programs on company computers. The Microsoft Store can be a significant vector for such activity, making it advisable to restrict access to it in corporate environments.
This guide will show you how to do exactly that (how lucky you are!) — and more. You'll learn how to block any application of your choice using built-in Windows features.
We’ll explore two approaches: Software Restriction Policies (available in Windows 10 only) and Application Control Policies with AppLocker (available in both Windows 10 and 11).
Creating the Group Policy Object
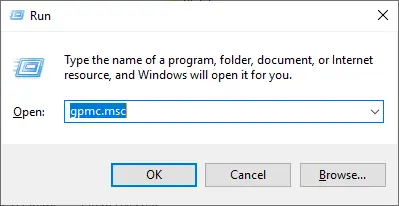
From the Active Directory server, we'll create a new Group Policy Object (GPO) to manage application restrictions.
- Open the Group Policy Management console:
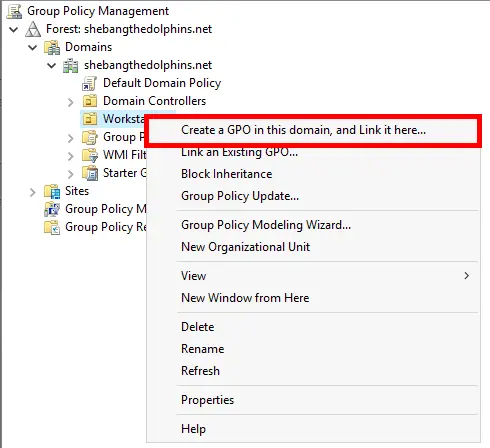
- Create a new GPO and link it to the Organizational Unit (OU) that contains your computer objects:
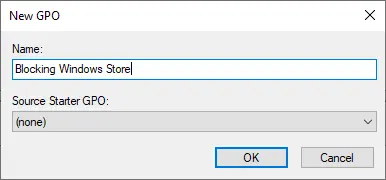
- Assign a meaningful name to the newly created GPO:
Using Software Restriction Policies (SRP) – Windows 10
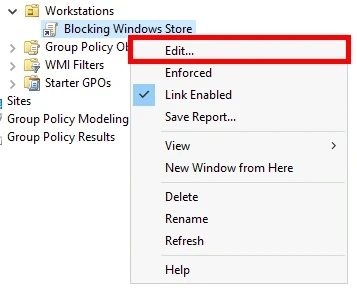
- Edit the previously created GPO:
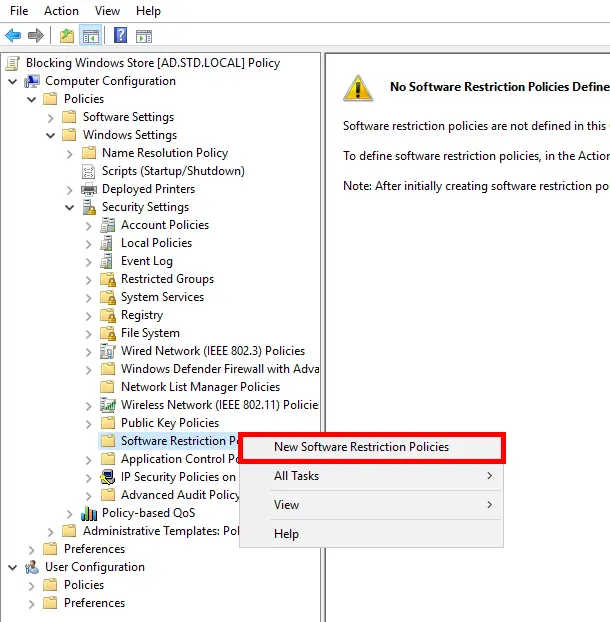
- Navigate to: “Computer Configuration > Policies > Windows Settings > Security Settings > Software Restriction Policies”. Right-click on Software Restriction Policies and choose New Software Restriction Policies:
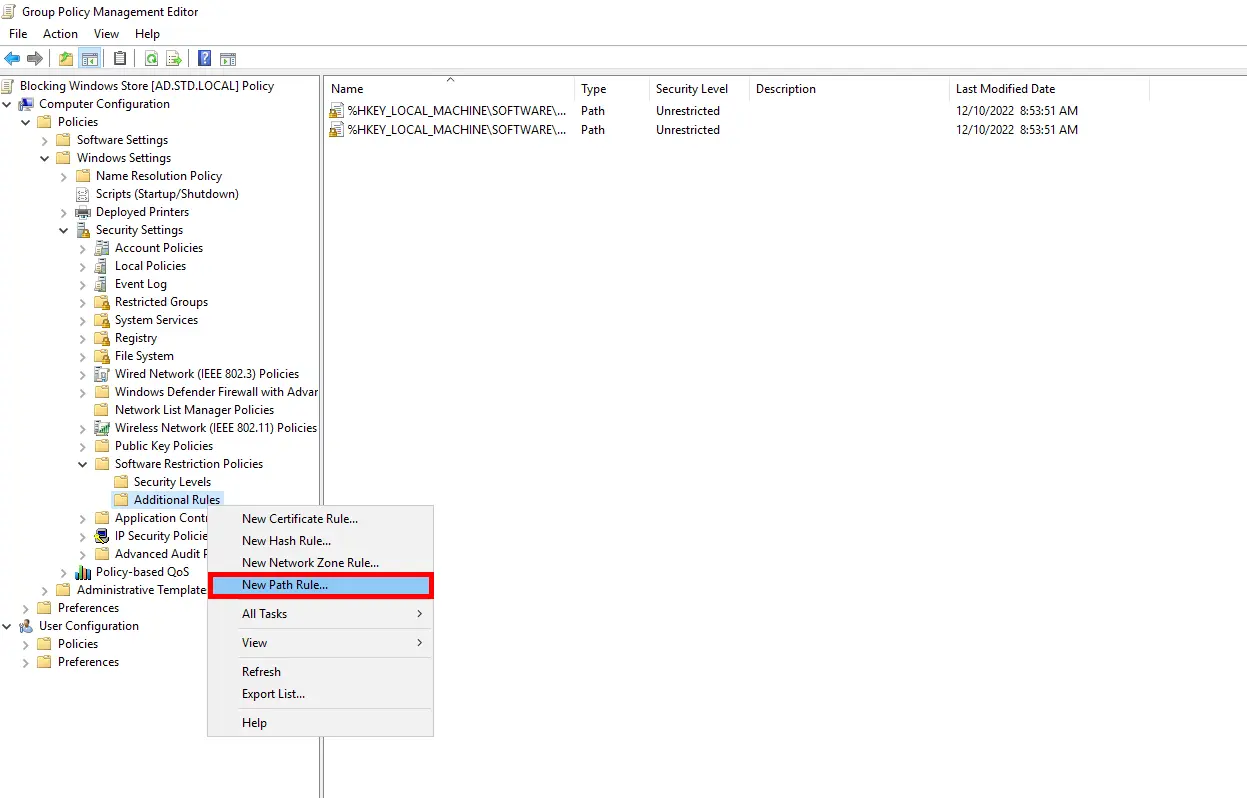
- Then go to: Software Restriction Policies > Additional Rules and add a new rule:
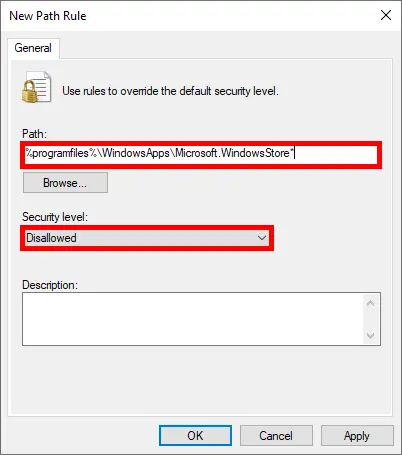
- In the Path field, enter: “
%programfiles%\WindowsApps\Microsoft.WindowsStore*”. Set the Security Level to Disallowed:
Using AppLocker (Windows 11)
In the latest edition of Windows 11, Microsoft has completely disabled Software Restriction Policies functionality. In fact, it has been deprecated starting with Windows 10 build 1803. We can still prevent users from launching specific applications using AppLocker, which is the evolution of Software Restriction Policies.
Enable the Application Identity Service
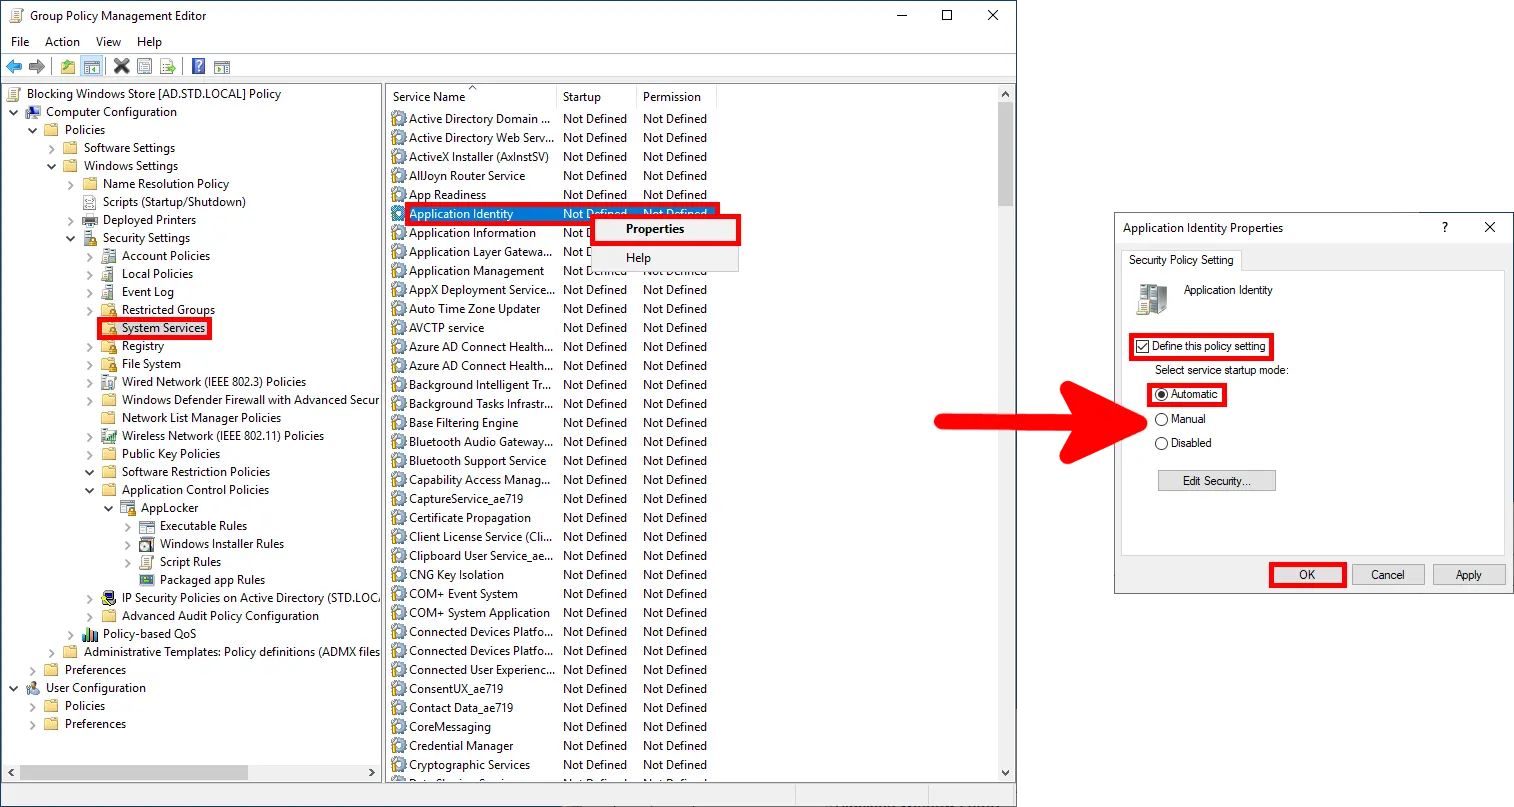
AppLocker requires the Application Identity service to be running in order to function properly. This service can be configured to start automatically using a Group Policy Object (GPO).
- To enable it, navigate to: “Computer Configuration > Policies > Windows Settings > Security Settings > System Services” within the same GPO:
Generating the XML Rules File
To create the AppLocker rules, you'll need to use a Windows 11 computer. The rules will be generated locally and later imported into your GPO on the domain controller.
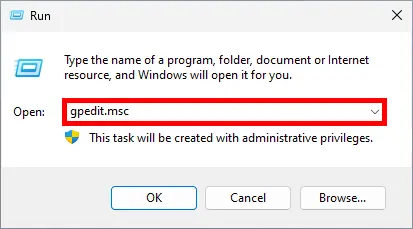
- Open the Local Group Policy Editor by launching
gpedit.mscfrom the Run dialog:
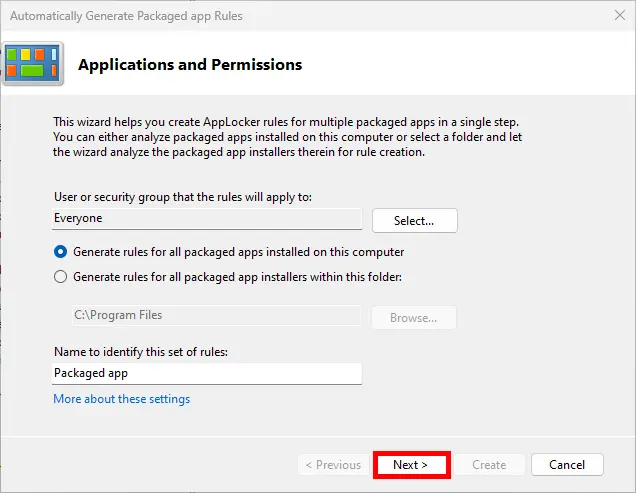
- Navigate to: Computer Configuration > Windows Settings > Security Settings > Application Control Policies > AppLocker > Packaged app Rules. Right-click on Packaged app Rules and choose Automatically Generate Rules…:

- Leave the default options selected and click Next:
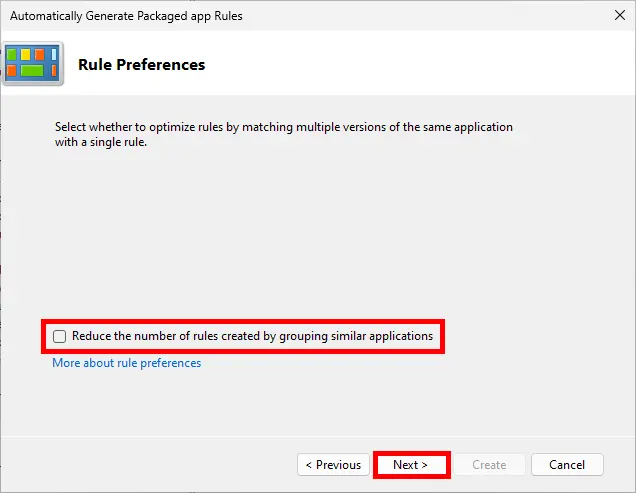
- Uncheck the option "Reduce the number of rules", then click Next:
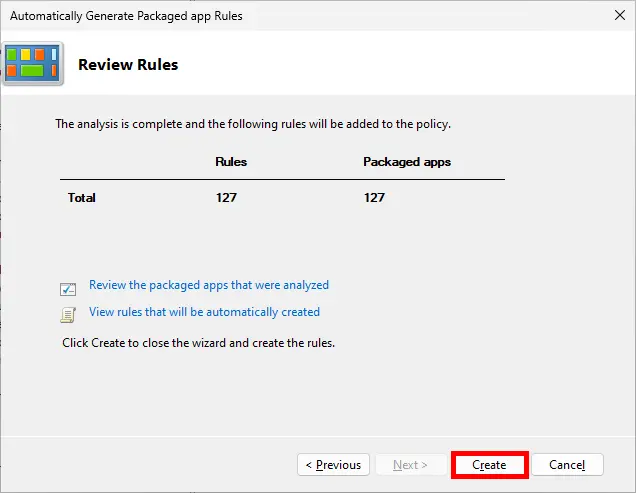
- Once the analysis is complete, click Create to generate the rules:
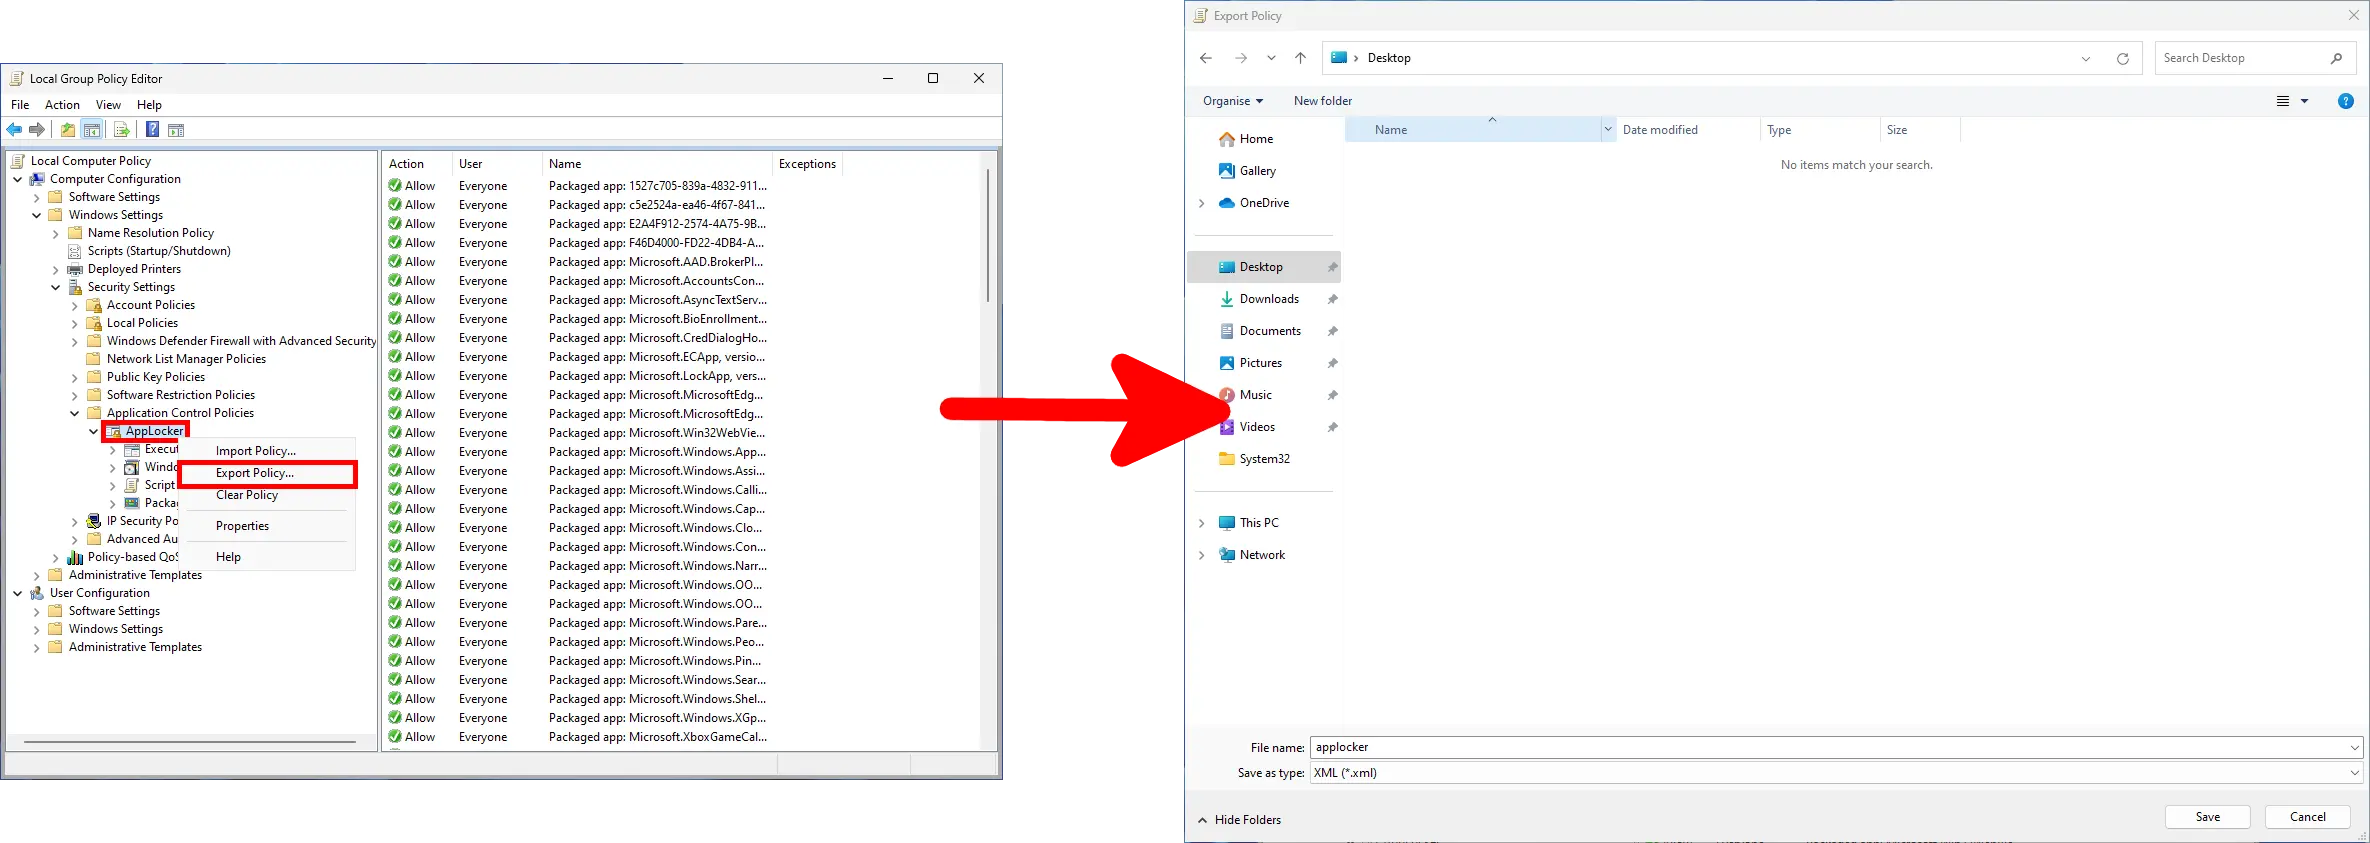
- After the rules are created, export the AppLocker policy to an XML file and copy it to your Active Directory server:
- The issue with the raw exported XML file is that it defines a specific version for each application:
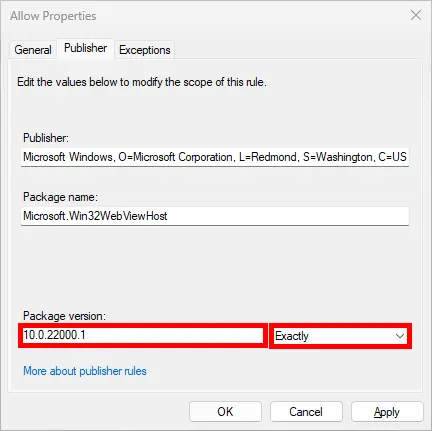
- However, we want the rules to apply to all versions of the application. The desired configuration should look like this:
- To avoid editing hundreds of rules manually, you can use the following PowerShell command to automatically update the XML file:
PS C:\> $(Get-Content .\AppLocker.xml -Raw -Encoding UTF8) -replace ".*BinaryVersionRange LowSection.*",' <BinaryVersionRange LowSection="*" HighSection="*" />' | Out-File -FilePath .\AppLocker_modifie.xmlAlternatively, you can download the already modified XML file here: AppLocker.xml.
Blocking the Windows Store (and Other Windows Apps)
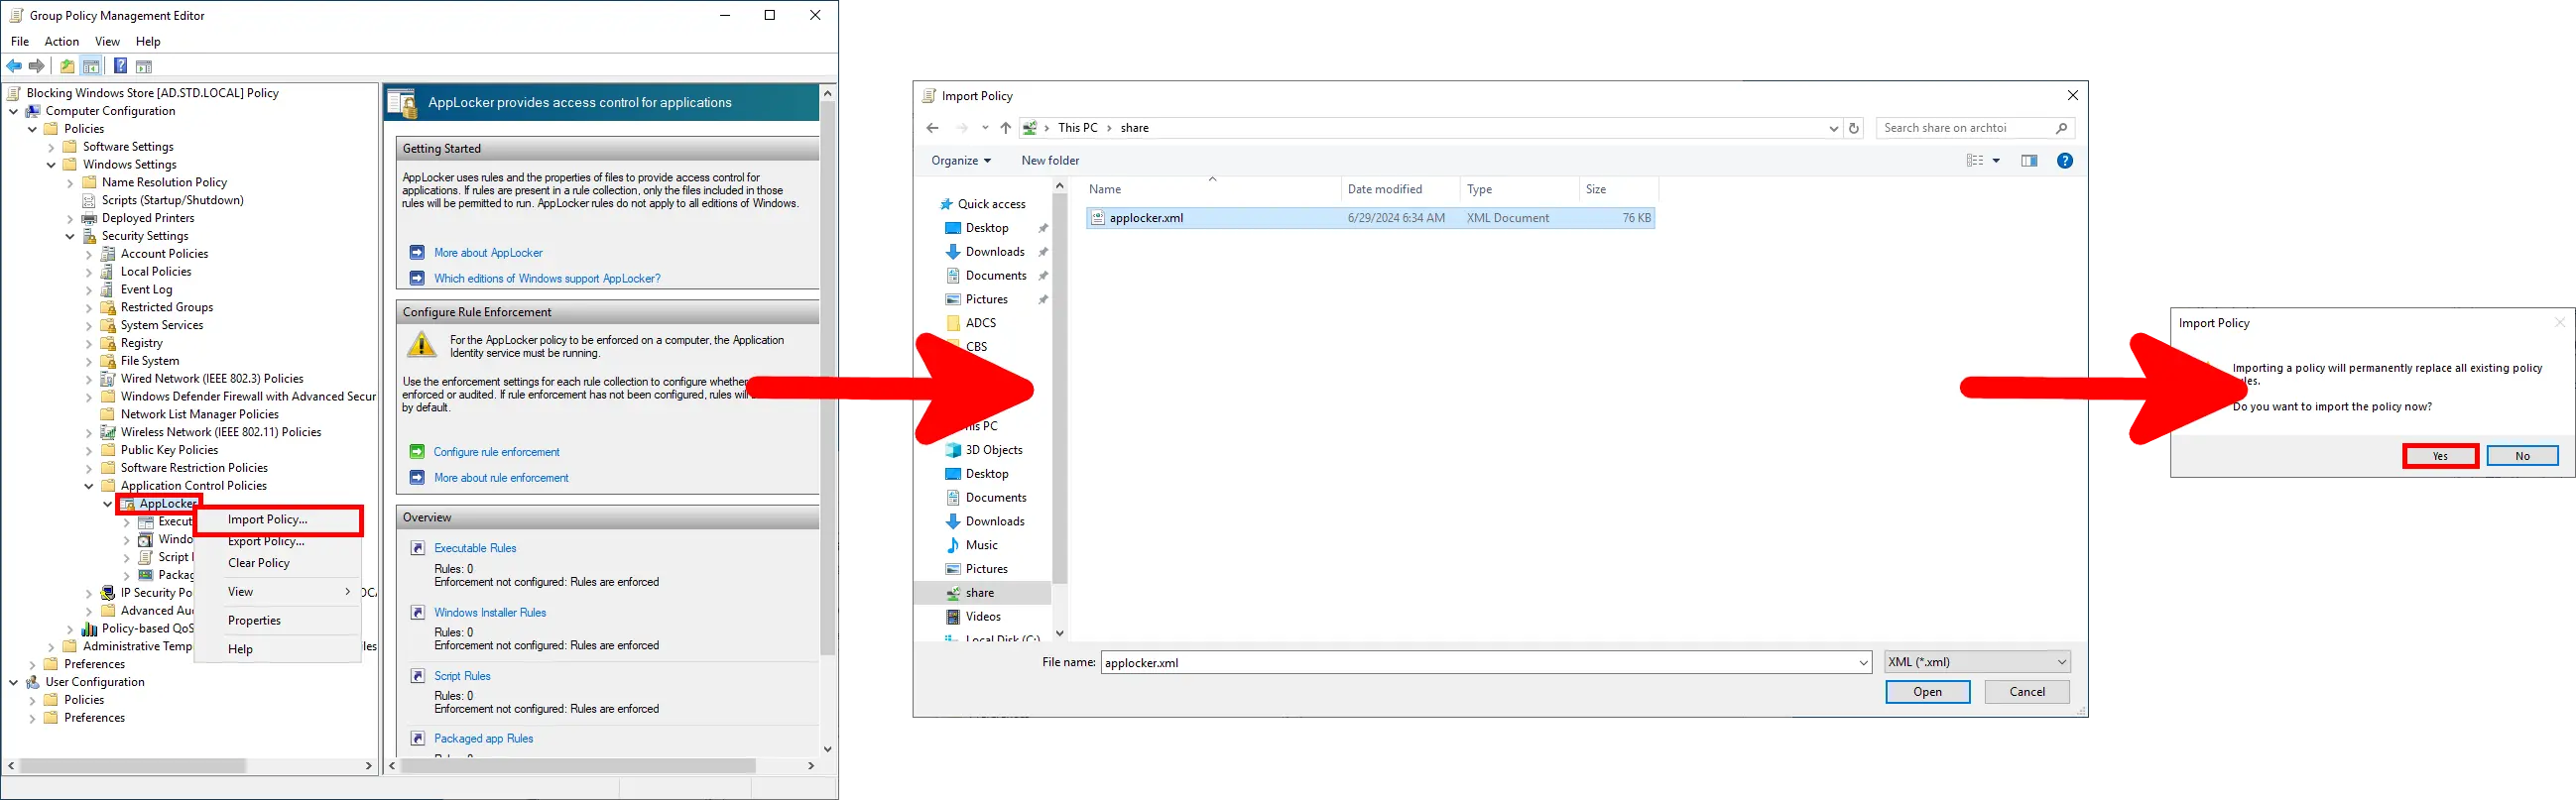
- Edit the previously created GPO:
- Go to: Computer Configuration > Policies > Windows Settings > Security Settings > Application Control Policies. Right-click on AppLocker and choose Import Policy… to load the previously created XML file:
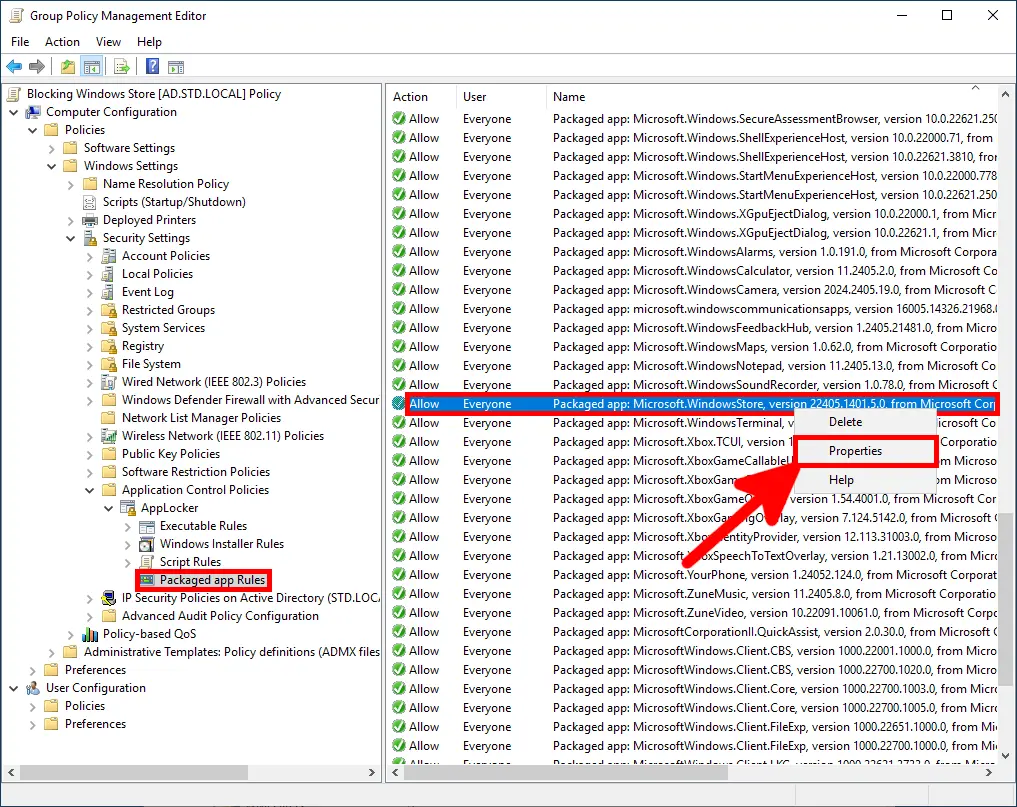
- After importing, navigate to Packaged app Rules and locate the rule for
Microsoft.WindowsStore. You can also block other apps such as Xbox, Zune, or games listed in the ruleset:
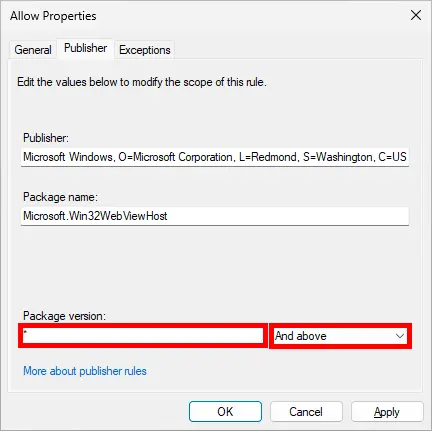
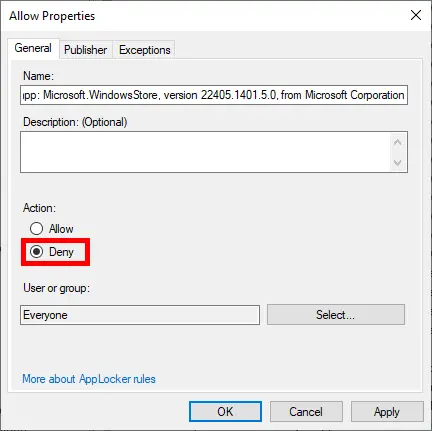
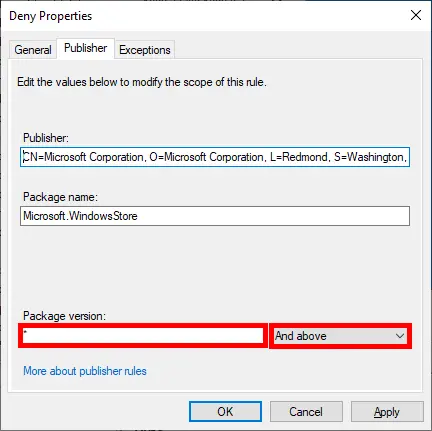
- Double-click the rule, change the action to Deny, then switch to the Publisher tab:
- In the Publisher tab, set the Package version to
*and chooseAnd aboveto ensure all versions are covered. Click OK to apply changes:
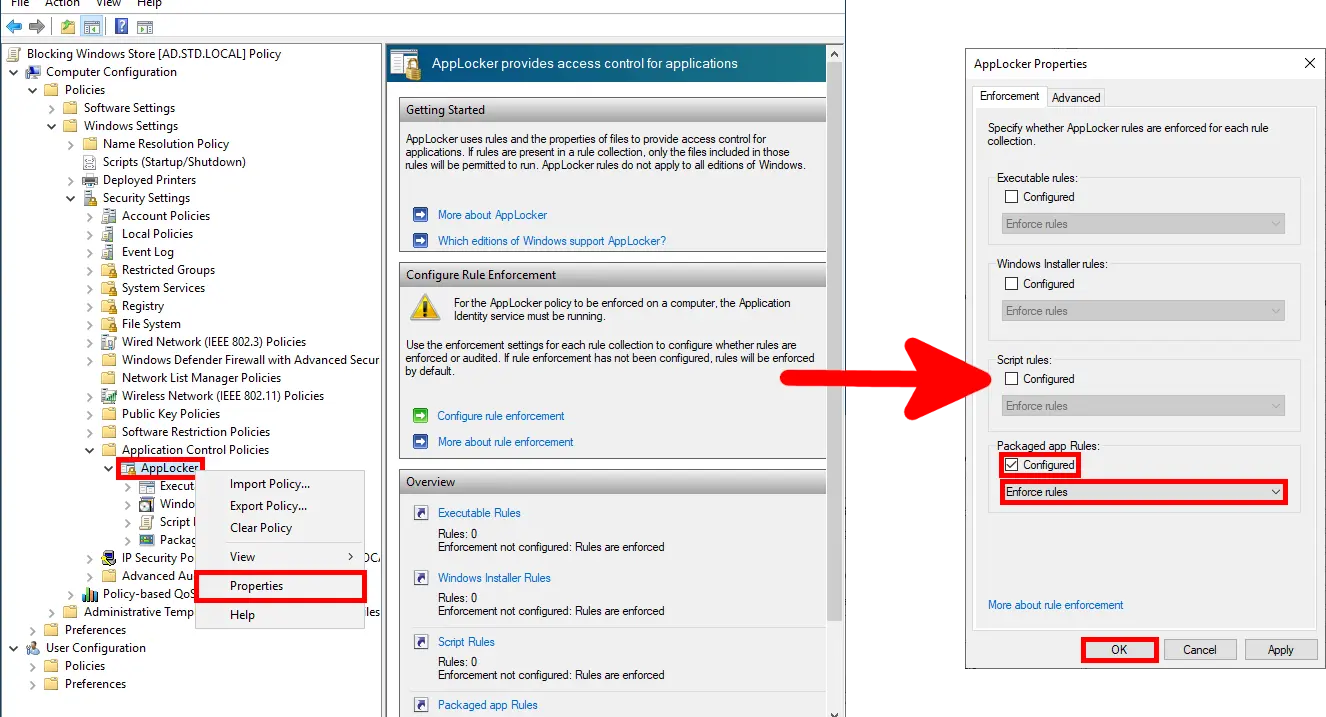
- To finalize, open the AppLocker Properties and under Packaged app Rules, check the
Configuredbox and selectEnforce rules. Then click OK:
Blocking Other Applications (Non-Windows Apps)
⚠️ Note: If the application you want to block is not a Windows App, you still need to import and enable the Packaged app Rules as shown earlier. If this step is skipped, enabling AppLocker’s Executable Rules may cause system malfunctions — such as the Start menu or apps relying on WindowsApps failing to launch.
As an alternative, you can create a rule that explicitly allows all Microsoft-signed applications to avoid these issues.
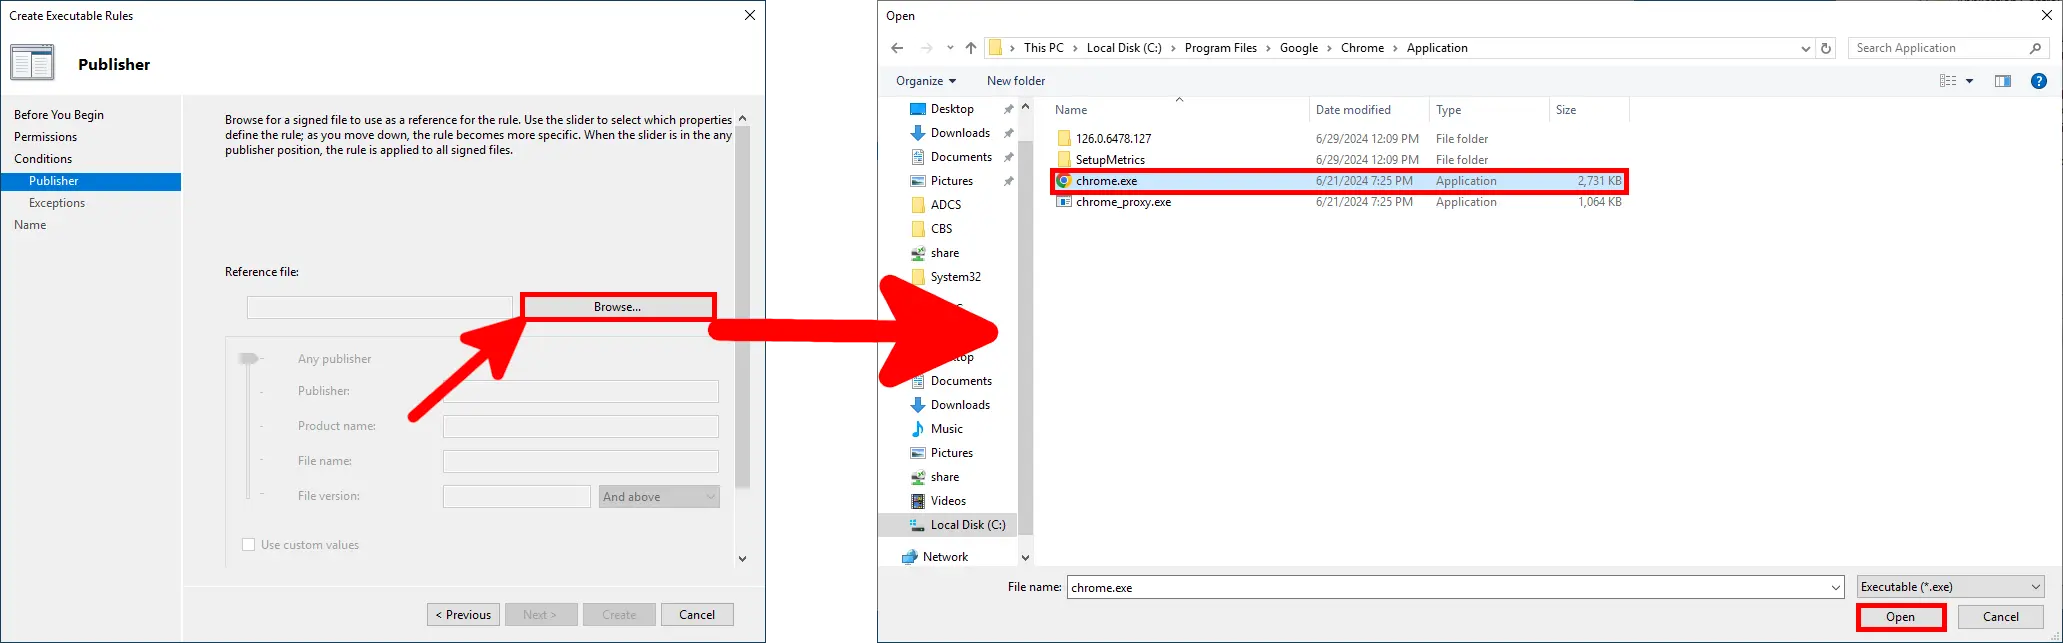
As an example, we'll look at how to block the Chrome Browser, aka the mole.
- First, click
Create Default Rulesto ensure essential system files and Microsoft applications are not unintentionally blocked:

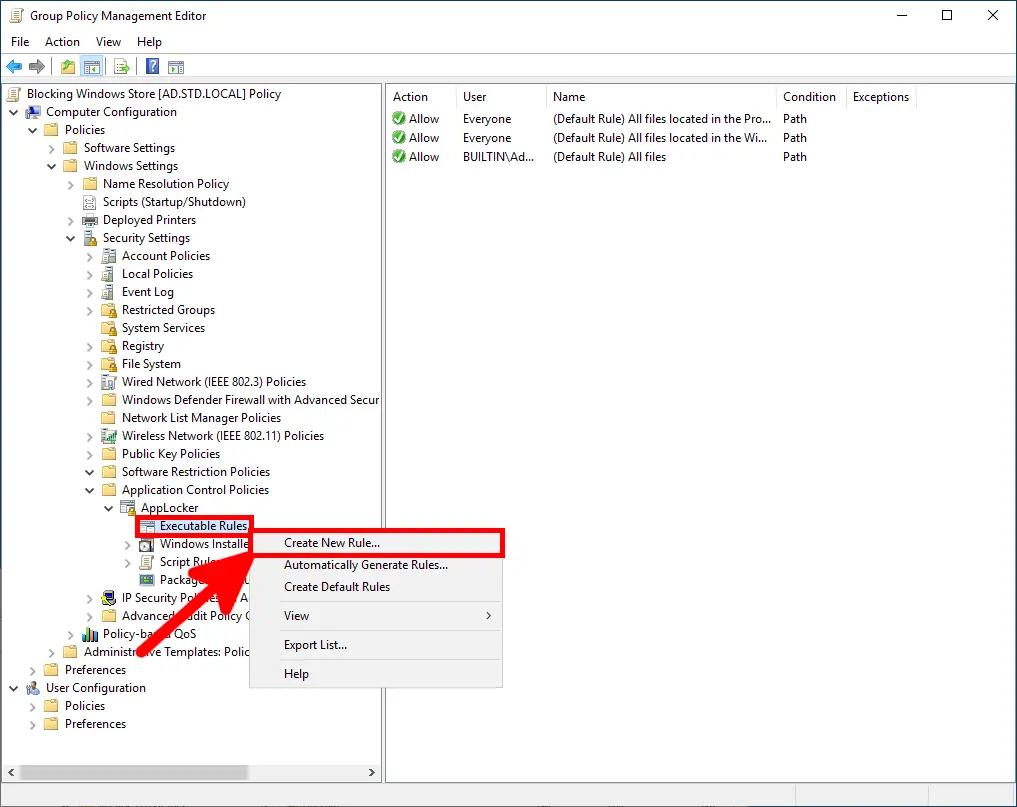
- Then, select
Create New Rule…to define a custom blocking rule:
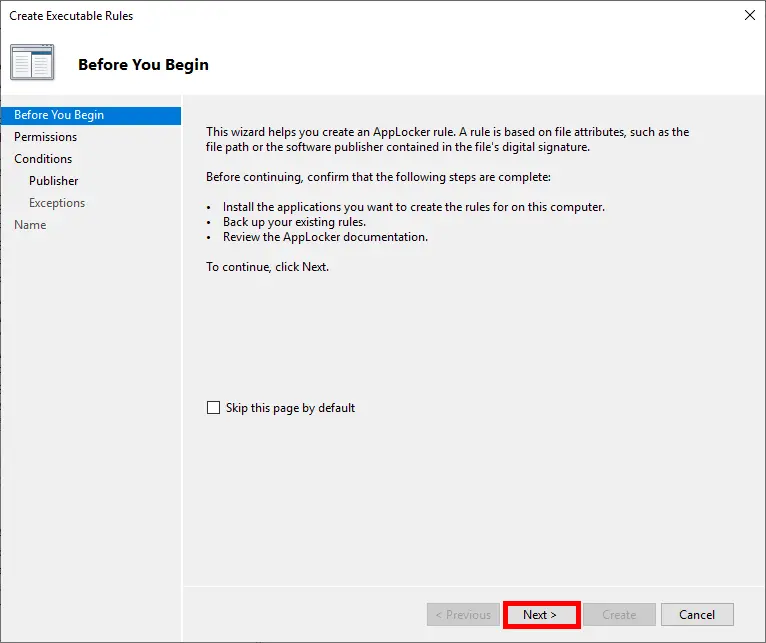
- In the Before You Begin screen, click Next to continue:
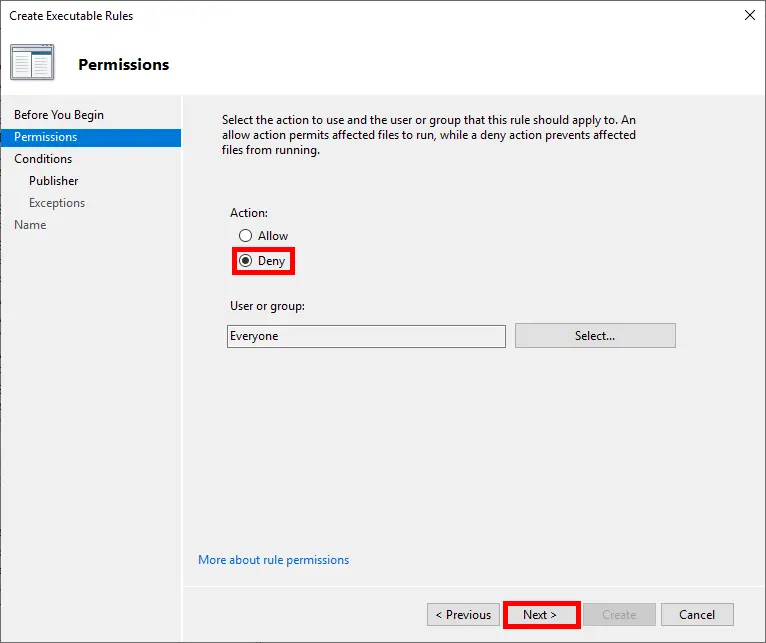
- Set the action to Deny to block execution of the application:
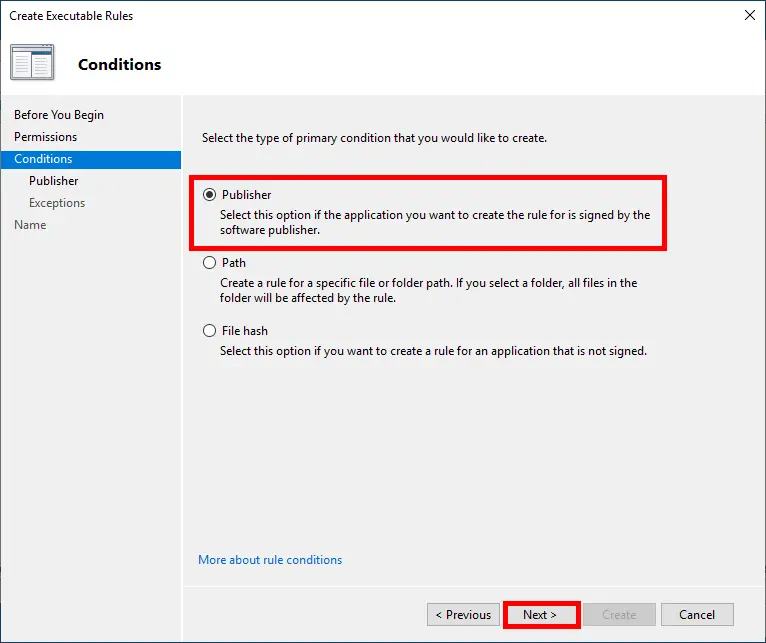
- Choose the rule condition. There are three options:
– Path: easy to bypass and not recommended for critical blocks.
– Hash: reliable but hard to maintain across multiple versions.
– Publisher: the most accurate and flexible method (recommended).
- Click Browse to specify the Executable of the application we want to block:
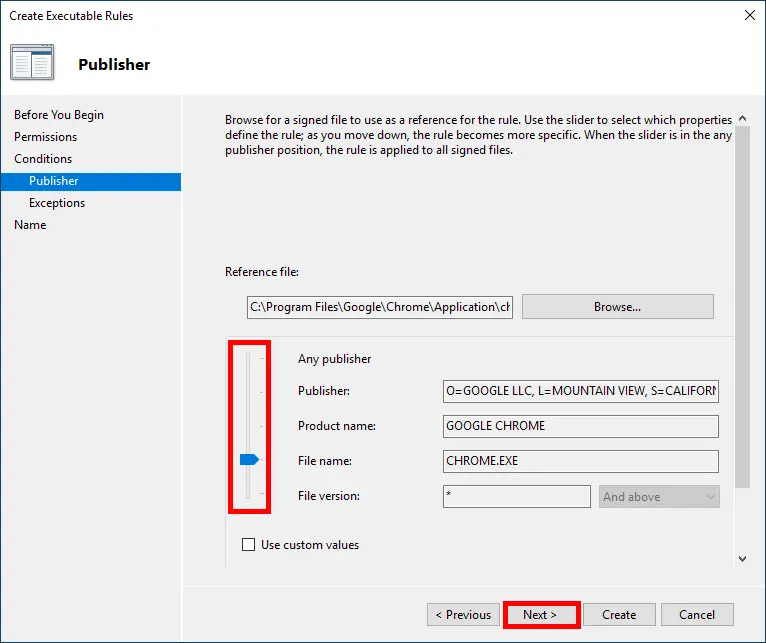
- Adjust the slider upward toward the file name to match all versions of the application. This ensures the rule applies regardless of future updates:
- Skip the Exceptions step by clicking Next, unless you have specific use cases to exclude:
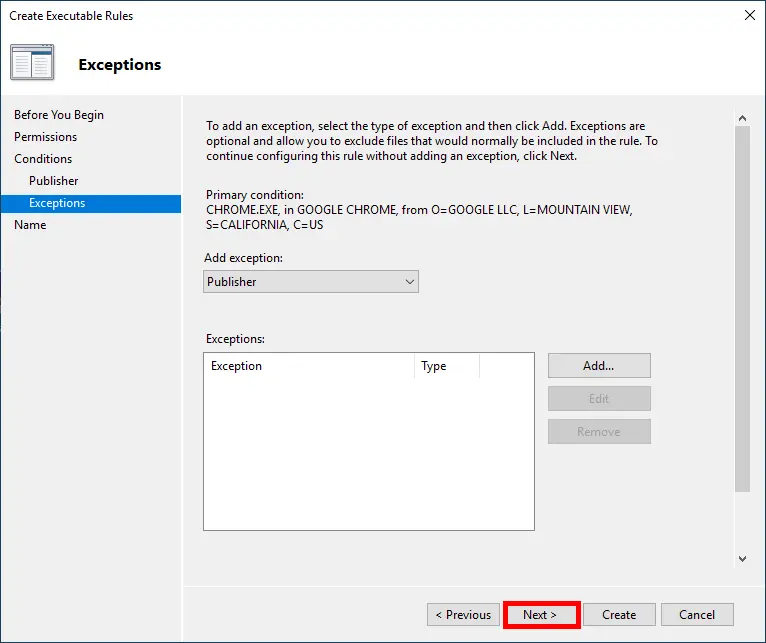
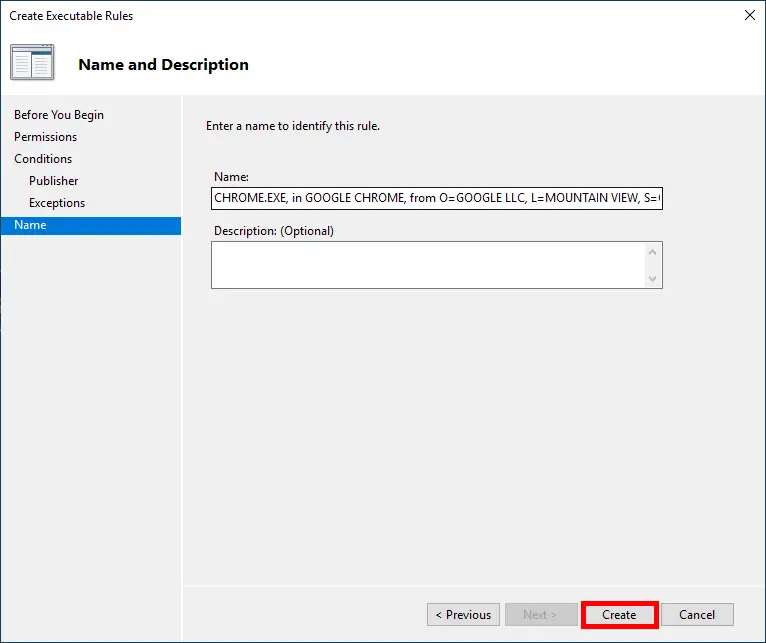
- On the final screen, review the rule details and click Create to finish:
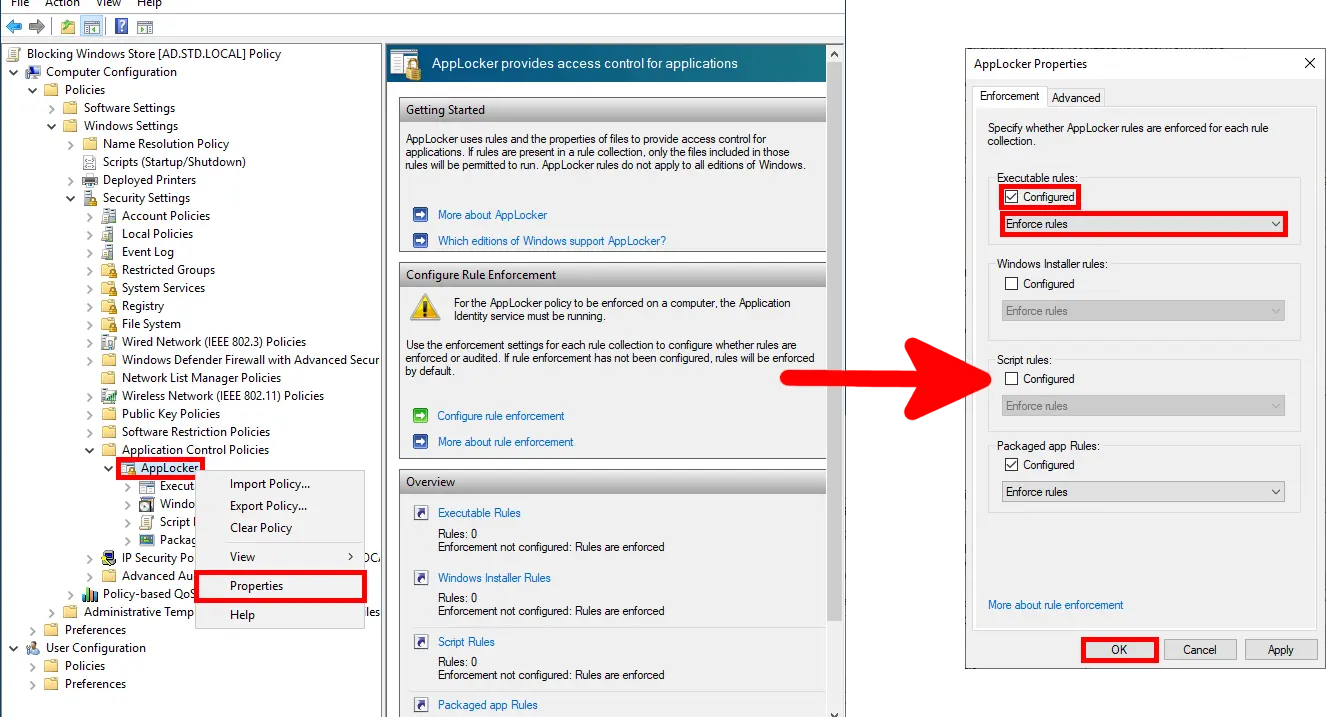
- Lastly, open AppLocker Properties and ensure the Executable Rules section is set to Configured and Enforce rules. This will activate the blocking policy:
Troubleshooting: Unblocking Legitimate Applications
In some cases, legitimate applications may be blocked depending on their location or execution context — for example, if they are run from directories outside Program Files. This section shows how to identify and unblock such applications.
Tracing Blocked Applications
- On the affected computer, open the Windows Event Viewer:
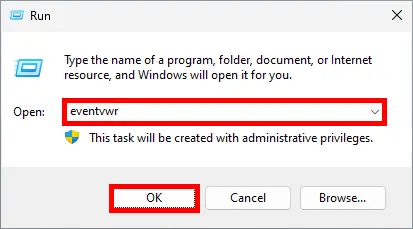
- Navigate to: Applications and Services Logs > Microsoft > Windows > AppLocker Review the logs to identify which executable was blocked and why.
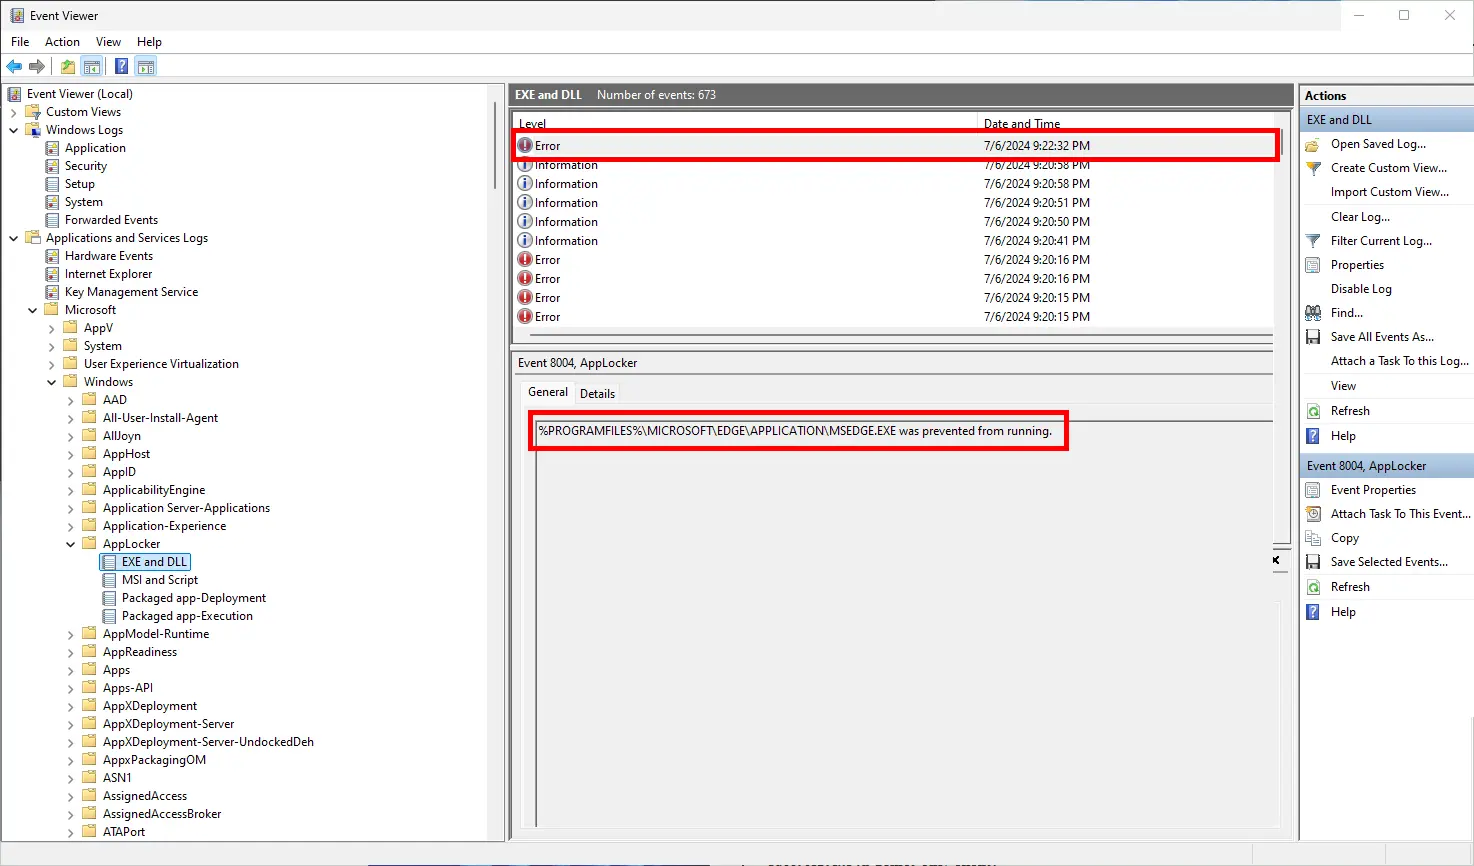
Once the blocked executable is identified, create a rule to explicitly allow it.
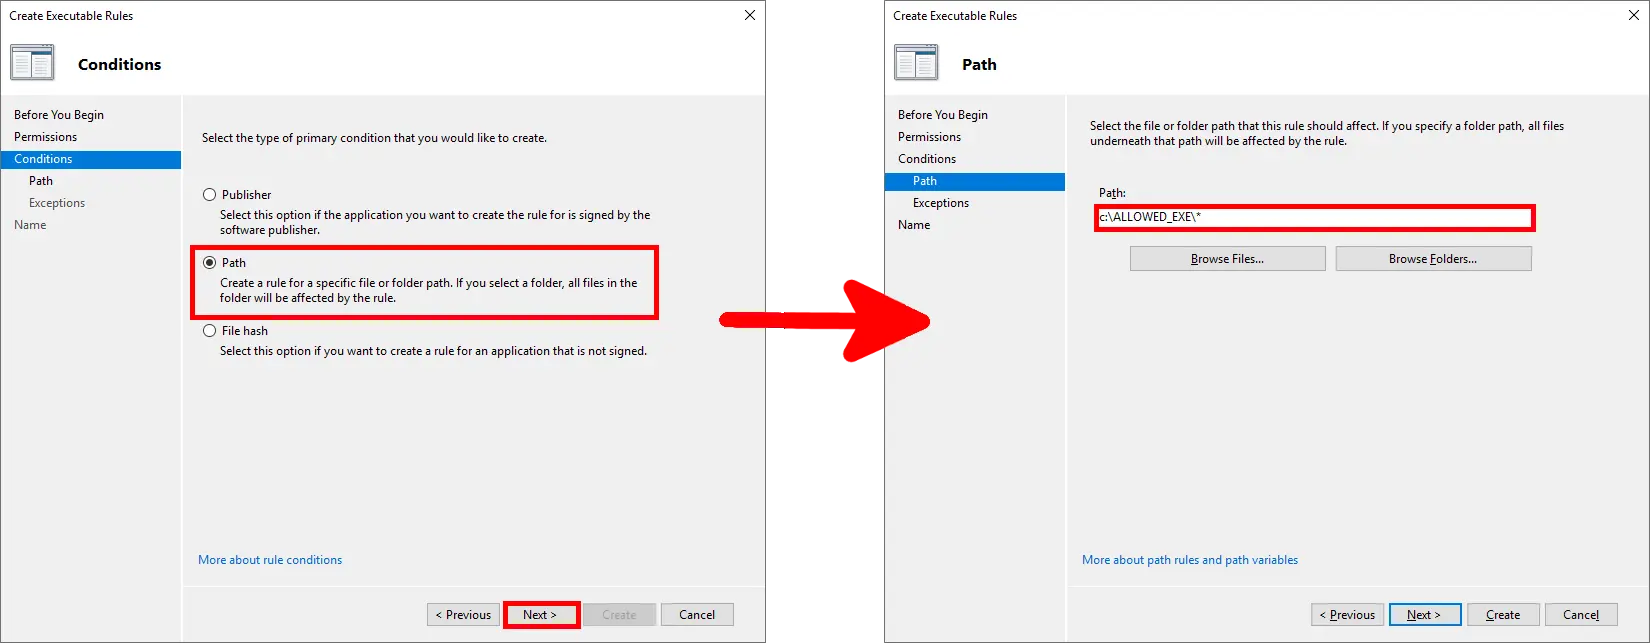
Allowing All Executables in a Folder
While not recommended for security reasons, you may need to allow all executable files within a specific folder — for instance, for trusted development tools or portable apps.
- To allow execution for all files under
C:\ALLOWED_EXE\, create a rule using a wildcard path: The asterisk (*) ensures that all.exefiles in the folder and its subfolders are allowed. Without it, only files in the root folder would be included:
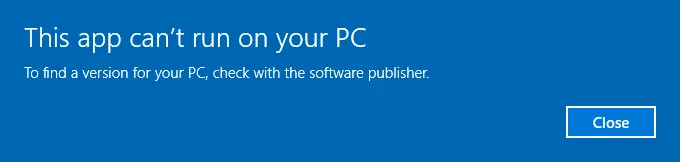
User Experience When Store Is Blocked
- Once the policy is in place, users attempting to launch the Microsoft Store will encounter this warning window: