How to Manage USB Flash Drive Access Using Group Policy in Windows
- Last updated: Jul 7, 2025

To enhance corporate IT security, it is essential to limit the use of unmanaged peripherals such as USB flash drives on workstations. These devices can carry viruses if previously connected to unsecured systems. Controlling which devices are authorized to connect is a key step toward reducing risks.
While some antivirus solutions offer this functionality, it is also possible to enforce such restrictions using Windows Group Policies.
This article explains how to configure these policies within an Active Directory environment.
Group Policy
- To configure USB device restrictions, open the Group Policy Management Editor and navigate to:
Computer Configuration > Administrative Templates > System > Device Installation > Device Installation Restrictions:
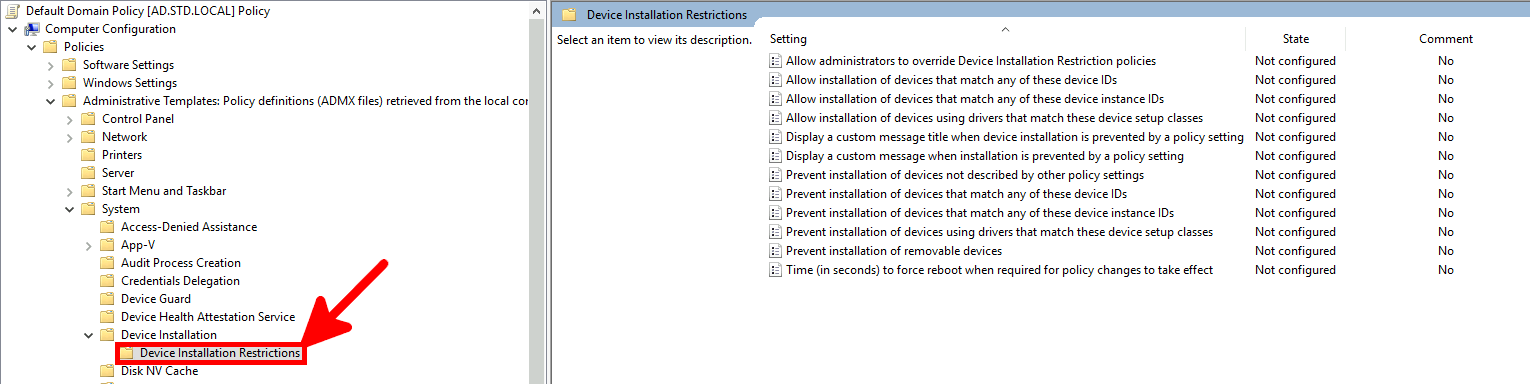
GPO Rules
To control USB flash drive access, two main Group Policy rules are available. The first blocks all removable media, while the second blocks any new devices not explicitly allowed. Below is a comparison of both and guidance on how to configure them effectively.
Prevent All Removable Media
- To block the installation of all removable media, enable the Prevent installation of removable devices policy in Group Policy:
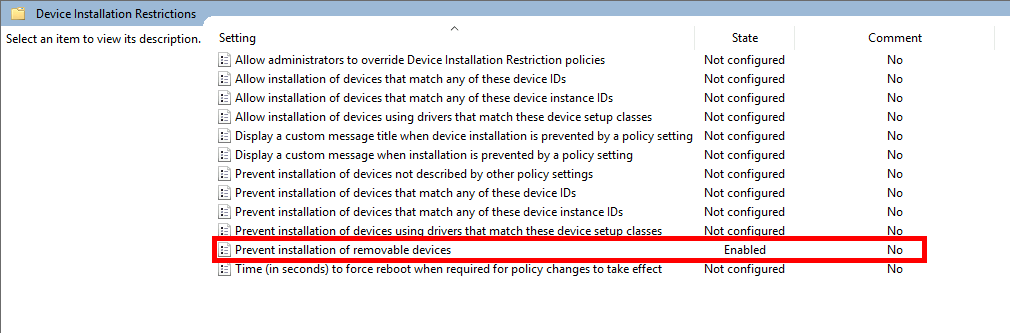
- Effect of this policy:
- Previously installed USB flash drives: remain functional.
- New USB flash drives: installation is blocked.
- Other new devices: installation is allowed.
Allow administrators to override Device Installation Restriction policies: this rule will still apply; administrators cannot bypass it.Allow installation of devices that match any of these device IDs: not effective for this rule; exceptions won't apply.
Prevent Installation of New Devices
To block all new device installations—including USB flash drives—enable the Prevent installation of devices not described by other policy settings policy.
⚠️ Caution: This rule blocks all new hardware devices, not just USB drives. If you restore a system backup on different hardware, Windows may fail to boot due to missing drivers.
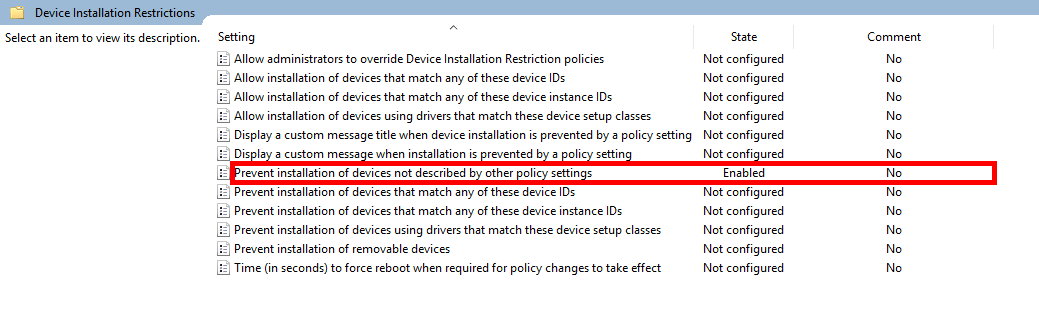
- Effect of this policy:
- Previously installed USB flash drives: still usable.
- New USB flash drives: installation blocked.
- All other new devices: installation blocked.
Allow administrators to override Device Installation Restriction policies: administrators can install devices if enabled.Allow installation of devices that match any of these device IDs: allows whitelisting specific hardware.
Adding Exceptions
Unlike the “Prevent all removable media” rule, this policy supports exceptions. You can allow specific devices by defining either their hardware IDs or instance IDs.
Exceptions with Device IDs
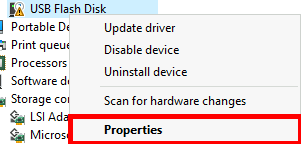
- Open Device Manager, right-click the device, and select Properties:
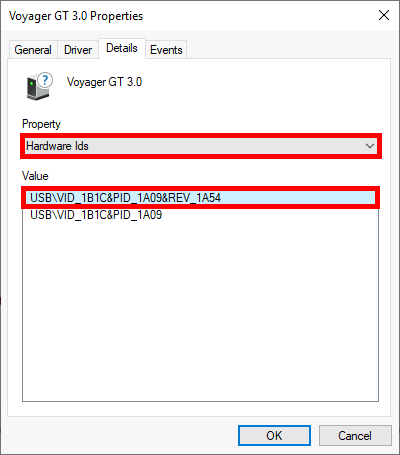
- Under the Details tab, select Hardware Ids and copy the desired value:
- Edit the policy
Allow installation of devices that match any of these device IDsand paste the copied ID:

Exceptions with Device Instance IDs
- In Device Manager, open the device properties as before:
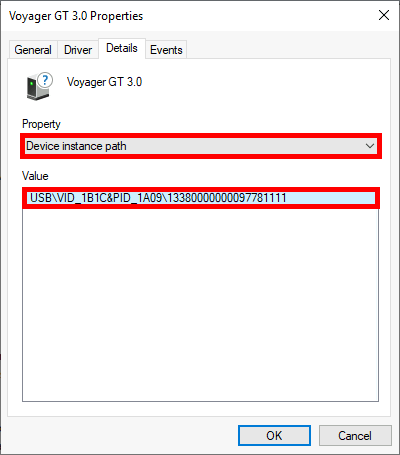
- Under Details, choose Device instance path and copy the ID:
- Edit the policy
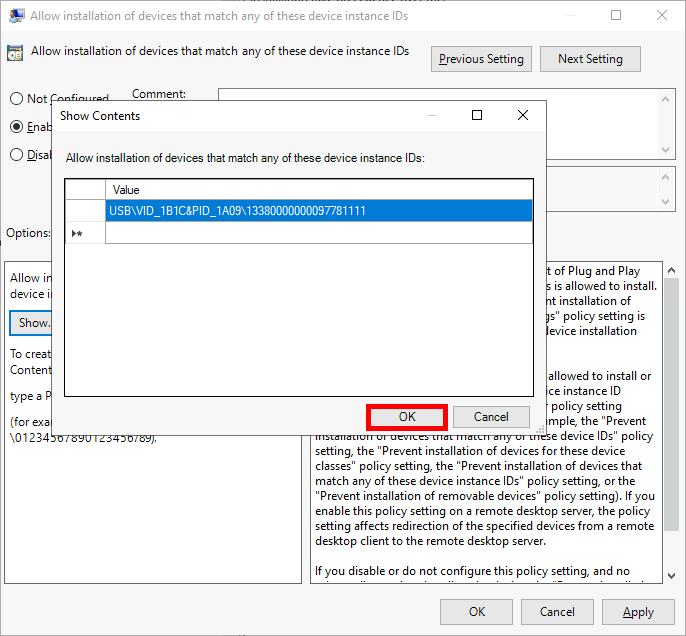
Allow installation of devices that match any of these device instance IDsand paste the copied value:
Remove Installed USB Devices
Even after applying Group Policy restrictions, previously installed USB flash drives will remain accessible. To fully enforce your policy, these devices must be manually removed from the system.
Method 1: Using Device Manager
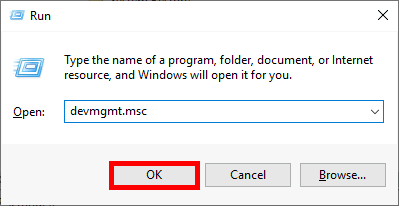
- Open the Device Manager console. You can do this by typing
devmgmt.mscin the Run dialog:
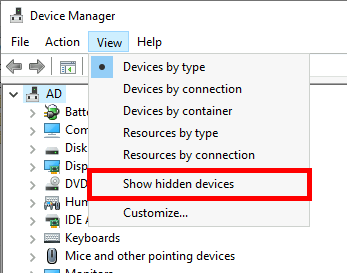
- Enable Show hidden devices to display all previously connected USB drives:
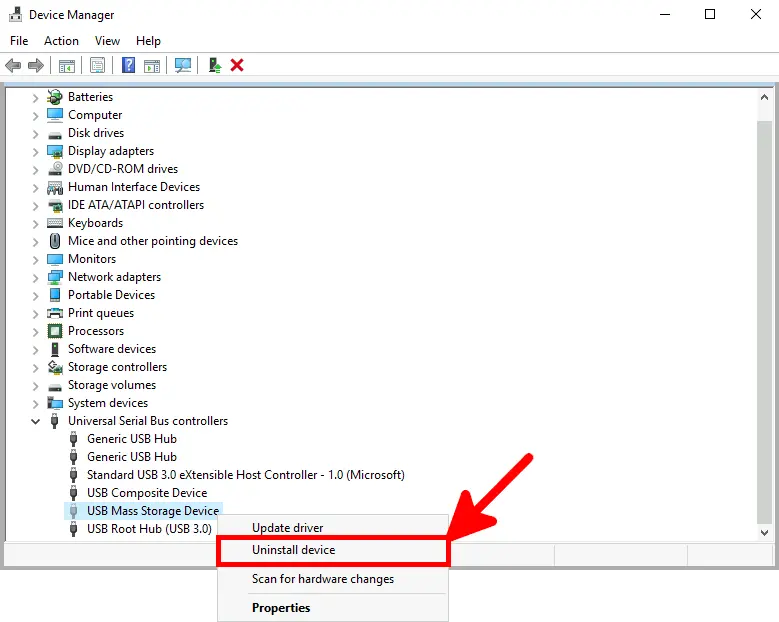
- Locate the USB Mass Storage Devices, right-click on each, and select Uninstall device:
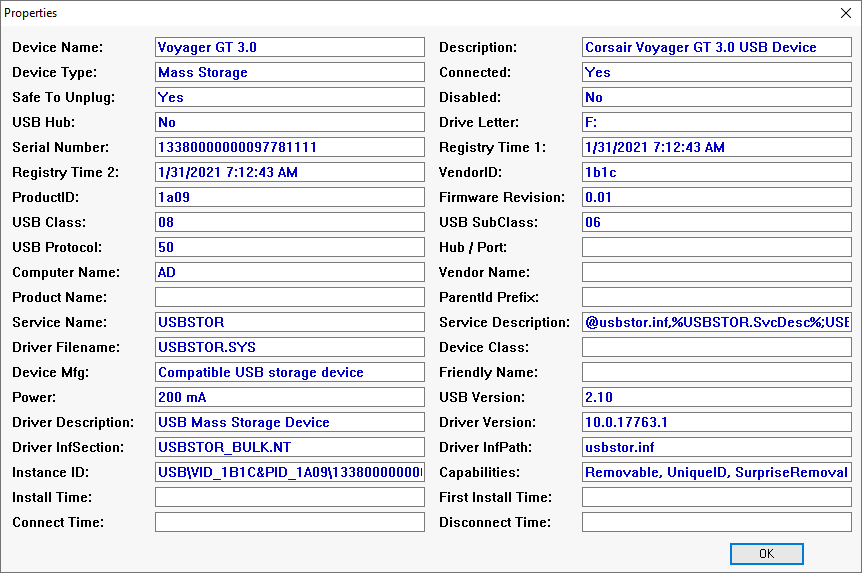
Method 2: Using USBDeview (NirSoft)
An alternative and more efficient method is to use USBDeview from NirSoft, available at https://www.nirsoft.net/.
- This tool allows you to list and remove multiple USB devices at once.
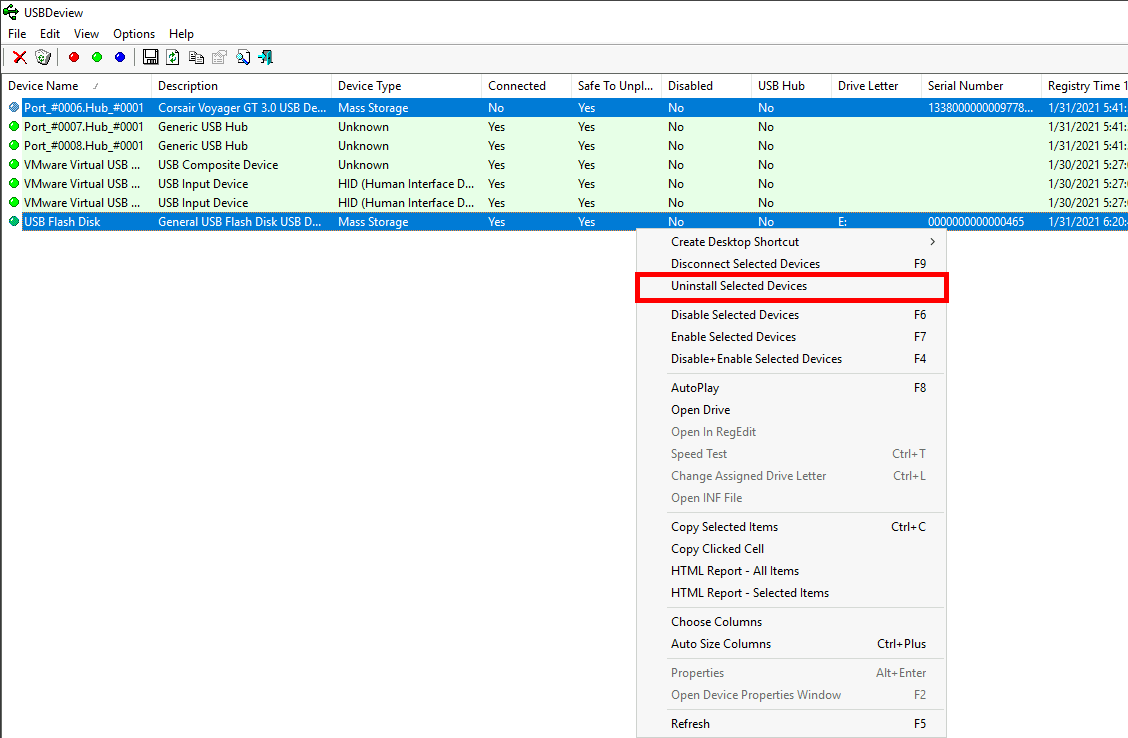
- It also displays detailed device information such as Instance ID and Serial Number: