Step-by-Step Guide to Setting Up a TFTP and DHCP Server on Windows with Tftpd64
- Last updated: Jul 5, 2025


TFTP (Trivial File Transfer Protocol) is a lightweight protocol used to transfer files between a client and a remote host over a network. It’s often used in embedded systems and network device management. Learn more on Wikipedia.
Despite being an older protocol, TFTP remains common in various network administration tasks. Personally, I use it to upgrade firmware on my equipment, such as Cisco switches.
This guide explains how to set up a TFTP server on Windows using Tftpd64 by Ph. Jounin — a free, portable utility that doesn’t require installation. Besides TFTP, it can also act as a DHCP, DNS, SNTP, and Syslog server.
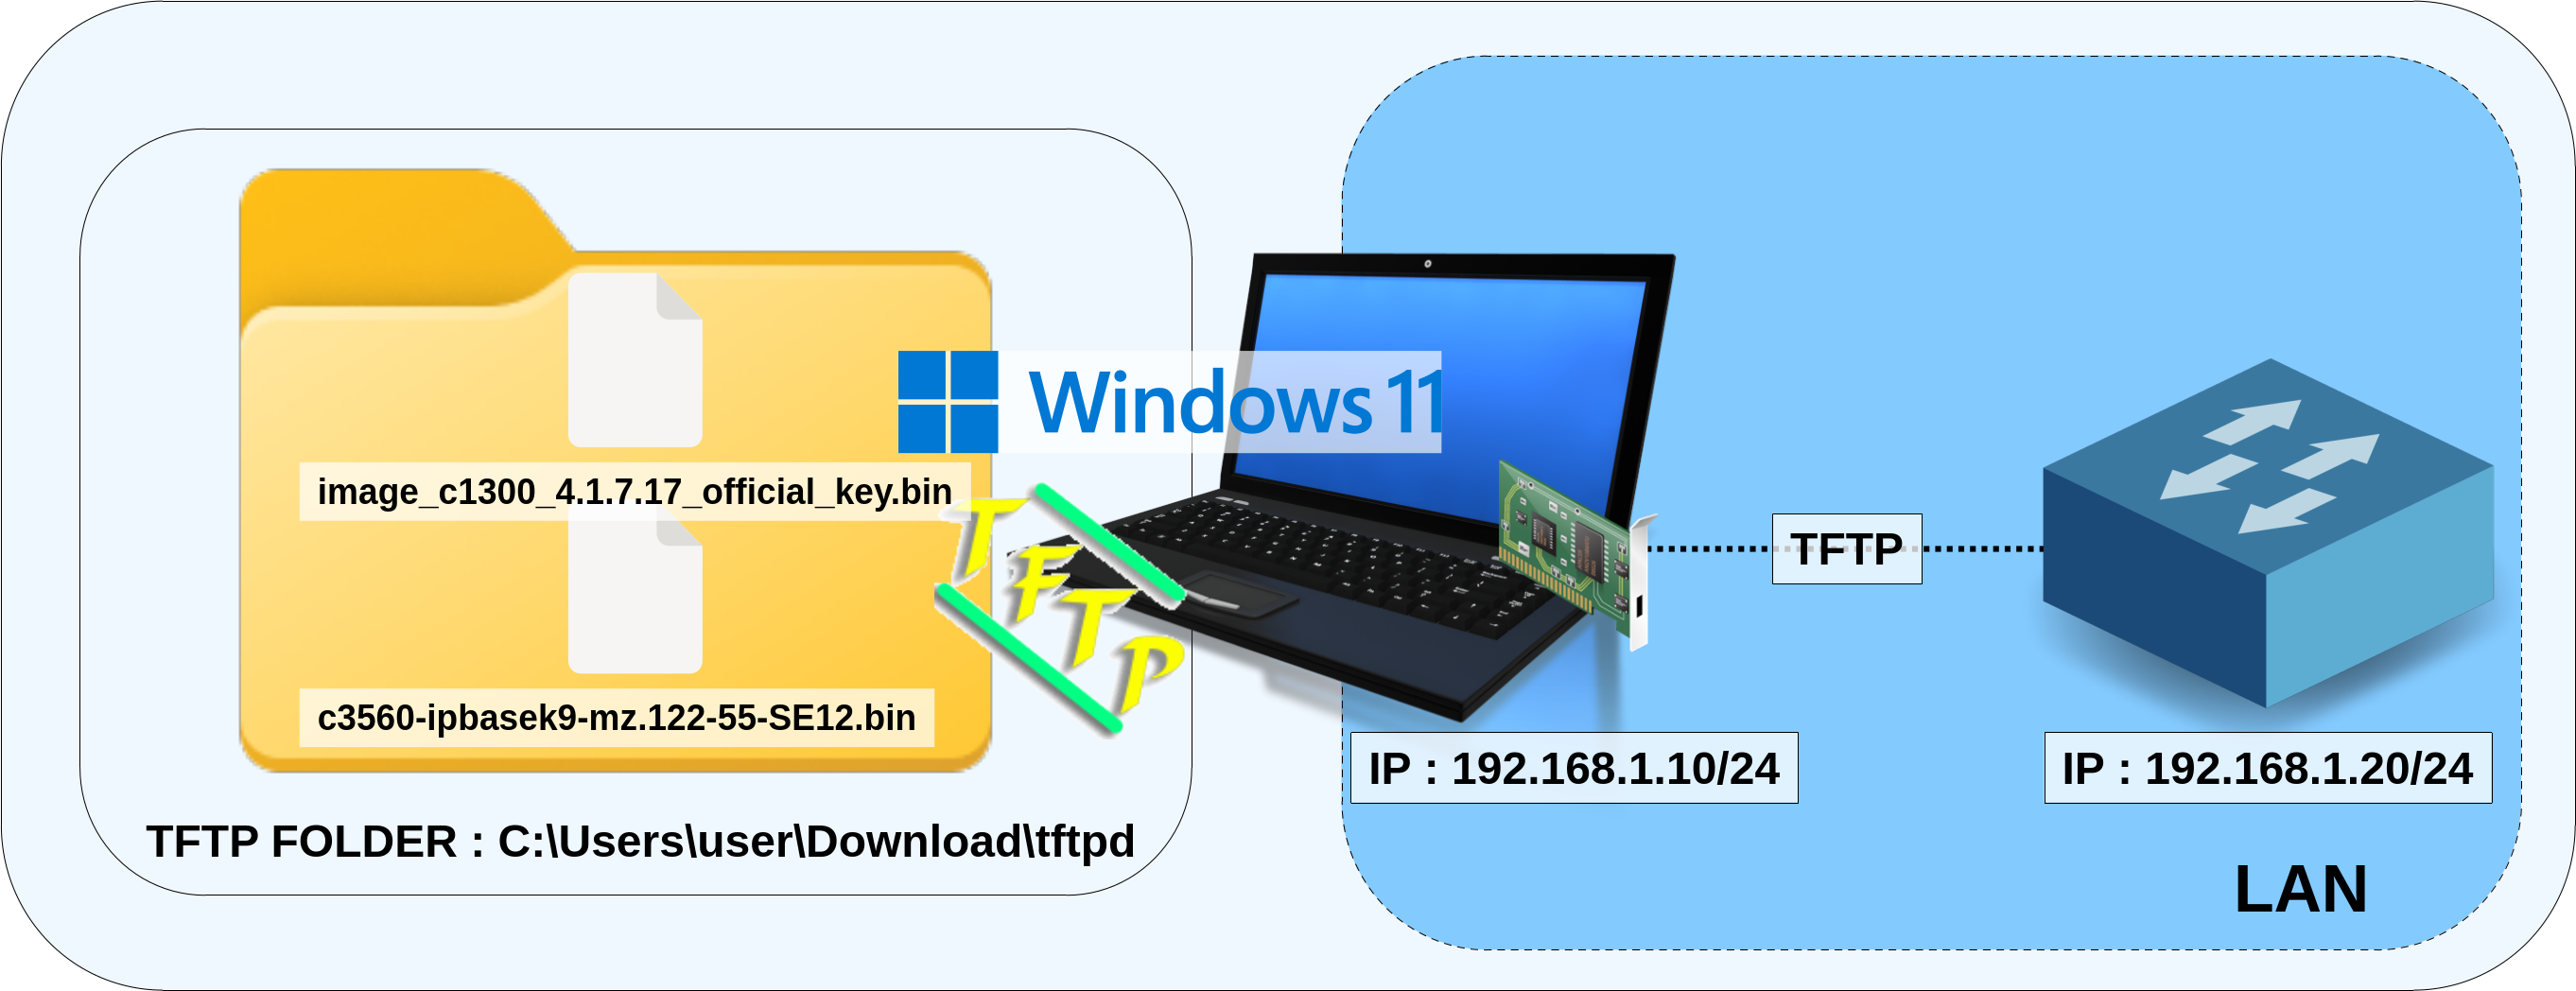
Network Diagram
- OS: Windows
- Tftp server:
Tftpd64 - Network Protocol:
UDP 69 - Tftp directory:
C:\Users\user\Download\tftpd
Download and Run
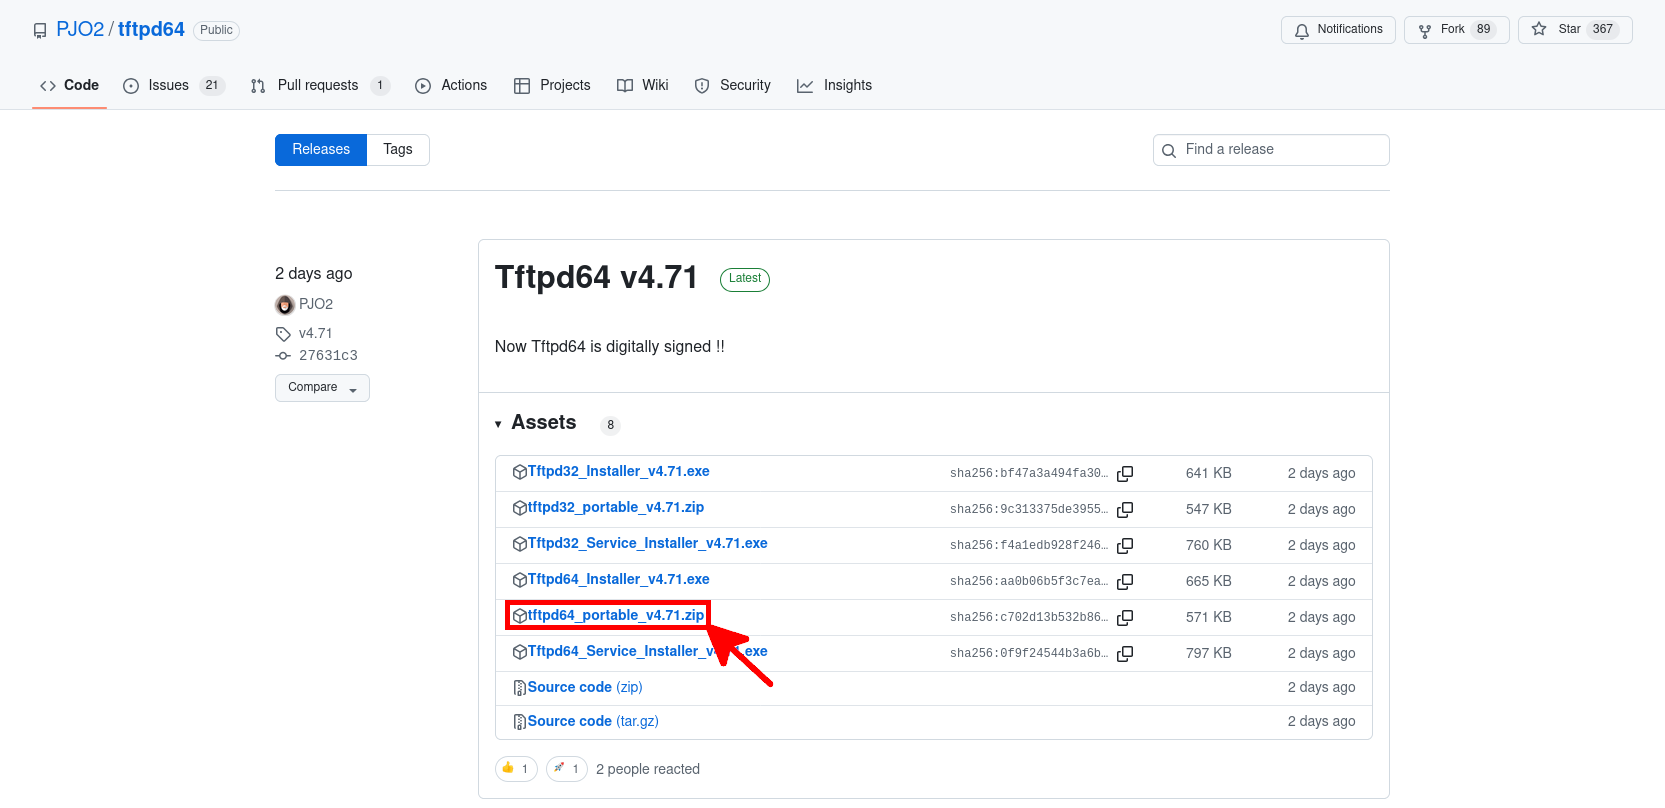
- Download
tftpd64 64 bitsportable edition from the official GitHub page:
- It's recommended to verify the
sha256checksum, for example usingPowerShell:
PS > Get-FileHash .\tftpd64_portable_v4.71.zip -Algorithm SHA256Algorithm Hash Path
--------- ---- ----
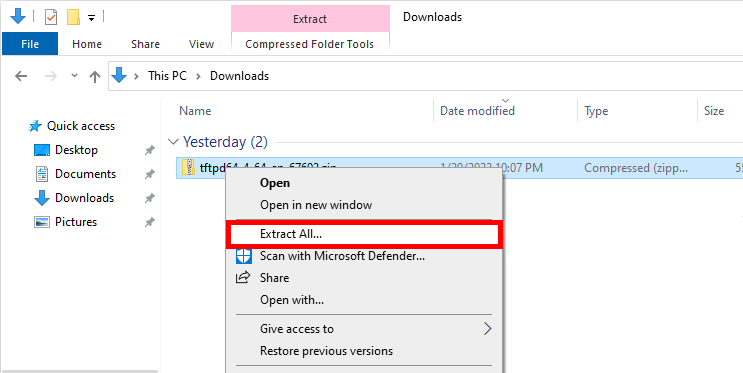
SHA256 C702D13B532B8619B7F057709AA4780F940830BAE5AFFB68F2F859E8A7DBF91C C:\Users\administrator...- After downloading, extract the
.ziparchive:
- Double-click the
tftpd64.exefile to launch the application:

Configuration
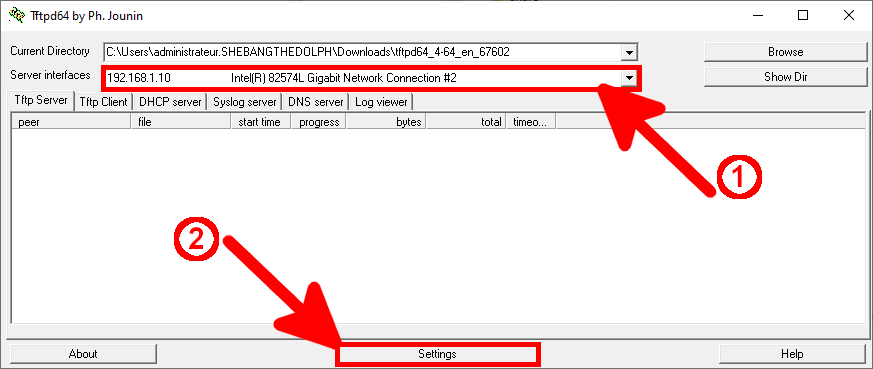
- Select the appropriate network interface, then click on Settings:
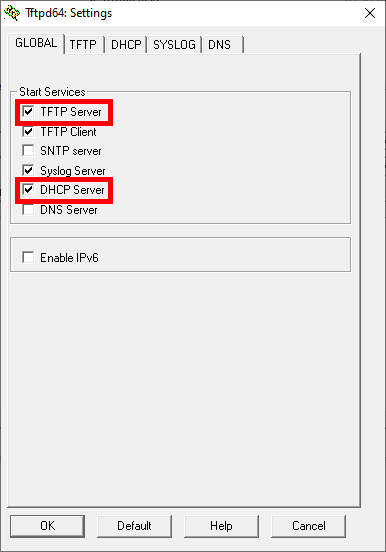
- In the GLOBAL tab, enable the TFTP and DHCP services:
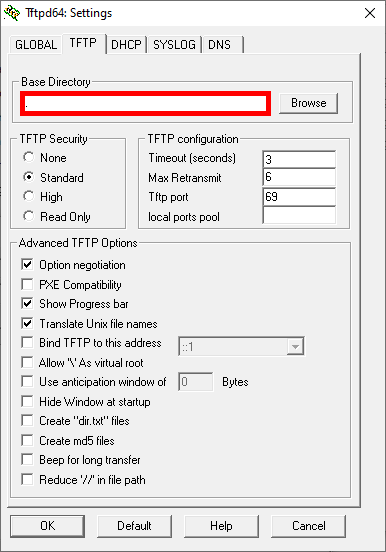
- In the TFTP tab, verify the Home Directory. By default, it points to the uncompressed folder. Click Browse if you want to change it:
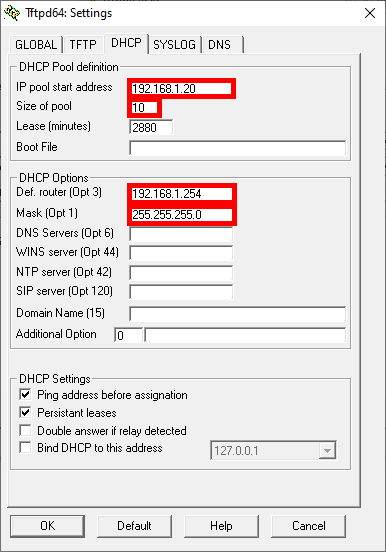
- If you want to configure a DHCP server, open the DHCP tab and set the following parameters:
- IP pool start: first IP address to assign
- Size of pool: number of assignable IPs (e.g., 20 devices from 192.168.1.20 to 192.168.1.39)
- Def. router: gateway address
- Mask: subnet mask
Verification
TFTP
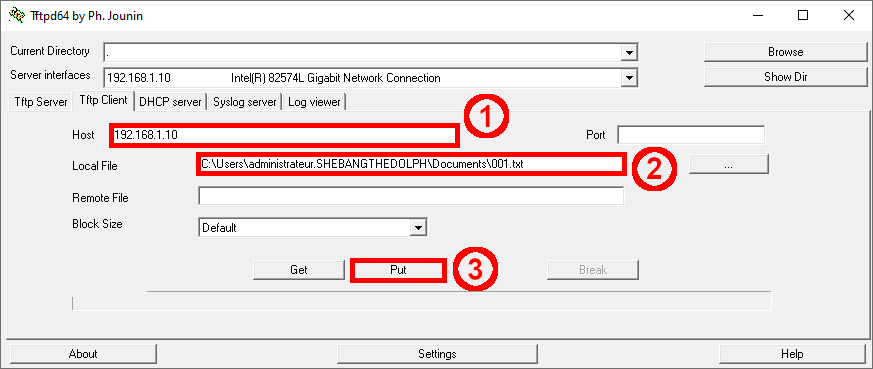
To confirm that the server is running correctly, you can use the built-in TFTP client.
- In the Tftp Client tab, enter the host IP, select the file to send, then click Put:
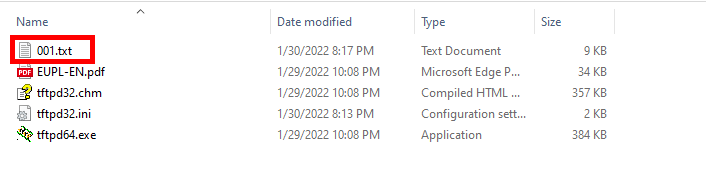
- The transferred file should appear in the directory where
tftpd64.exeis located:
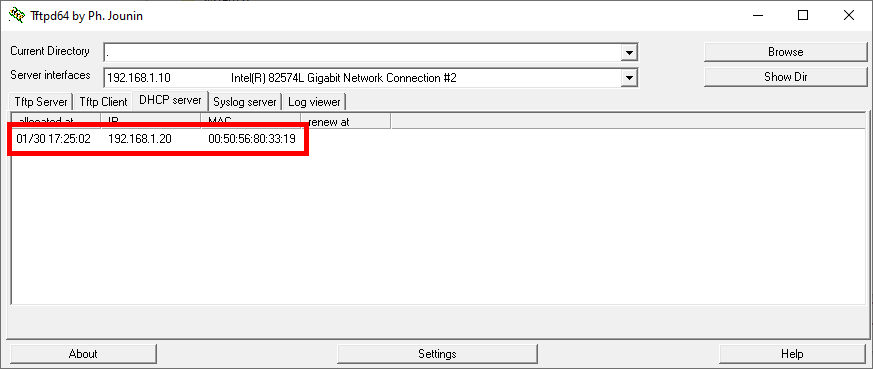
DHCP
- To verify that the DHCP service is working, open the DHCP Server tab. You should see the list of assigned leases: