How to Back Up and Restore Proxmox Virtual Machines with vzdump
- Last updated: Aug 10, 2025
With the release of Proxmox VE 9, I recently had to migrate a server from Proxmox VE 8 to the latest version. I will not detail the migration procedure here, as the official documentation is already very comprehensive: Upgrade from Proxmox 8 to 9. Instead, this guide shows you how to create a reliable Proxmox virtual machine backup with vzdump — and how to restore it using qmrestore — to provide an additional safety net in case of an upgrade failure or other server operation issue. While this is not a replacement for a dedicated Proxmox Backup Server, it serves as an extra layer of protection. I strongly recommend backing up all your virtual machines using this method before performing any major maintenance tasks, ensuring you have a quick recovery solution in case of failure or incident.
This method is also ideal for migrating your Proxmox virtual machines to another server, even without shared storage.
Another key advantage is that the backup file can be exported to any medium, including cold storage, making archiving and future restoration easier.
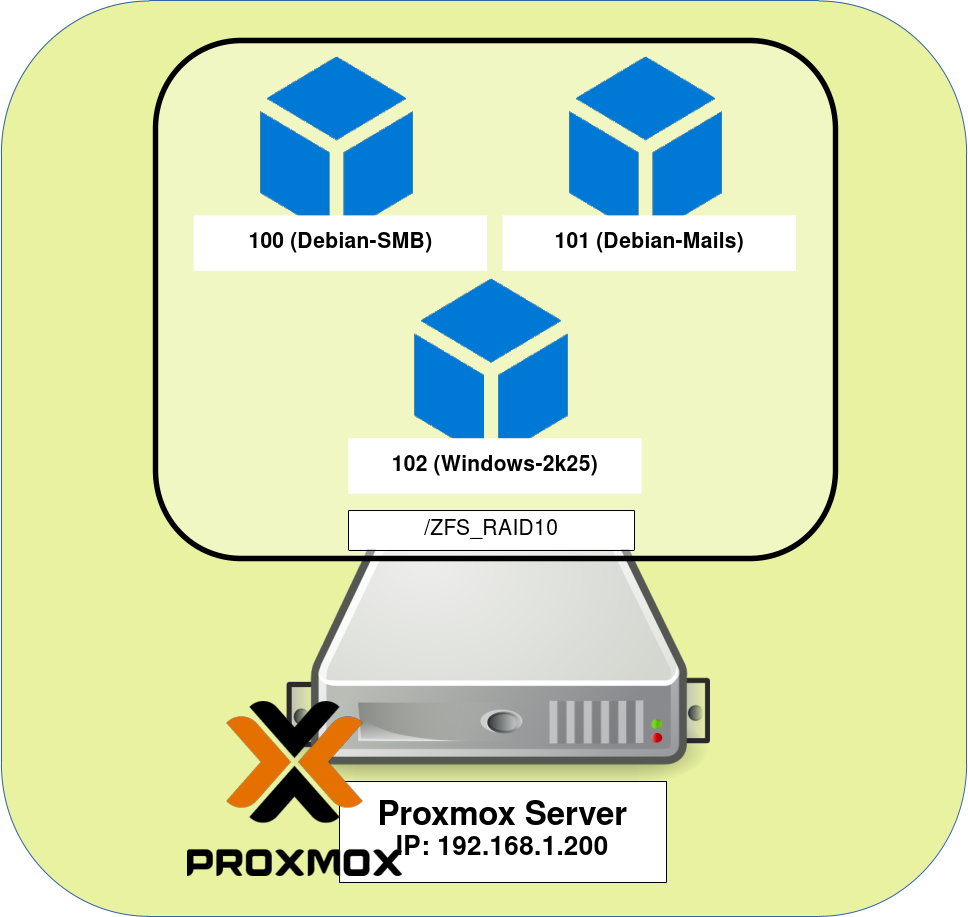
Architecture Overview
Let’s consider the following scenario: a single Proxmox VE server hosting several virtual machines that we want to back up.
Backing Up a Proxmox Virtual Machine with vzdump
Since vzdump is a command-line tool, start by connecting to your Proxmox VE server via SSH as root:
user@host:~$ ssh -l root 192.168.1.200- List all available storage locations and select the one where you want to store your backup. In this example, we will use the ZFS_R10 storage:
root@pve:~# pvesm status
Name               Type     Status           Total            Used       Available        %
ZFS_R10         zfspool     active     15468593152      6815054108      8653539044   44.06%
local               dir     active       756262400        30017152       726245248    3.97%
local-zfs       zfspool     active       812571432        86326156       726245276   10.62%
Next, create a dedicated BACKUP folder inside the ZFS_R10 storage. This folder will store all your virtual machine backup files.
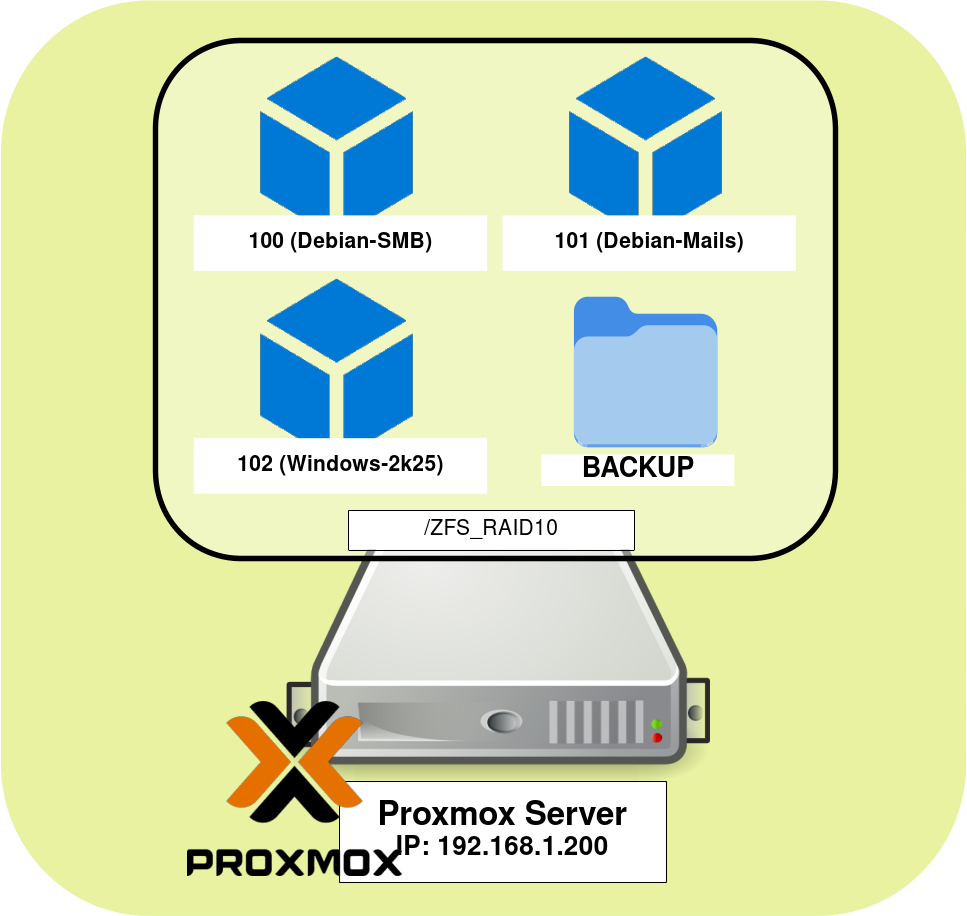
- Navigate to
/ZFS_R10and create the BACKUP directory:
root@pve:~# cd /ZFS_R10root@pve:~# mkdir BACKUP- Now we can run a backup using the
vzdumpcommand. Key options to know:<ID>: the ID number of the virtual machine to back up.--mode: defines the VM state during backup.stop: safest method — the VM is shut down before backup and restarted afterwards.snapshot: creates a live backup using a snapshot (minimal downtime).suspend: pauses the VM during the backup process.
--compress: compression format.zstdis fast and offers good compression ratios.--dumpdir: directory where the backup file will be stored.
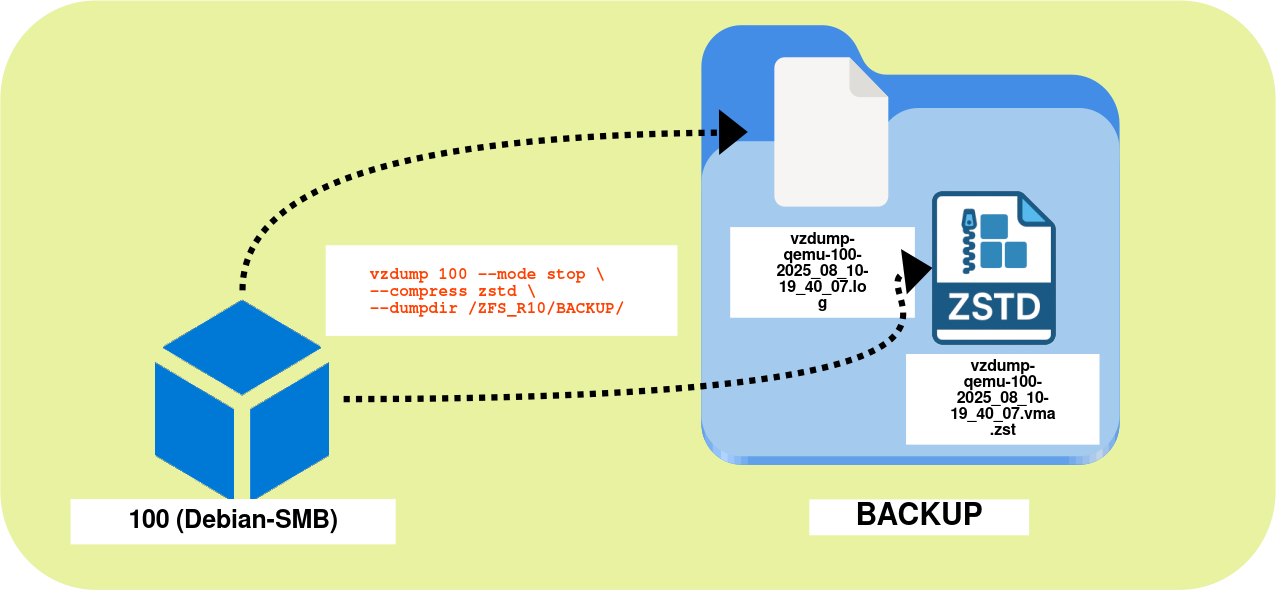
root@pve:~# vzdump <ID> --mode stop --compress zstd --dumpdir <folder>- Example: backing up VM 100 to the
/ZFS_R10/BACKUP/folder:
root@pve:~# vzdump 100 --mode stop --compress zstd --dumpdir /ZFS_R10/BACKUP/The vzdump command will create two files in the target directory:
.zst— the compressed backup archive..log— a log file with details of the backup process.
Once the backup is complete, you can export the BACKUP folder (and its files) to another host using the rsync command:
user@host:~$ rsync -av --progress root@192.168.1.200:/ZFS_R10/BACKUP /home/john/For a detailed guide on rsync usage, see How to Use rsync with Examples.
Restoring a Proxmox Backup
After creating a backup, it is recommended to test it using the qmrestore command to ensure it can be restored successfully.
- The
qmrestorecommand uses the following parameters:<archive>: the full path to the backup file.<vmid>: the (unique) ID for the restored VM. Use--forceto overwrite an existing VM with the same ID.--storage <storage>: the target storage for the restored VM (check available storages withpvesm status).
root@pve:~# qmrestore <archive> <vmid> --storage <storage>- Example: restoring VM 100 as a new VM with ID 500 in the ZFS_R10 storage:
root@pve:~# qmrestore /ZFS_R10/BACKUP/vzdump-qemu-100-2025_08_10-19_40_07.vma.zst 500 --storage ZFS_R10