Step-by-Step Guide: Installing and Configuring Proxmox Backup Server for Secure VM Backups
- Last updated: Feb 4, 2026
So we've seen how to get rid of Broadcom VMware in these series of brilliant tutorials: the installation of Proxmox PVE here, the creation of virtual machines in this article and also the full procedure of the migration of VMware ESXi virtual machines to Proxmox: here.
But what about the backup? Is it possible to also get rid of Veeam Backup? Well, Proxmox also offers a turnkey solution for backing up a Proxmox VE environment. I've got nothing against Veeam Backup for now, but I see a slow drift, as we've seen with other software: the move to subscription-based licensing and increasingly cumbersome software. So it could be a good idea to change your backup solution now, and that's precisely the aim of this tutorial: to talk about setting up Proxmox Backup Server, the official backup solution for Proxmox VE.
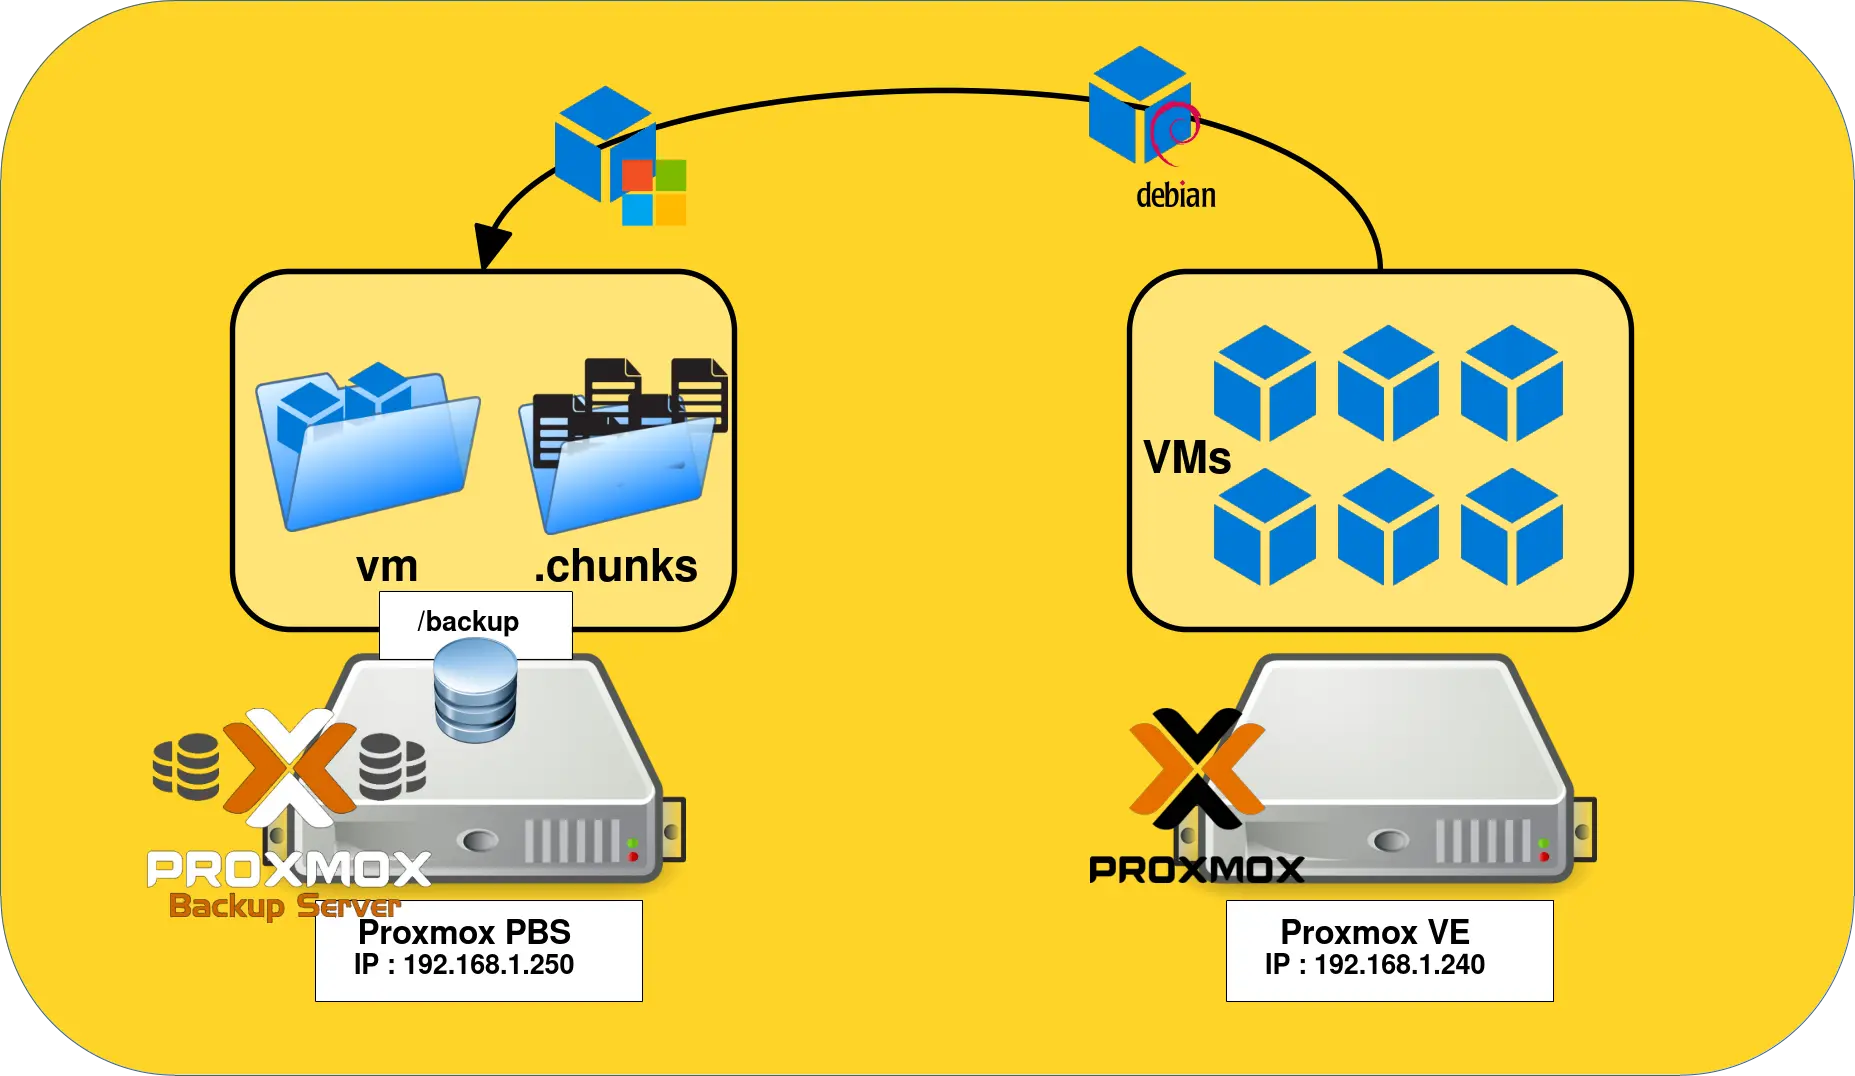
Architecture overview
Let's say we are in an architecture with one Proxmox VE where some virtual machines are running. We will install the Proxmox Backup Server on another machine in the same network.
Installation
Download the ISO
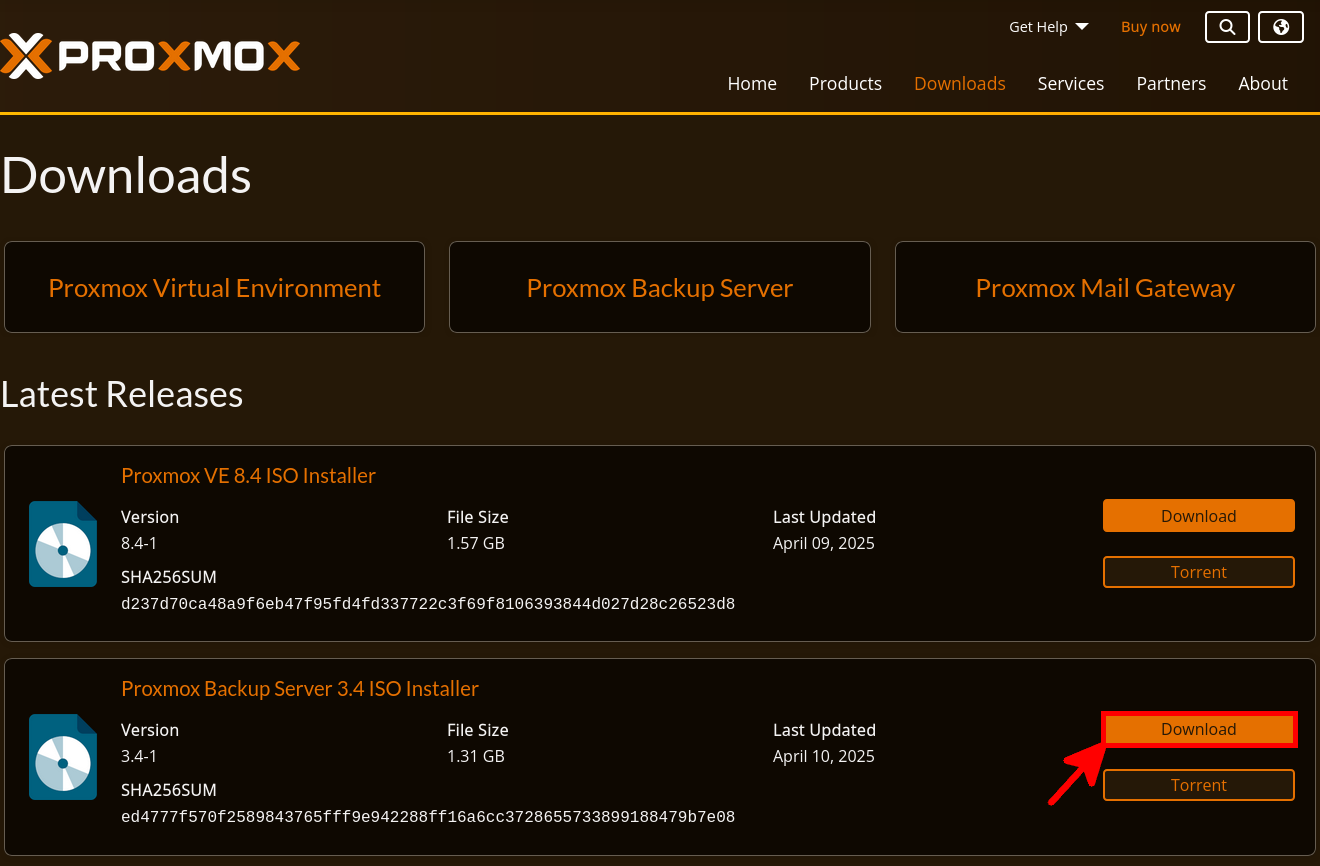
As with Proxmox Virtual Environment we need to download the ISO from the official Proxmox website: https://www.proxmox.com/en/downloads. From there we have to download the Proxmox Backup Server ISO Installer.
Next, you can either burn a CD (do we still do that?), use a USB tool like Rufus, create a bootable drive with dd on Unix-like systems, or mount the ISO via iDRAC Enterprise Manager if installing on a Dell server (which is my case!). Many examples of media preparation on the official wiki: https://pve.proxmox.com/.
Installing Proxmox Backup Server
Let's move on to installation. As with Proxmox VE, this is a fairly straightforward process.
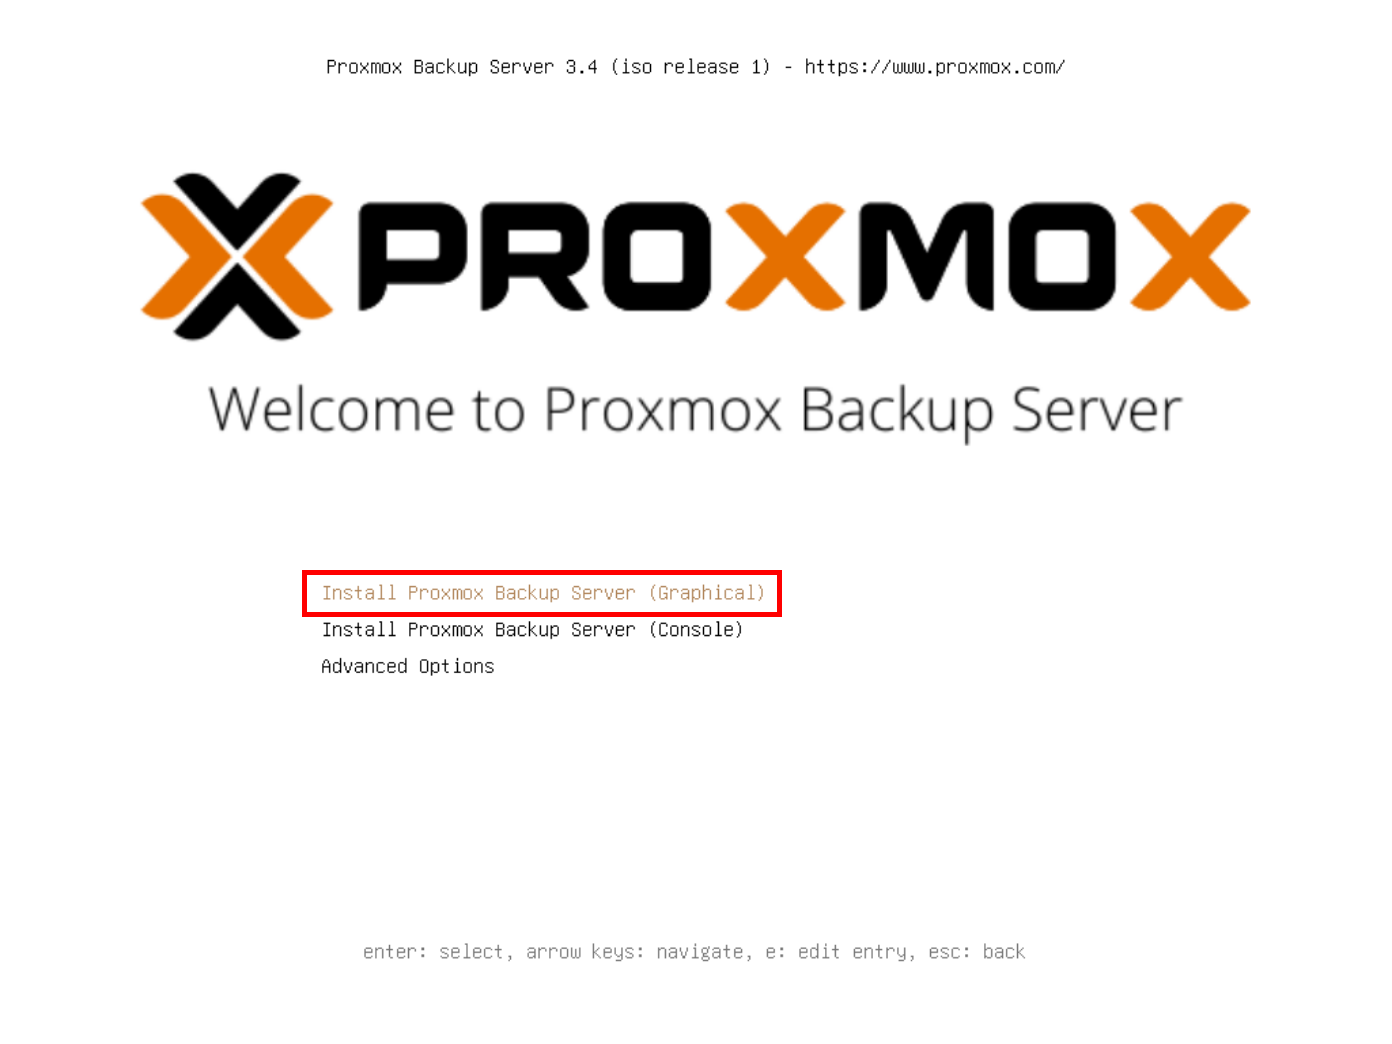
- Once started on our media, the Proxmox welcome menu should appear. Select Install Proxmox Backup Server (Graphical):
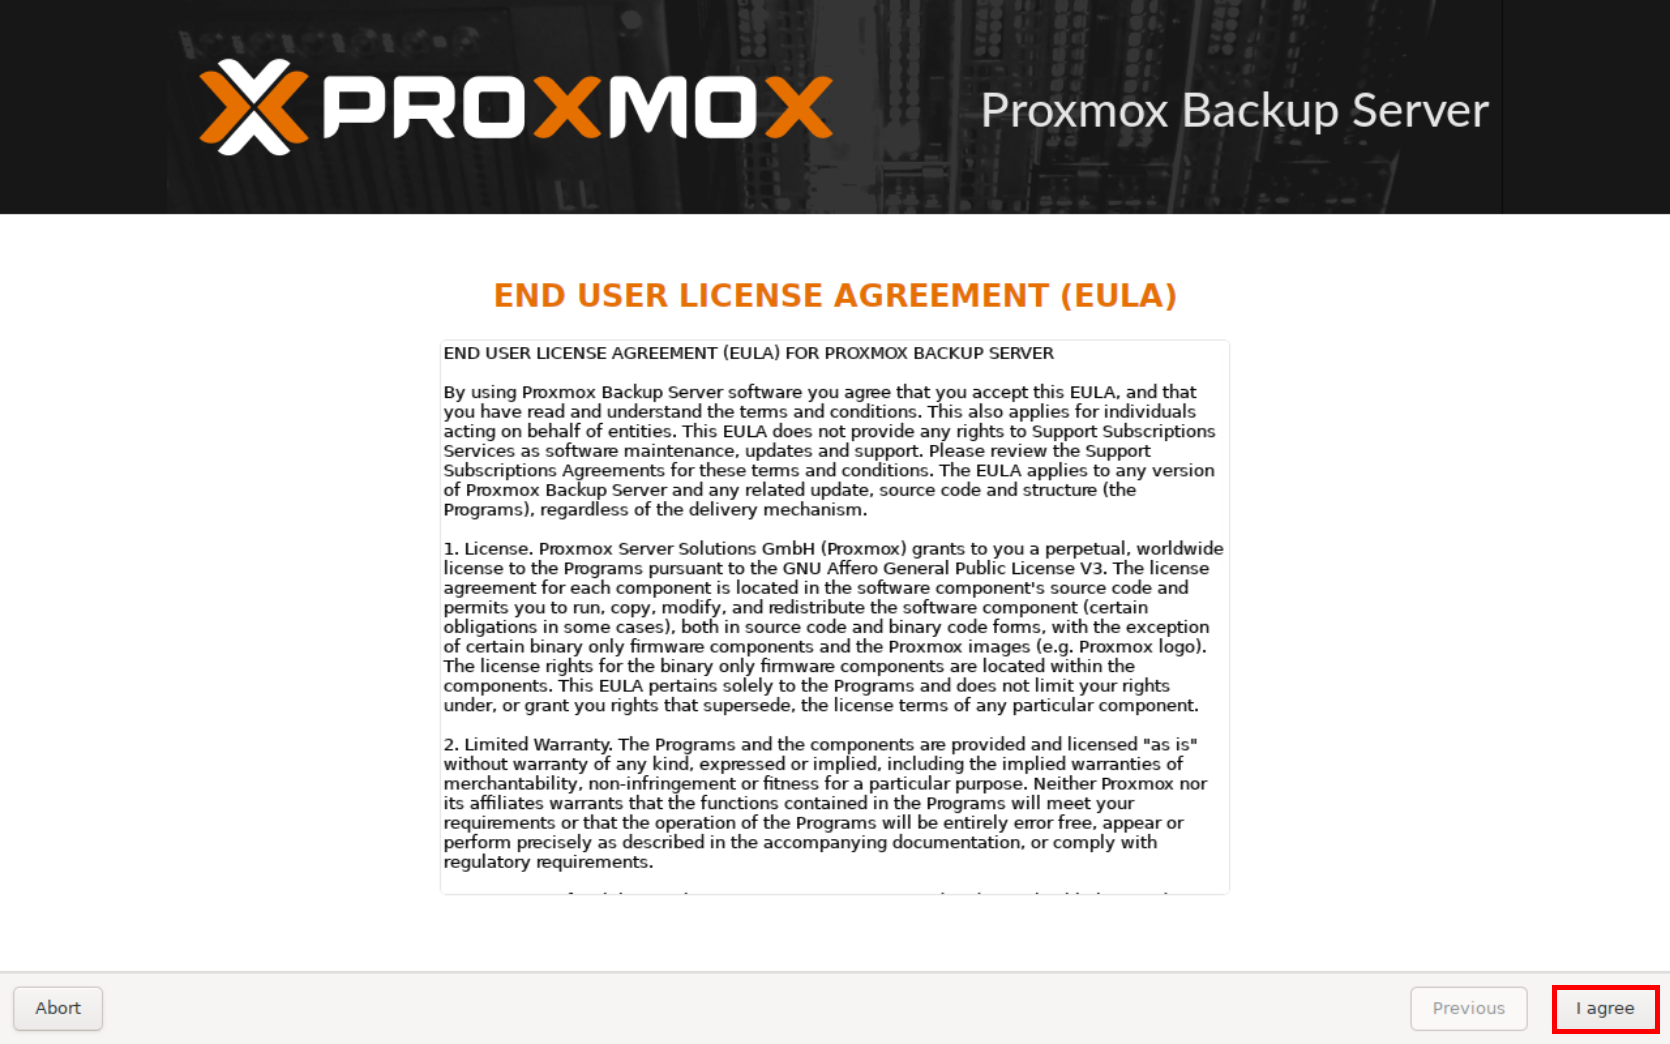
- Read the EULA if you have the time and accept by clicking on I agree:
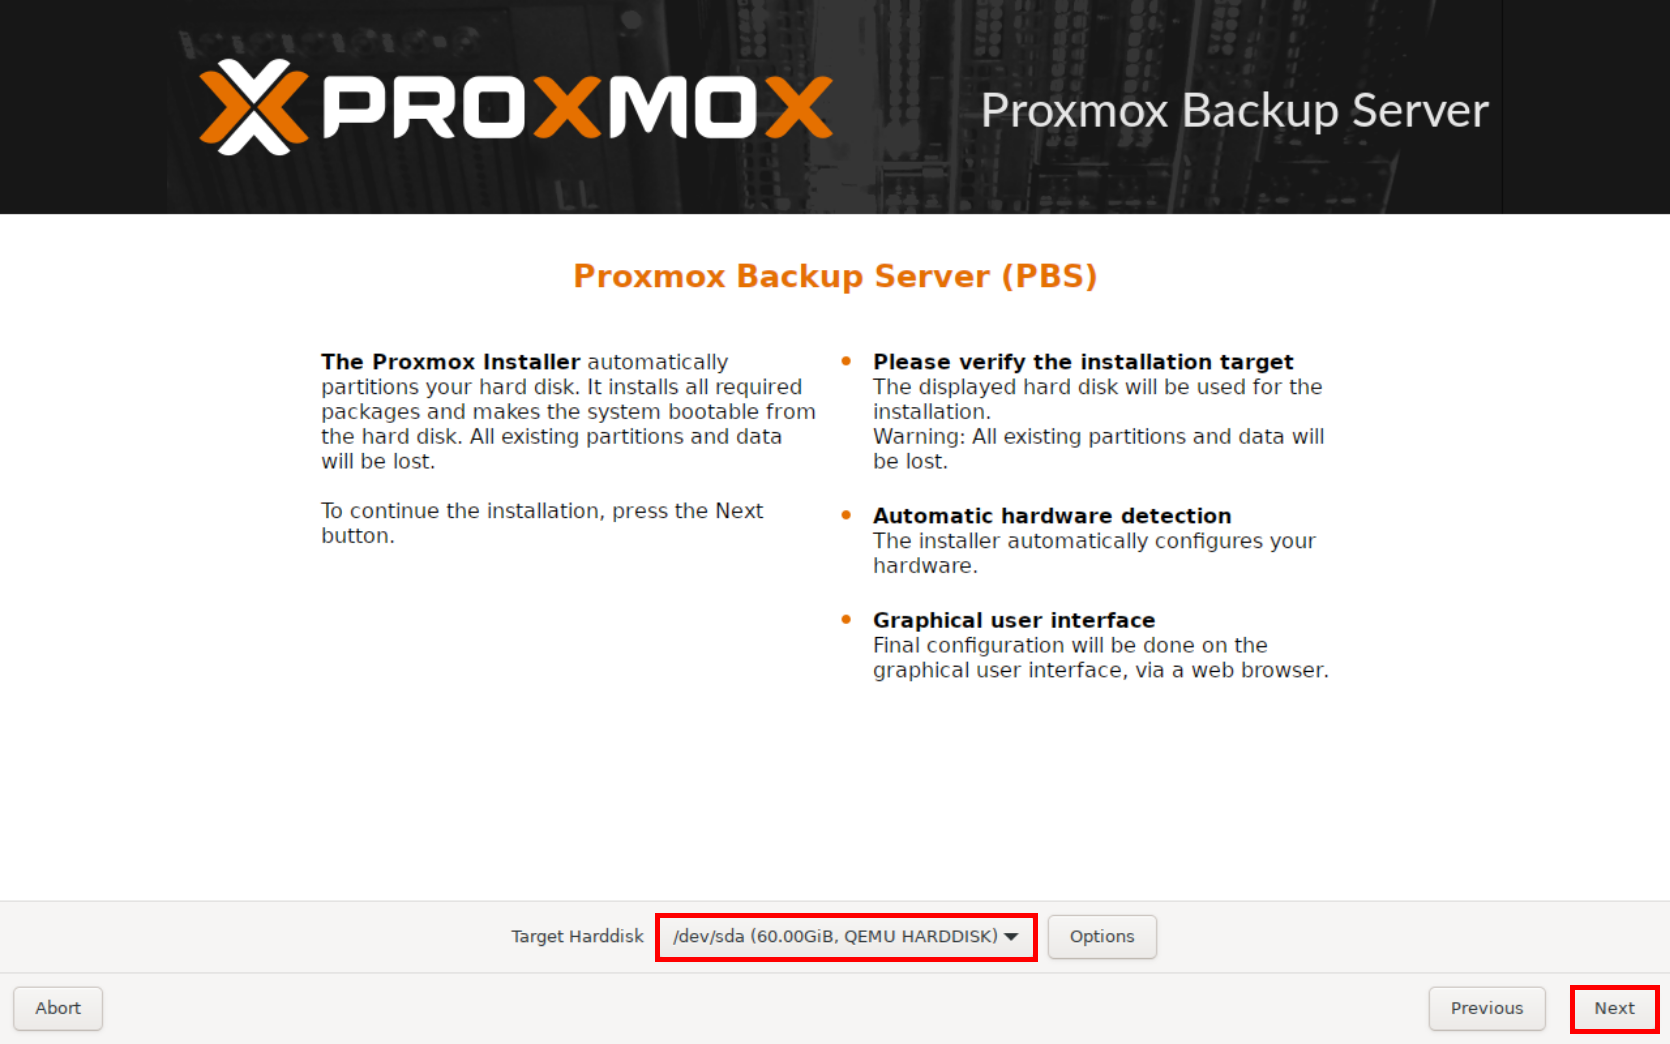
- Select the target hard disk and click on Next:
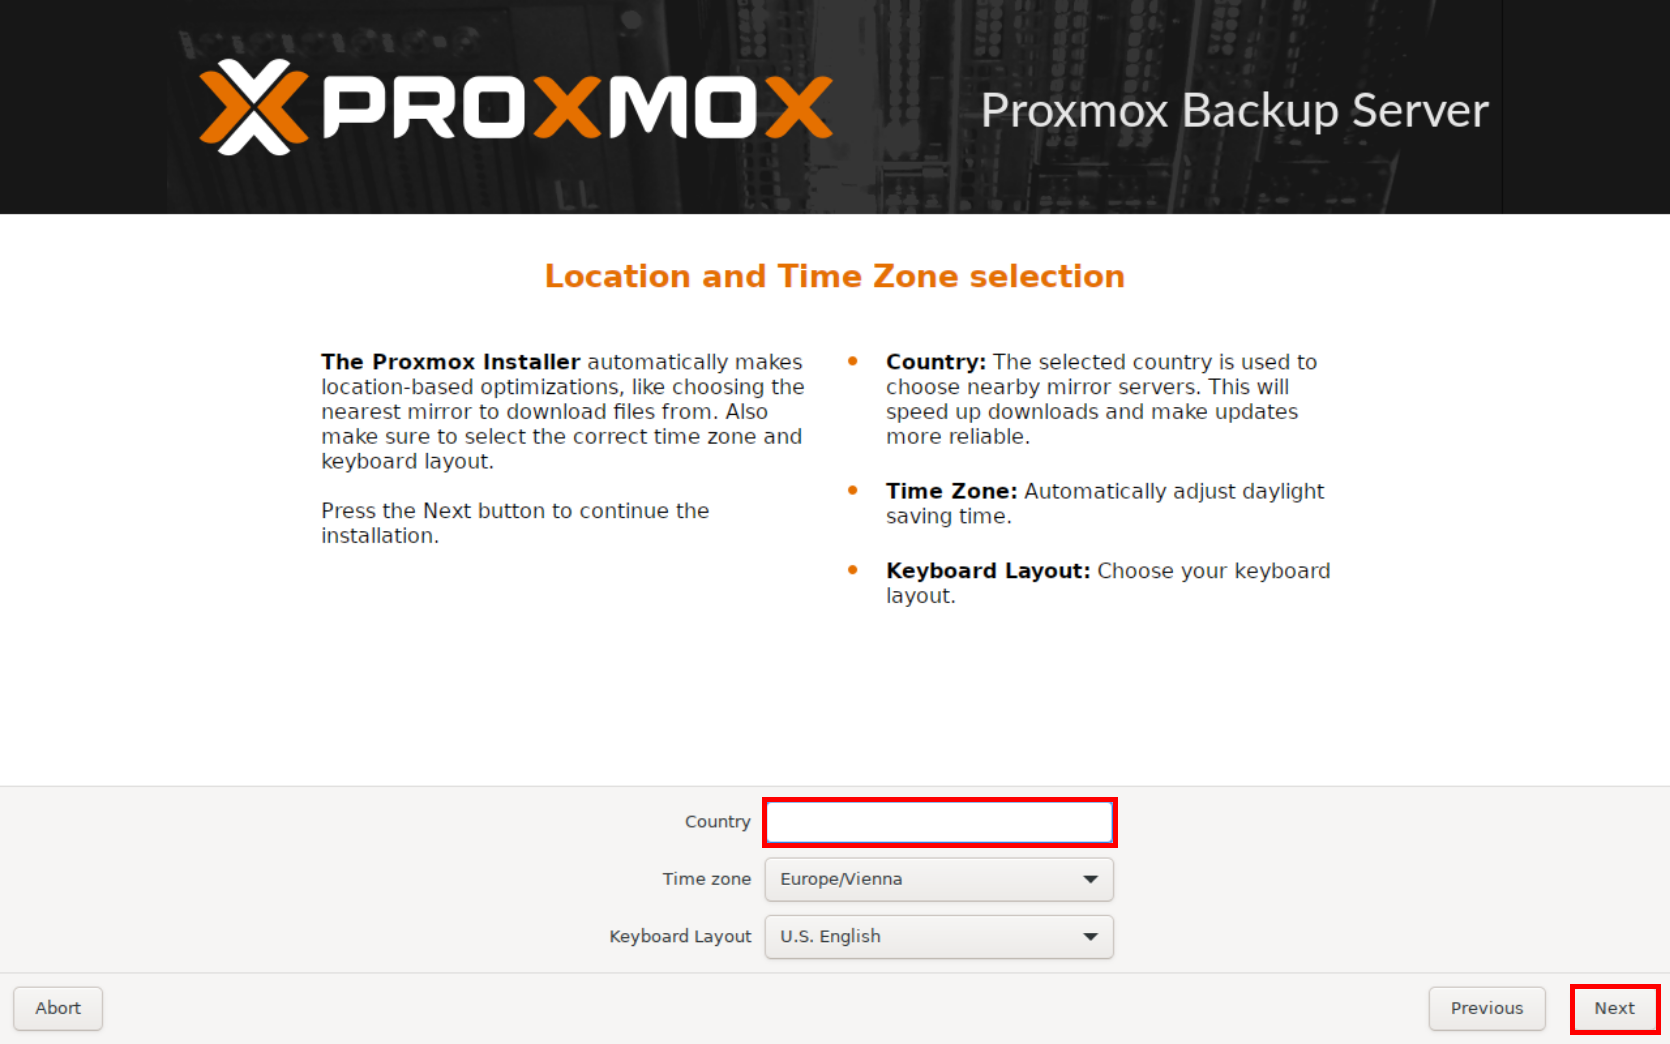
- Enter country and select time zone and keyboard layout:
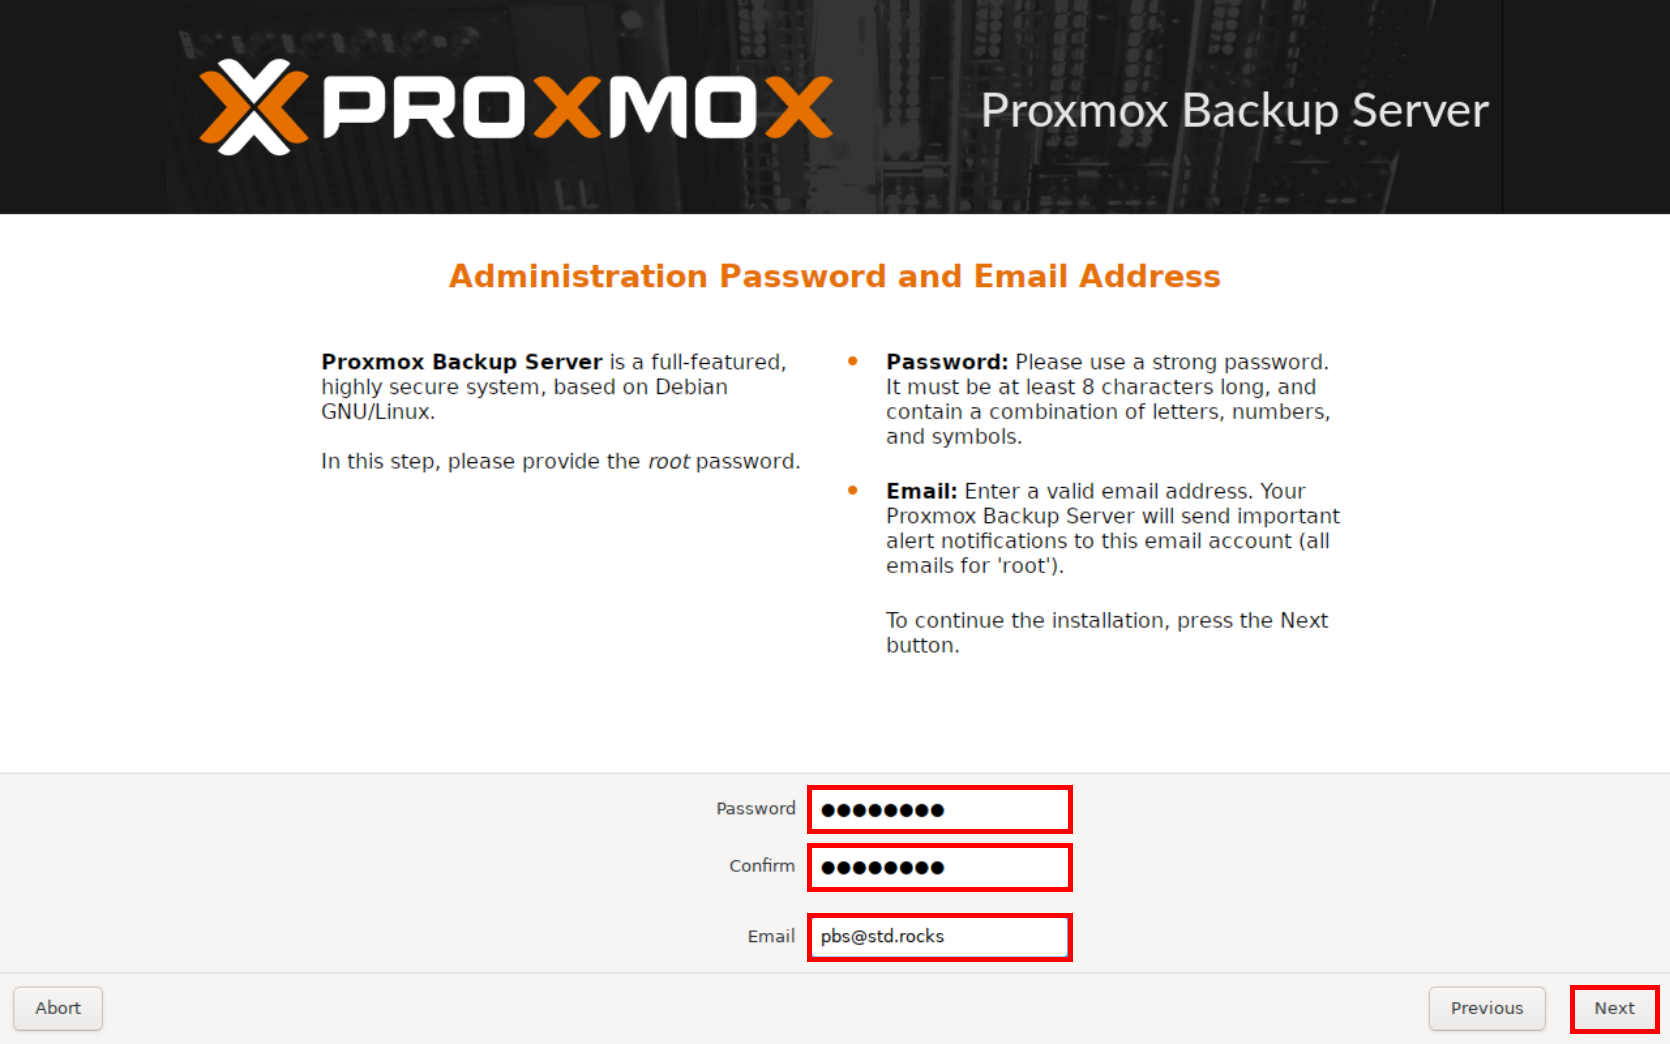
- Set a strong password for the root user and enter an e-mail address:
- Select the physical network card and IP configuration you wish to give to the management interface:

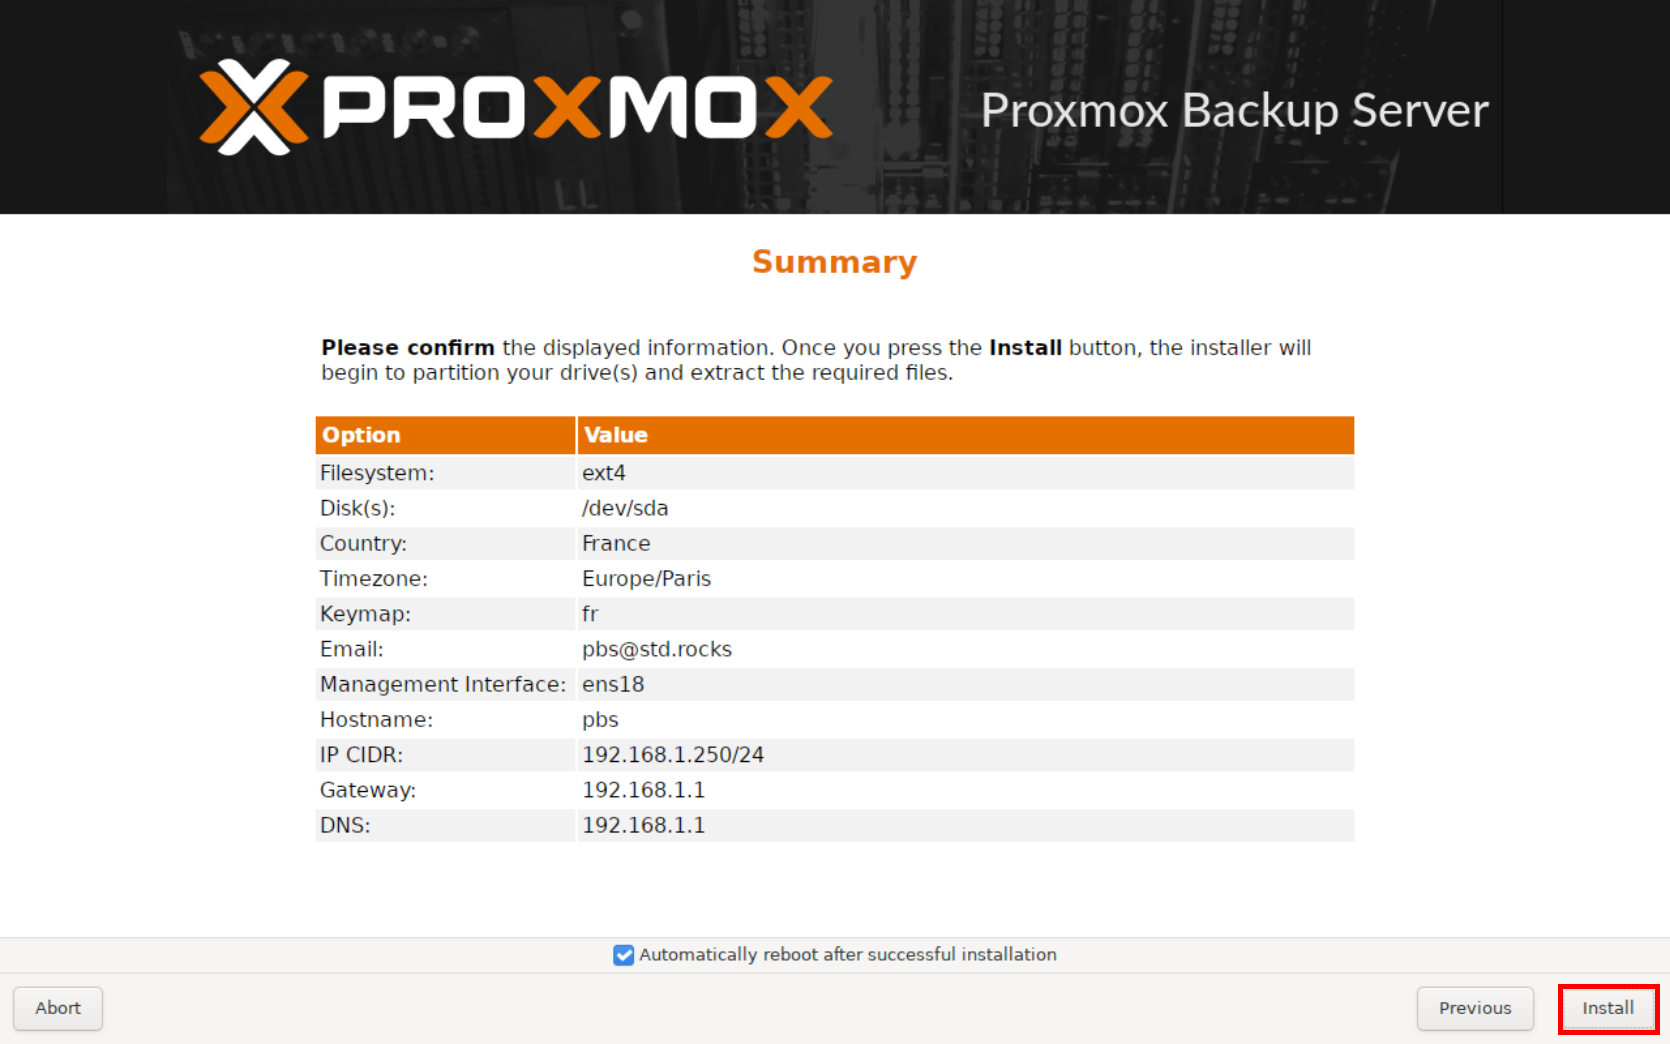
- Check the information displayed and click on Install to start Proxmox VE installation. Once installation is complete, the system automatically reboots:
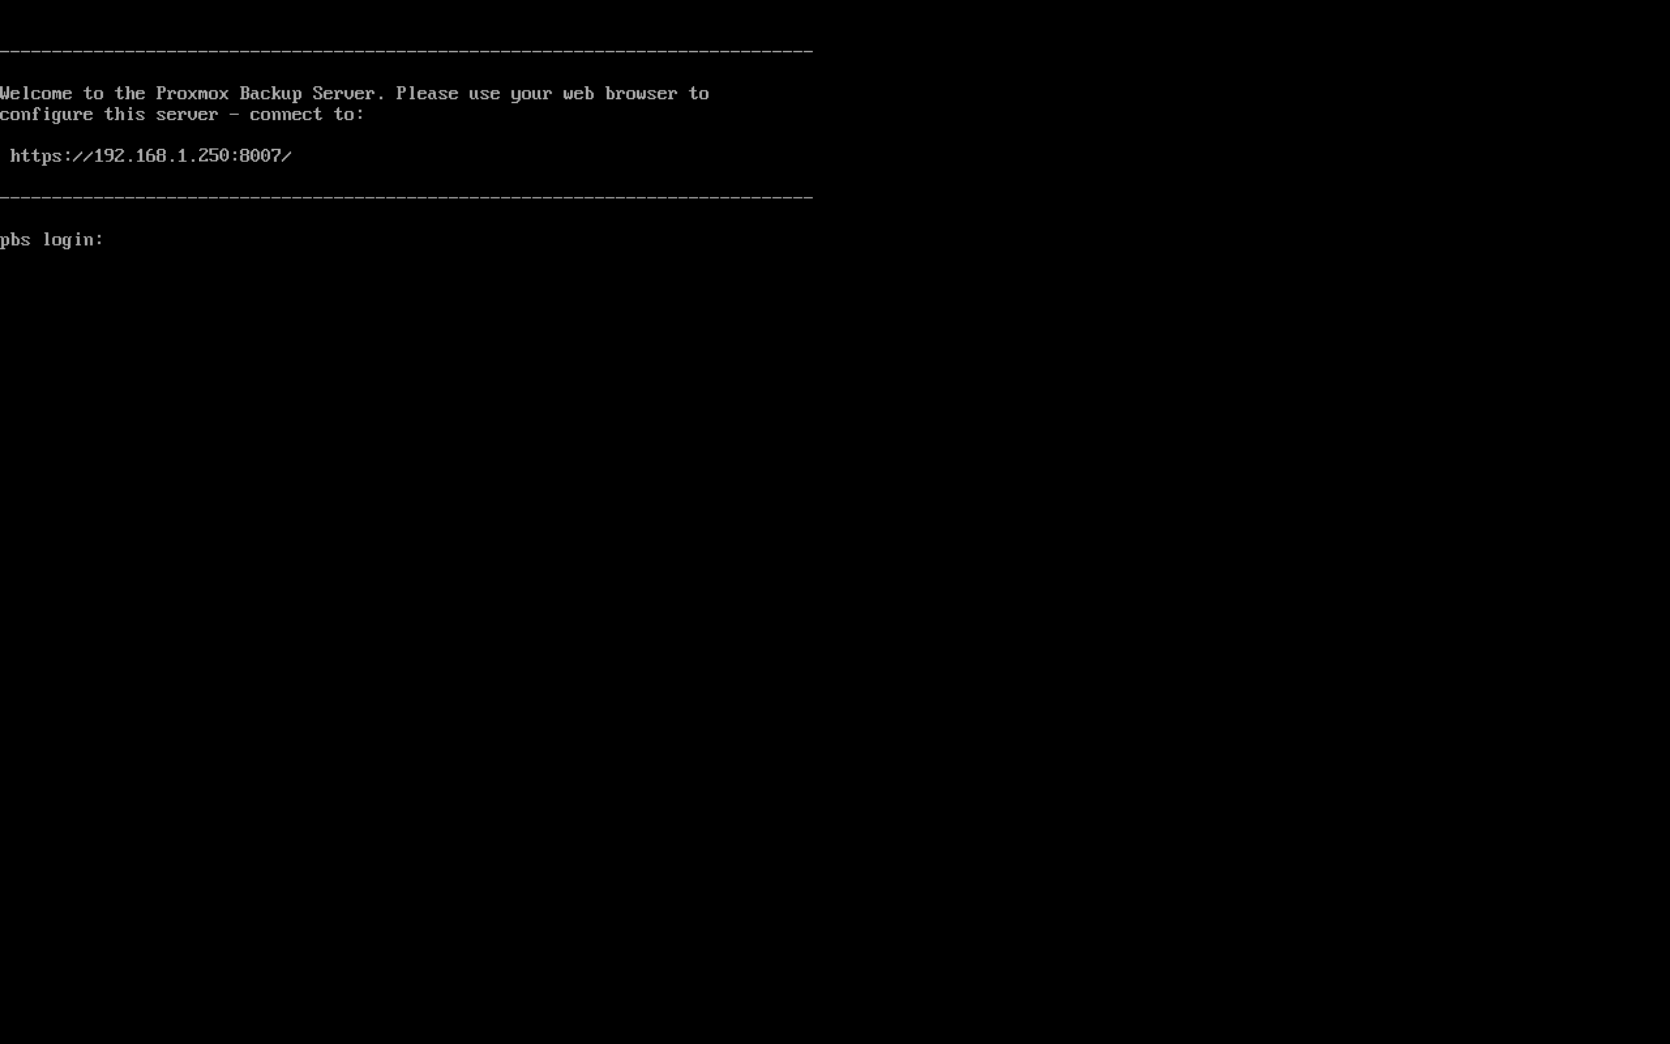
- Once restarted, Proxmox Backup Server will prompt you to connect to the web interface on the address you defined earlier and on port 8007:
Connecting to the Web interface
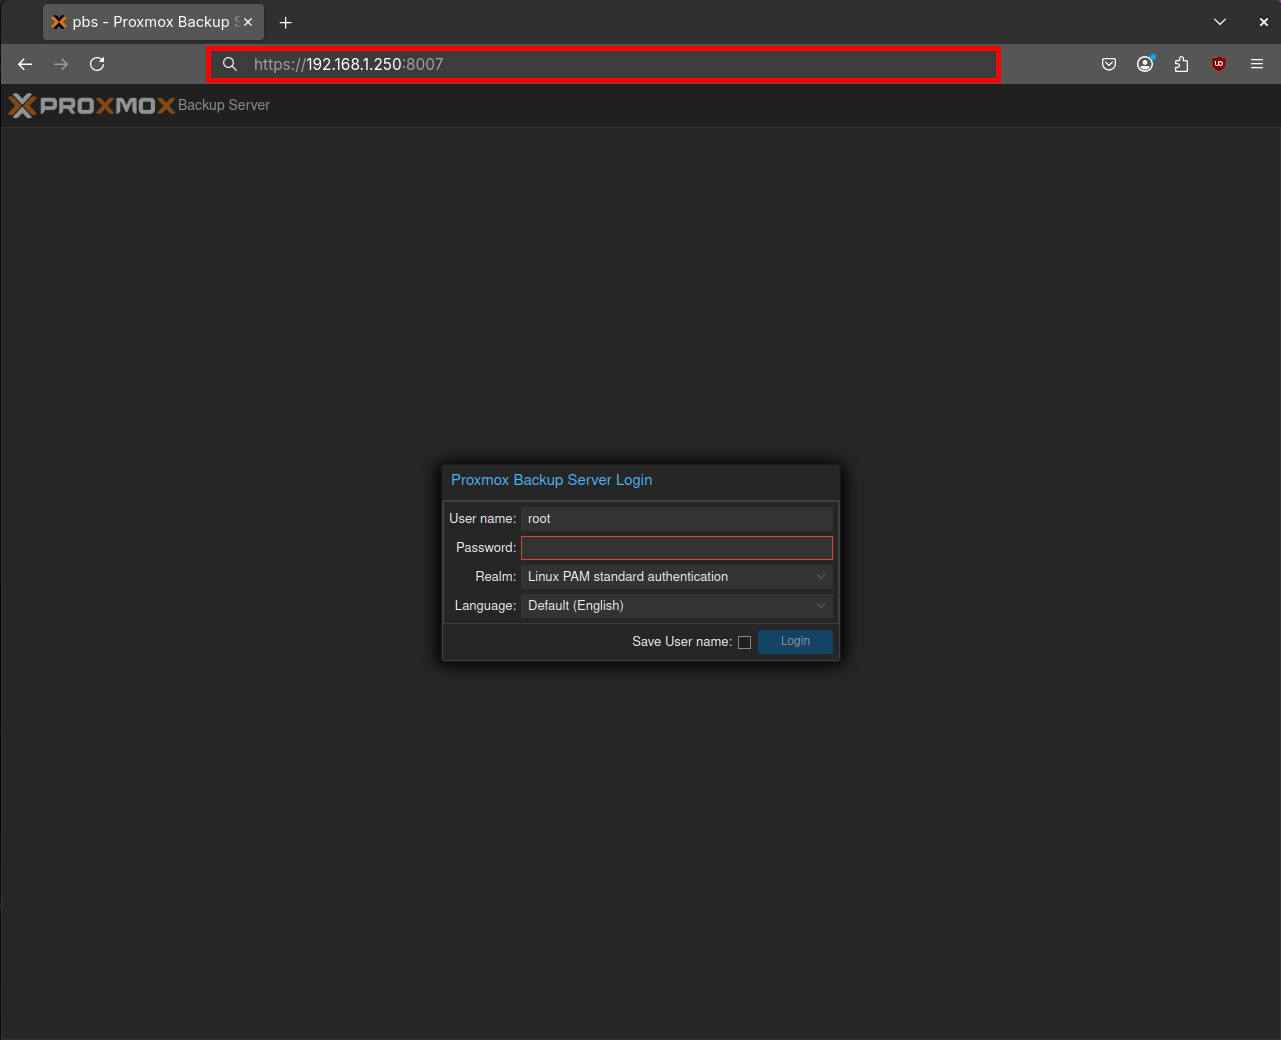
- Open a web browser and access the Proxmox administration interface using the address you specified above:
Post Installation
Add No-Subscription repository
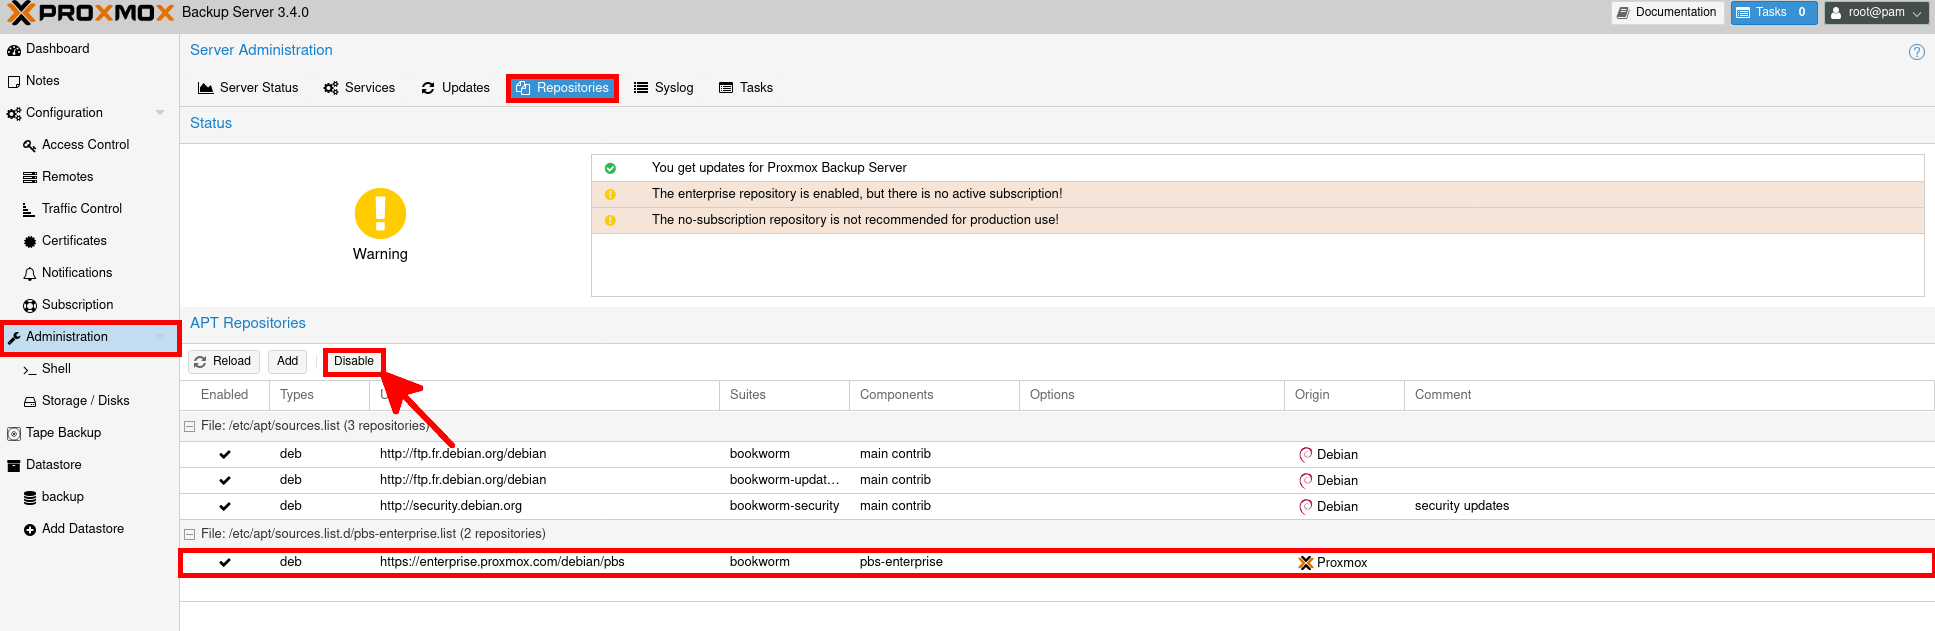
If, like me, you don't have a subscription, you may want to disable enterprise repositories (which needs valid licensing) and enable no-subscription repositories.
- Go to Administration. In the Repositories menu, click on the enterprise repository line and click to the Disable button:
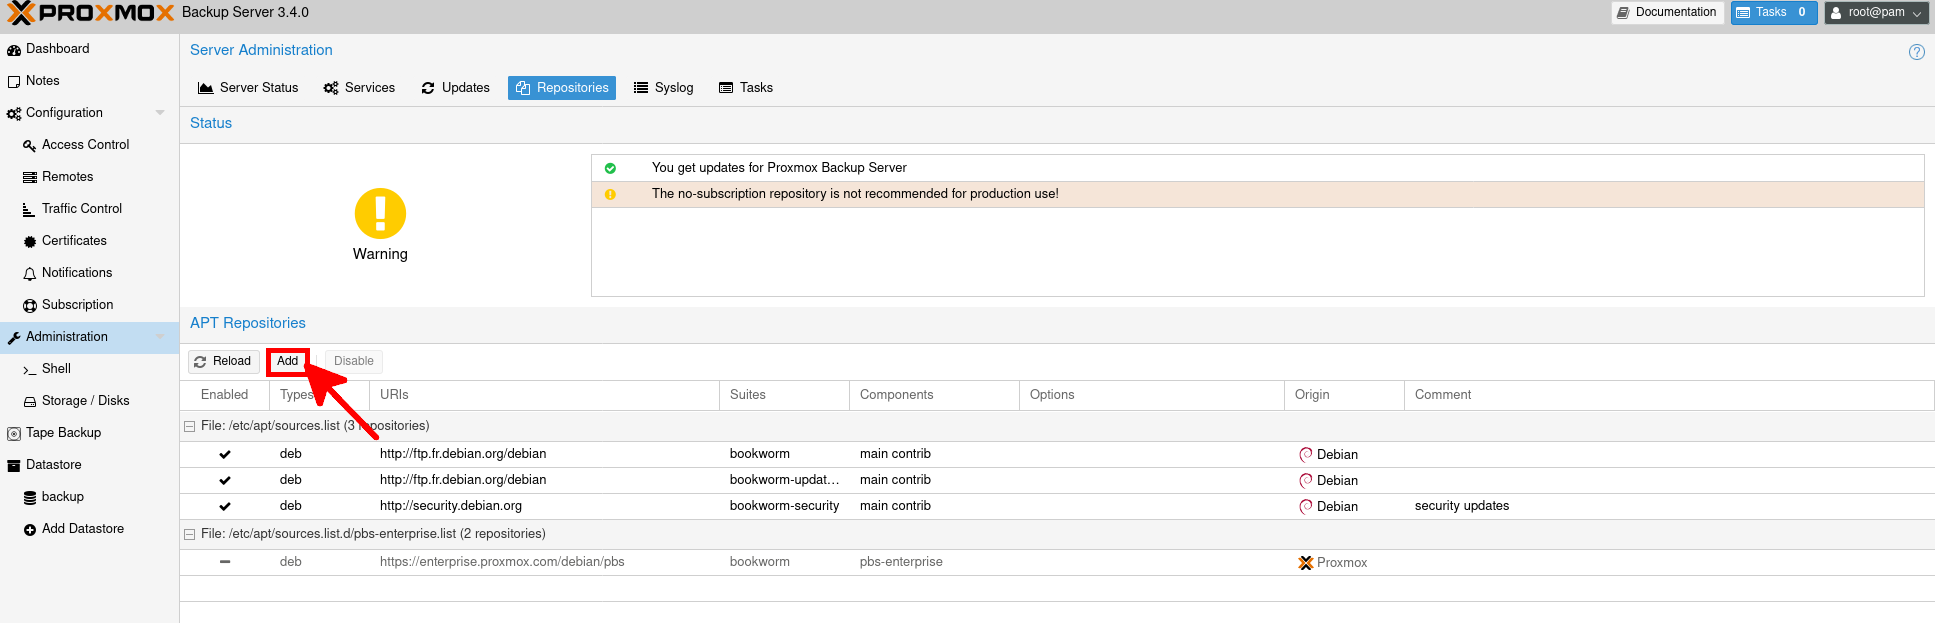
- Click the Add button:
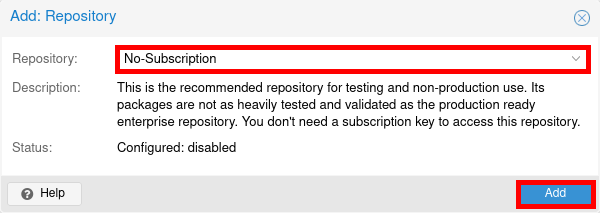
- Select No-Subscription and click Add:
- Go to the Shell menu and run an upgrade:
root@host:~# apt update && apt full-upgrade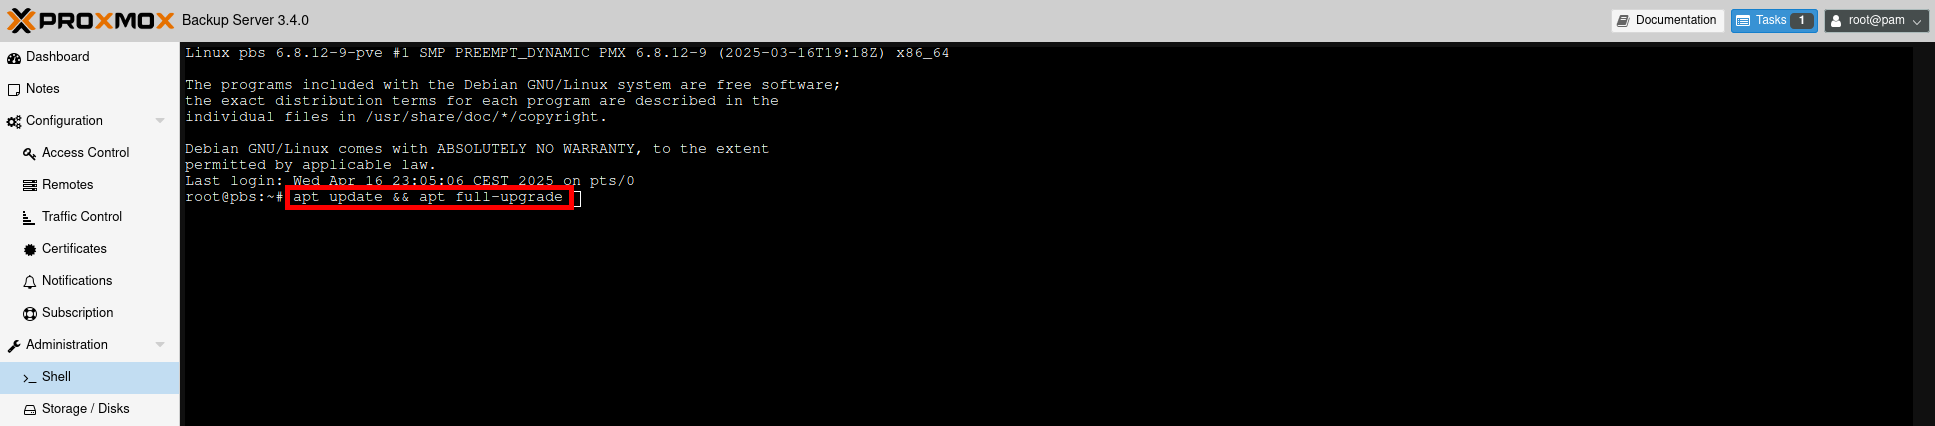
- Then create a
/backupfolder in which the backups will be placed:
root@host:~# mkdir /backupAdd backup user
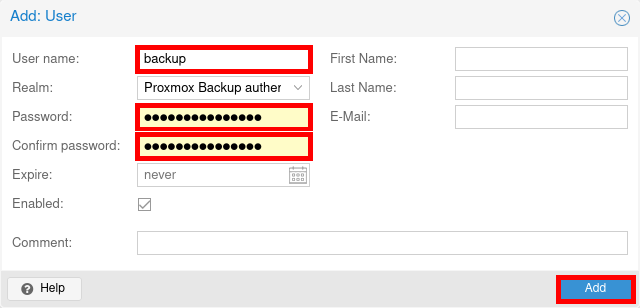
For security reasons, we don't want to use the root user to make backups, so we'll create a user with restrictive rights dedicated to this task.
- Go to Access Control menu and click on Add:

- Enter a username, set a complex password and click on Add:
Add Datastore
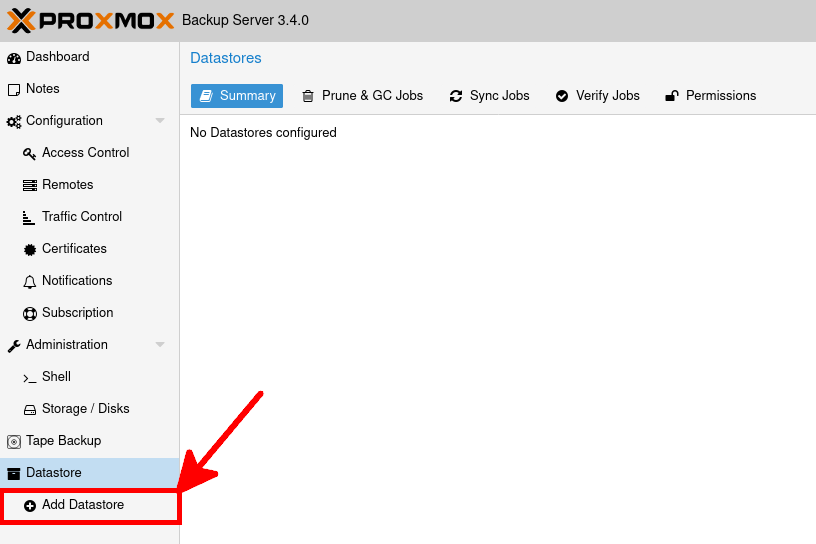
Now we need to declare a datastore in order to indicate to Proxmox Backup Server where to put the data.
- Click on Add Datastore:
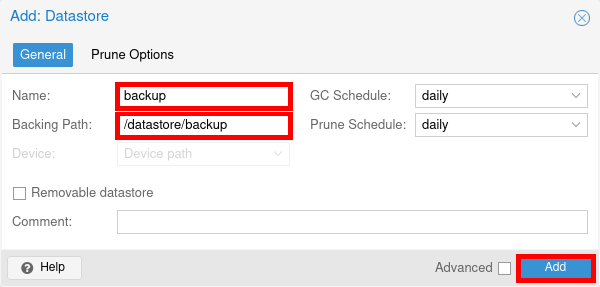
- Give the datastore a name and specify the path, here /datastore/backup for our /backup folder previously created:
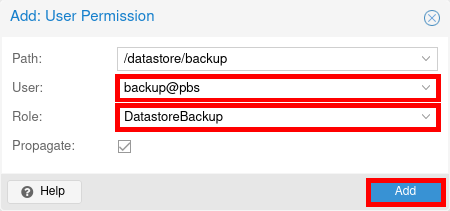
- Select the newly added datastore. In the Permissions tab, click Add > User Permission:
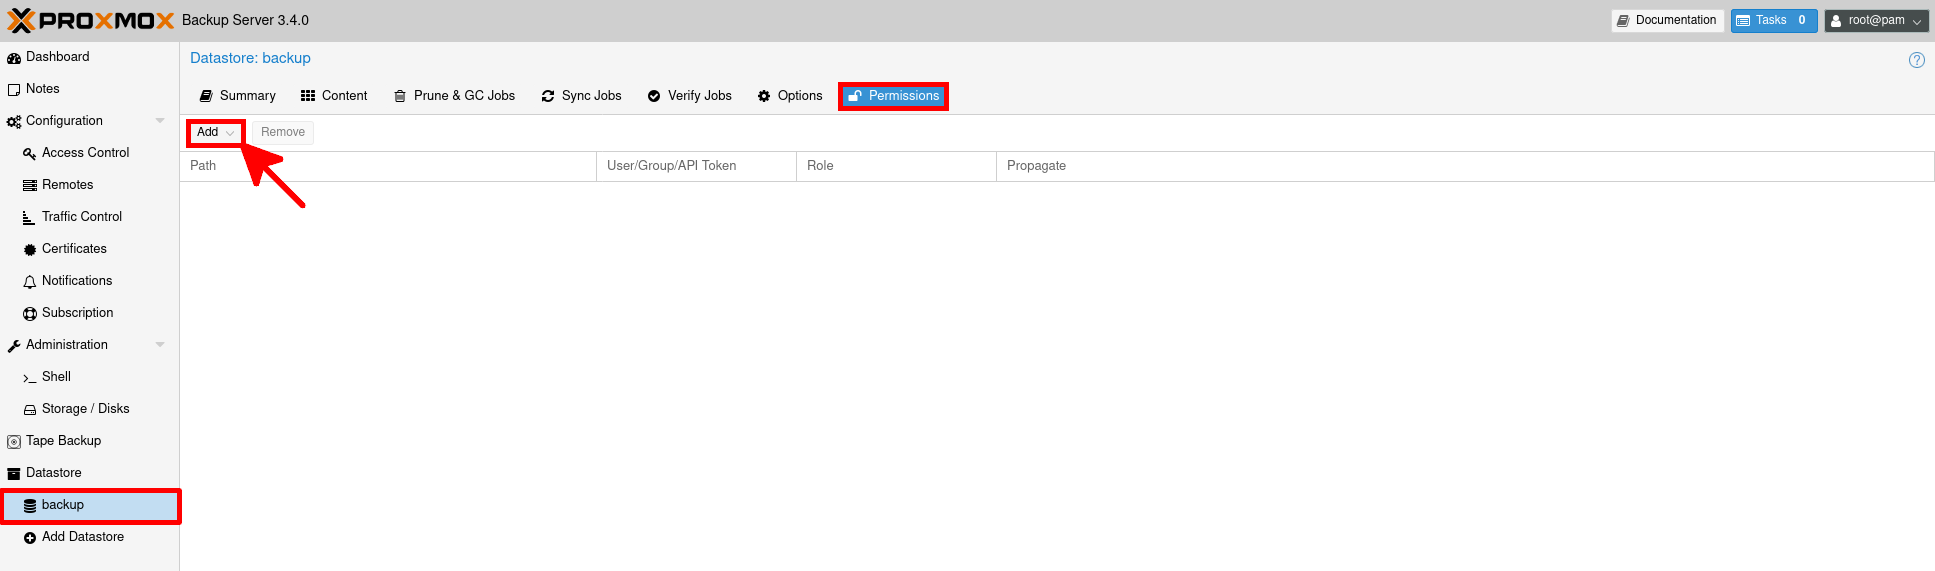
- Select newly created backup@pbs as user. For role, select DatastorePowerUser for minimum rights:
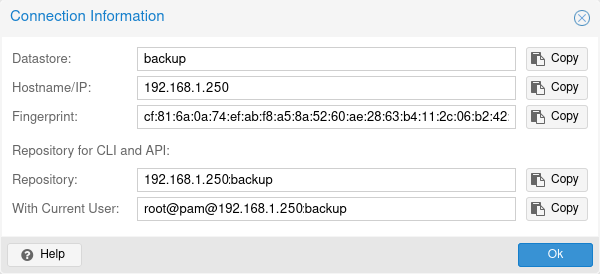
- Finally, go to the newly declared datastore and click on Show Connection Information:
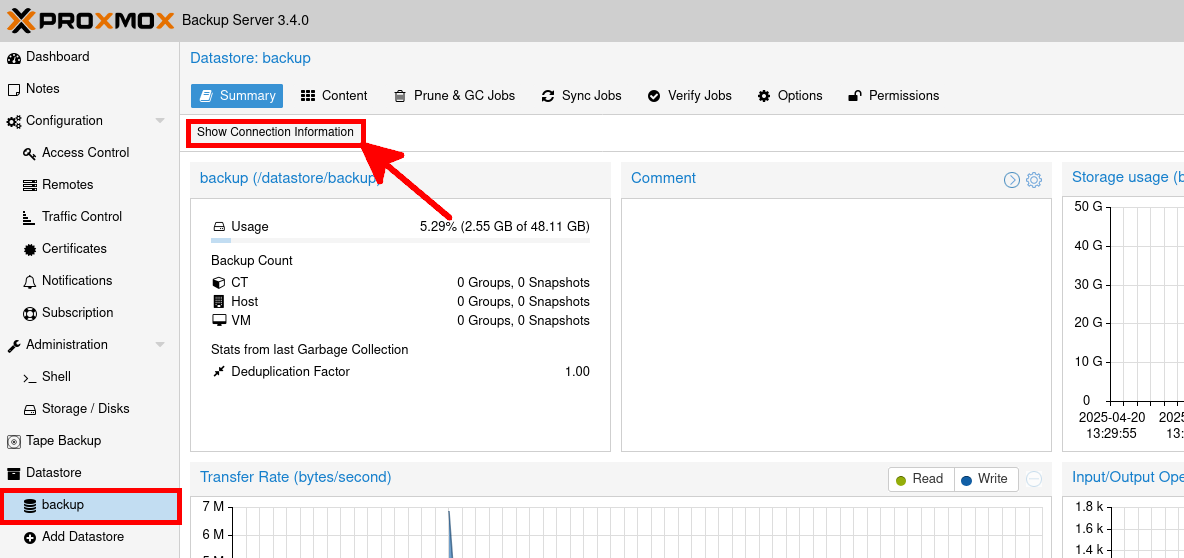
- It will print all the information we will need to add the datastore to our Proxmox VE:
Proxmox VE
Add PBS
We are now going to declare our Proxmox Backup Server datastore to our Proxmox VE.
- Connect to your Proxmox VE web interface and go to Storage. From there click on Add > Proxmox Backup Server:

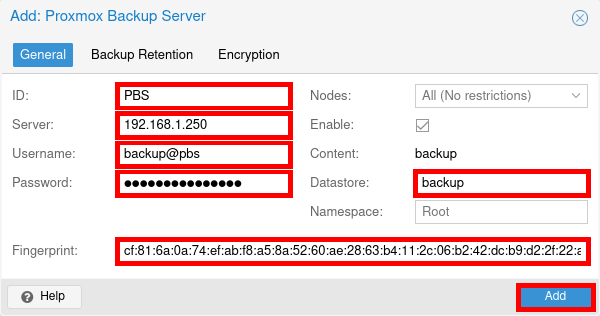
- Set the following information based on the data retrieved earlier:
- Name: Define a name of your choice.
- Server: IP or name of the PBS server. Note that you can specify the TCP port.
- Username and Password: Enter the IDs of the backup user previously set.
- Datastore: The name of our PBS datastore.
- Fingerprint: Copy and paste the Fingerprint of the PBS server.
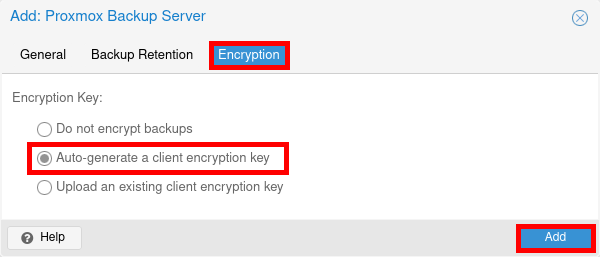
- Optionally (but recommended) you can set Encryption in order to protect your backup. Select Auto-generate and click on Add:
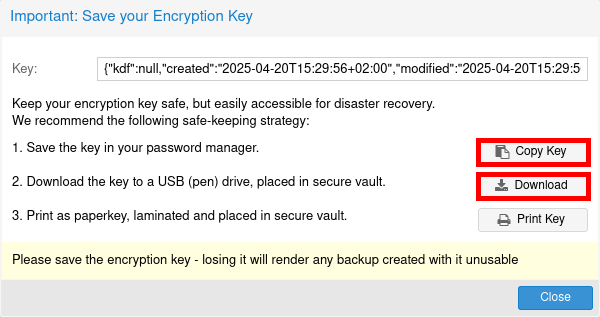
- Follow recommendations by saving the key:
- You should now be able to back up any virtual machine to your Proxmox Backup Server:

Schedule Backup
Now it's time to configure our backup in order to automatically save our virtual machines.
- Navigate to Datacenter > Backup and click on Add:

- Create a Backup Job with the following parameters:
- Storage: the Proxmox Backup Server previously set.
- Schedule: Here for example, every day at 2:00 AM.
- Selection mode: VMs that are selected.

Backup Maintenance
Now that our backups are configured, we’ll look at two additional—but recommended—tasks to enhance reliability: pruning and backup verification. In this example, we’ll schedule a daily pruning job to keep the last 15 backups, as well as a daily verification task to ensure backup integrity. Both actions require access to the Proxmox Backup Server (PBS) interface.
Configure Retention (Pruning)
To avoid excessive disk usage, it's important to prune old backups on a regular basis.
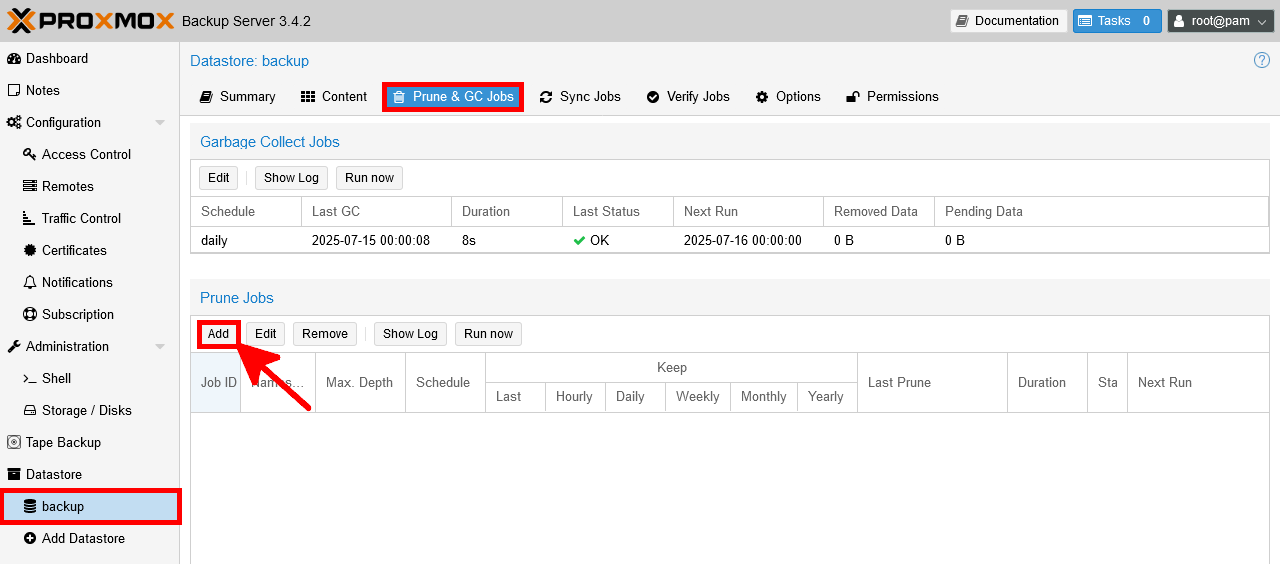
- Head to the datastore containing your backups and open the Prune & GC Jobs tab. Under Prune Jobs, click Add to create a new pruning rule:
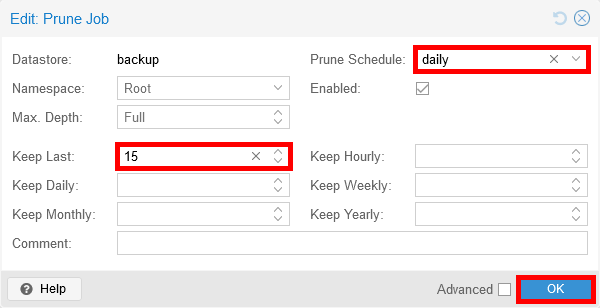
- Set the retention policy according to your needs. In this example, we keep the last 15 backups and schedule pruning to run daily. Once configured, click OK to save.
Enable Backup Verification
To ensure your backups remain consistent and restorable, you can schedule regular backup verification.
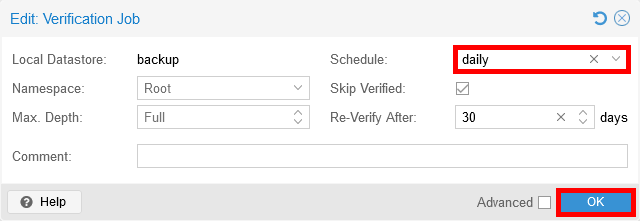
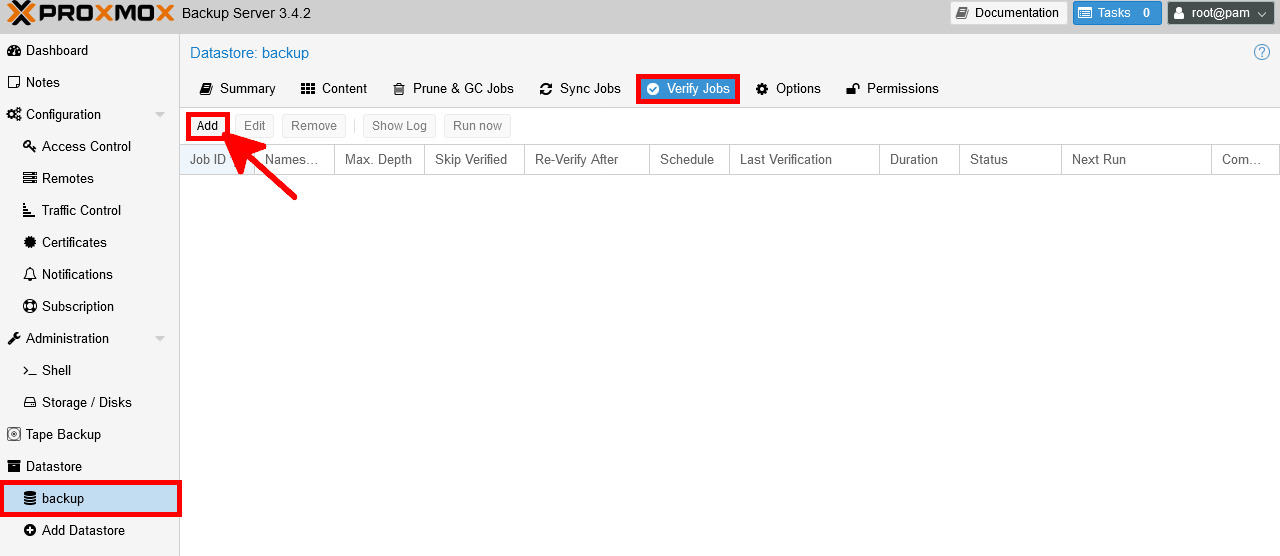
- Go to the Verify Jobs tab and click Add to create a new verification task.
- You can customize the schedule and verification interval as needed. For example, you may choose to run it daily and re-verify backups every 30 days. When you're done, click OK to apply the settings.