Configure RADIUS and VLANs on Cisco Switch with NPS Server
- Last updated: Oct 22, 2024

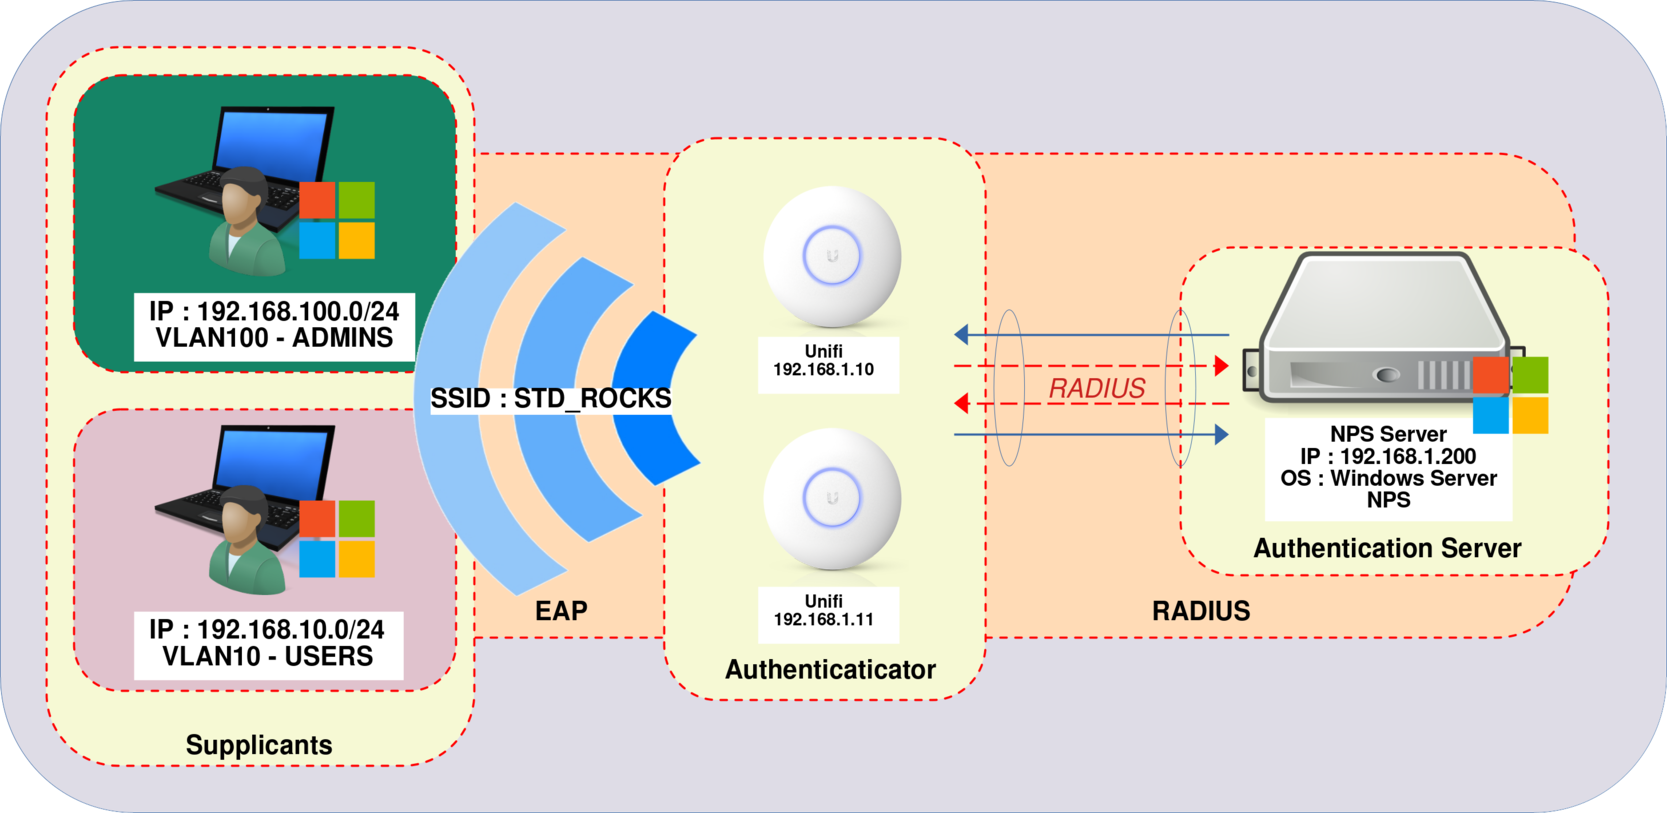
I have elegantly shown how to set up a WPA Enterprise architecture using PEAP-MSCHAPv2 🤢 and EAP-TLS 🥰. The configuration works without a hitch. However, in my network, there are different user profiles for Wi-Fi access, each requiring access to specific VLANs. But how can I ensure that some users are directed to the ADMINS VLAN, while others are assigned to the USERS VLAN?
There are two strategies for achieving this: the first is to configure multiple SSIDs (one for each VLAN), which requires a separate RADIUS server to manage each VLAN. However, this approach can be complex and impractical. The more efficient solution is to exploit RADIUS attributes such as Tunnel-Private-Group-ID, Tunnel Medium Type, and Tunnel Type to enable dynamic VLAN assignment. By doing so, we can manage all VLANs from a single NPS server, and users will only need to connect to a single SSID. In this guide, we'll look at the latter method.
- For the rest of this guide, we'll make the following assumptions:
- We have successfully configured a working PEAP-MSCHAPv2 or EAP-TLS installation.
- The VLANs have been set up correctly in our network.
UniFi Network Server
We need to configure several parameters in the UniFi Network Server. Let's take a closer look at the process.
In this scenario, let's consider a configuration with three distinct networks: 192.168.1.0/24 designated for Servers and WiFi access points, 192.168.10.0/24 allocated to Users, and 192.168.100.0/24 specifically reserved for Administrators.
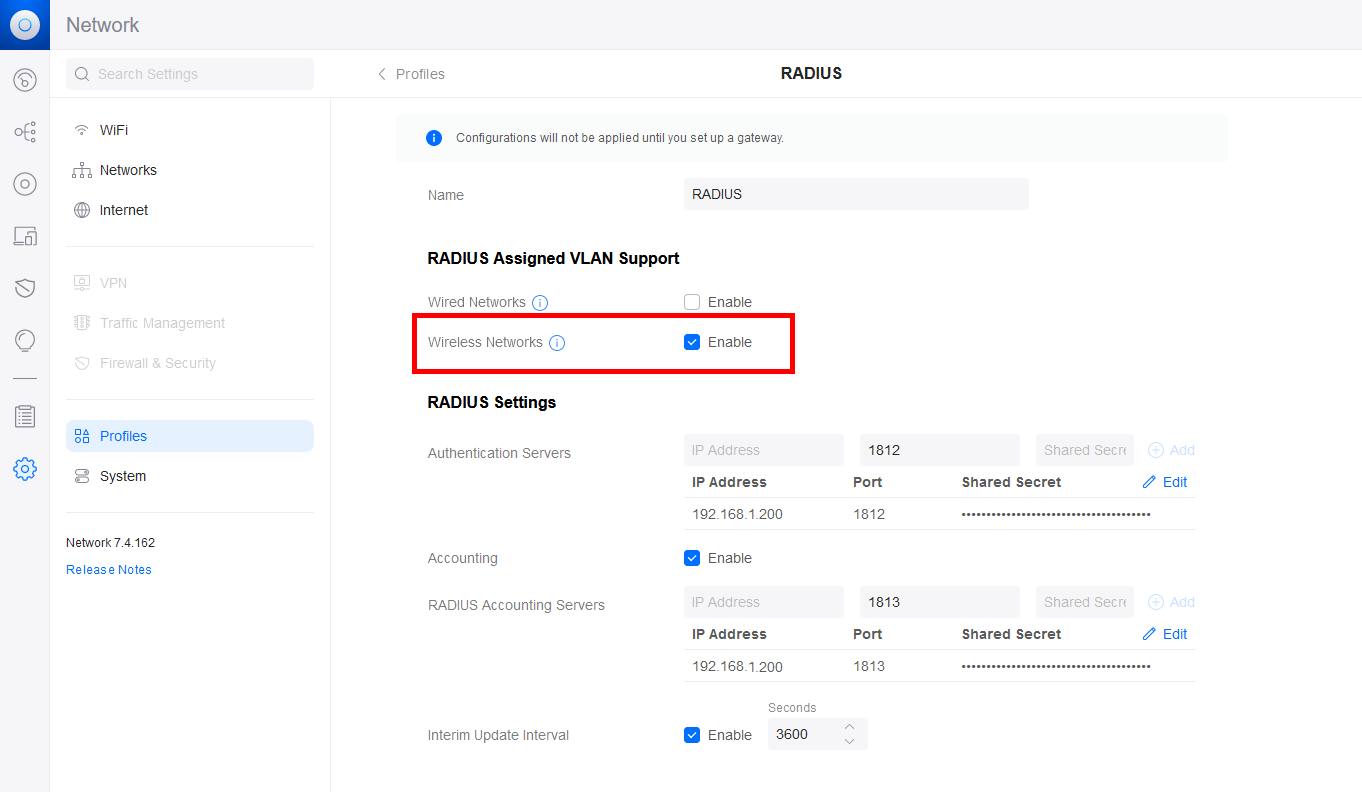
- In the RADIUS profile, activate RADIUS Assigned VLAN Support for Wireless Networks:
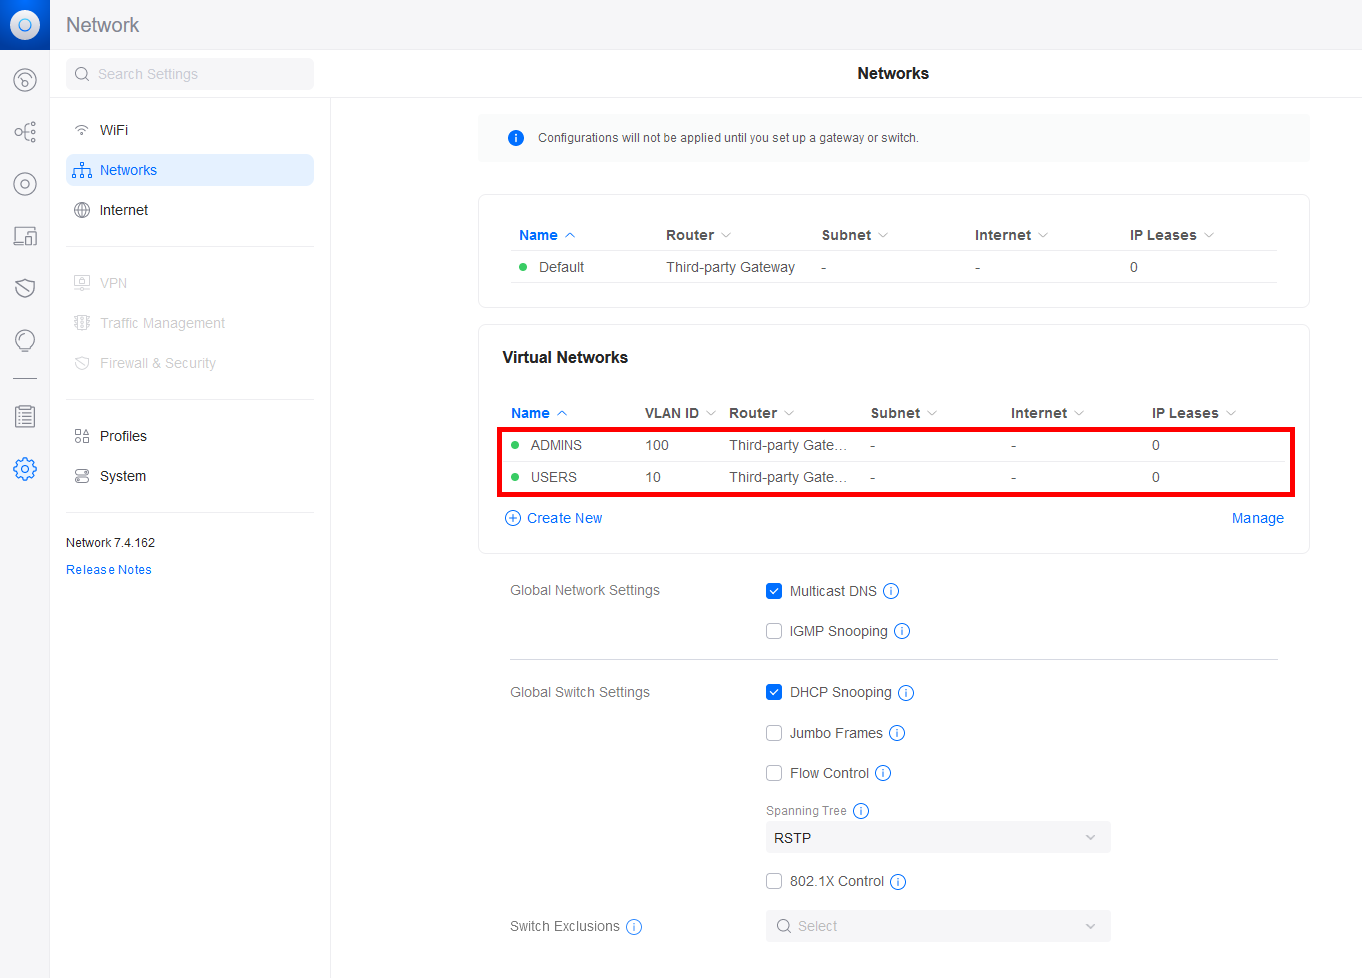
- Make sure that your VLANs are correctly configured:
Authentication Server (NPS)
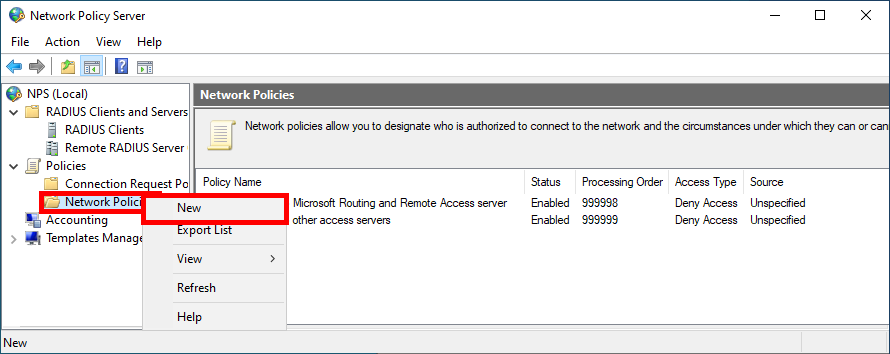
- Open the Network Policy Server Console:

You need to set up two separate Network Policies: one for ADMINS and another for USERS.
- Click on New in the Network Policies folder:
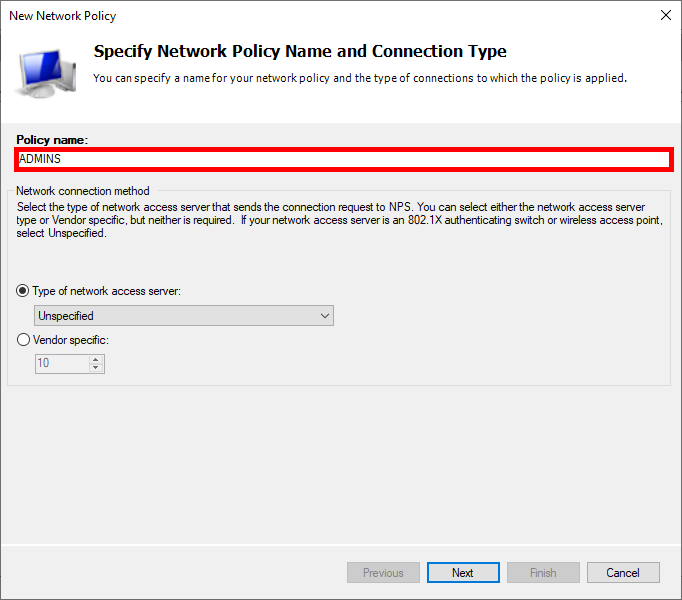
- Give Policy a name:
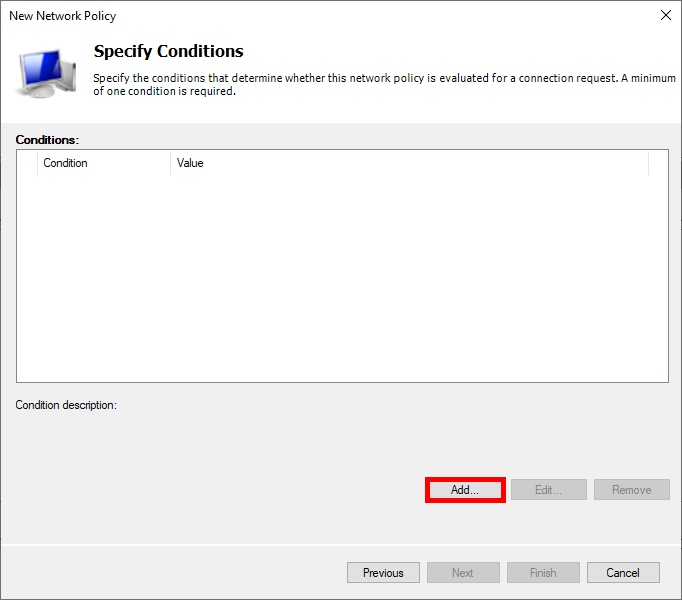
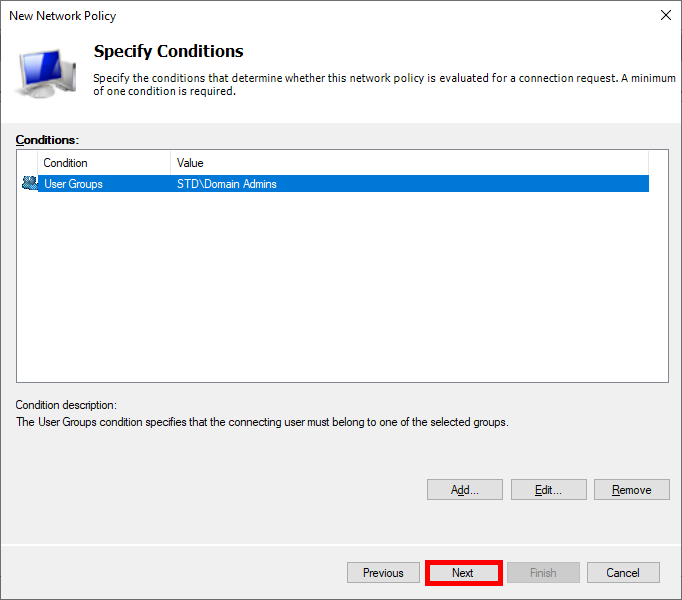
- Click on Add to specify the condition:
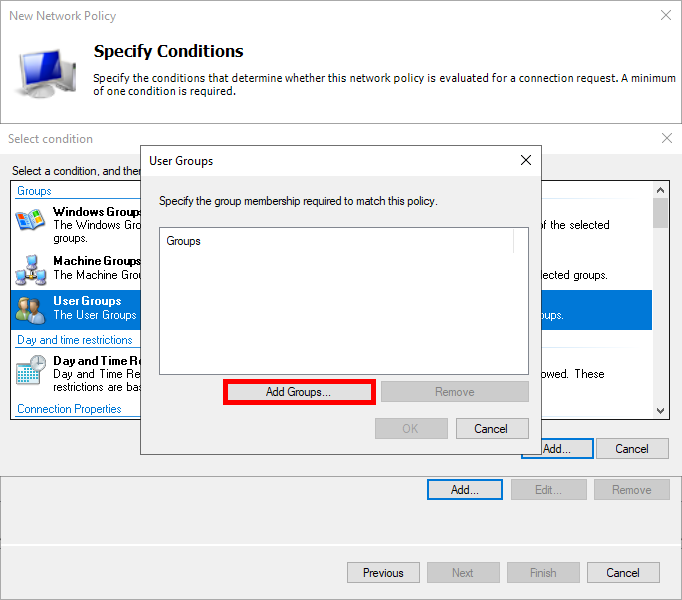
- Select User Groups, and click on Add Groups…:
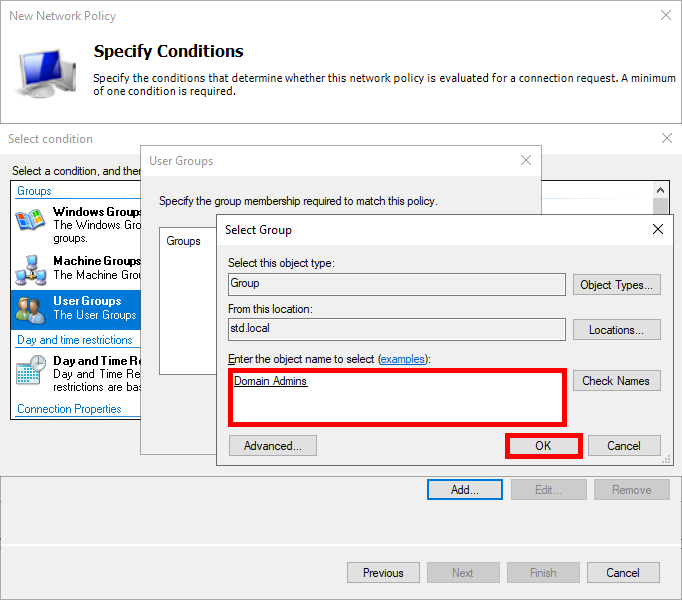
- Add an Active Directory user group, e.g. Domain Admins for ADMINS:
- Click on Next:
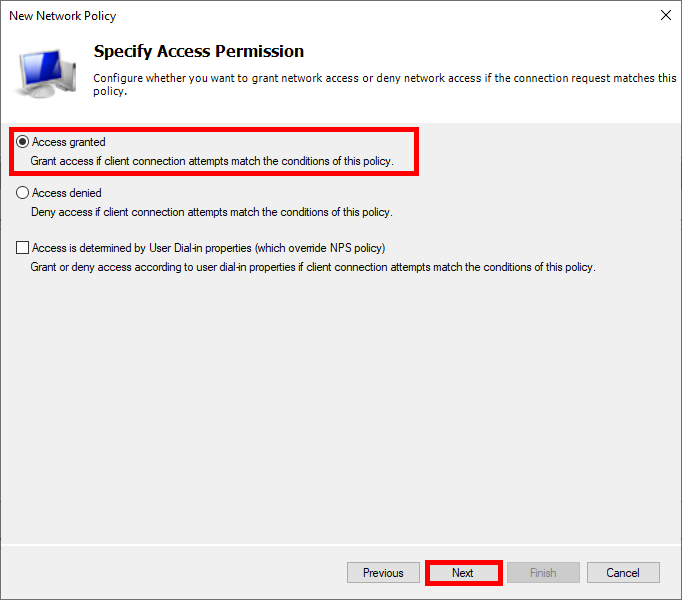
- Select Access granted:
- In the Configure Settings section, you can delete the pre-existing entry for Framed-Protocol PPP and then click on Add…:
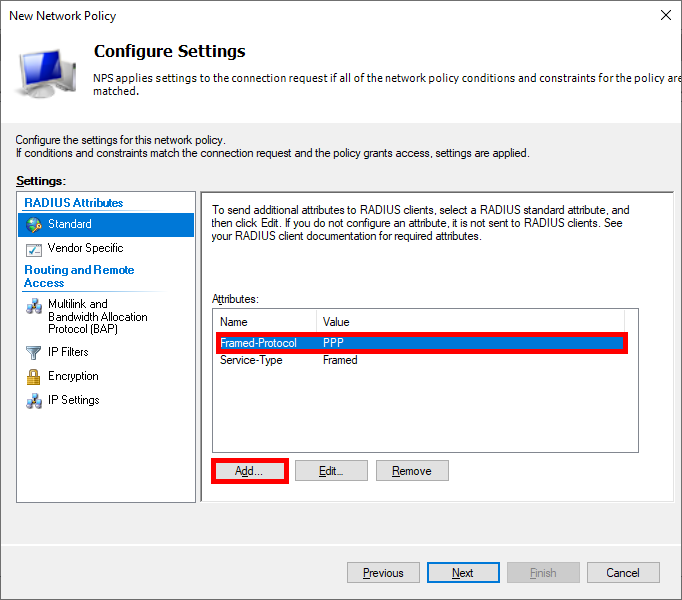
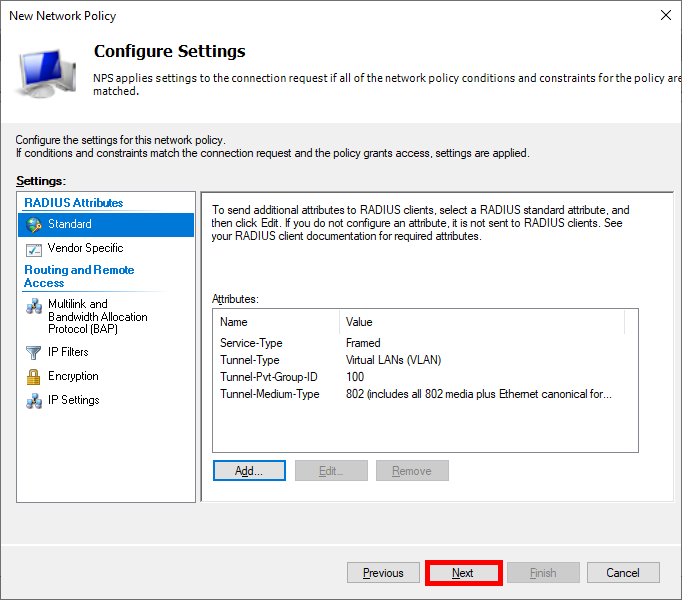
- Now let's add these three entries:
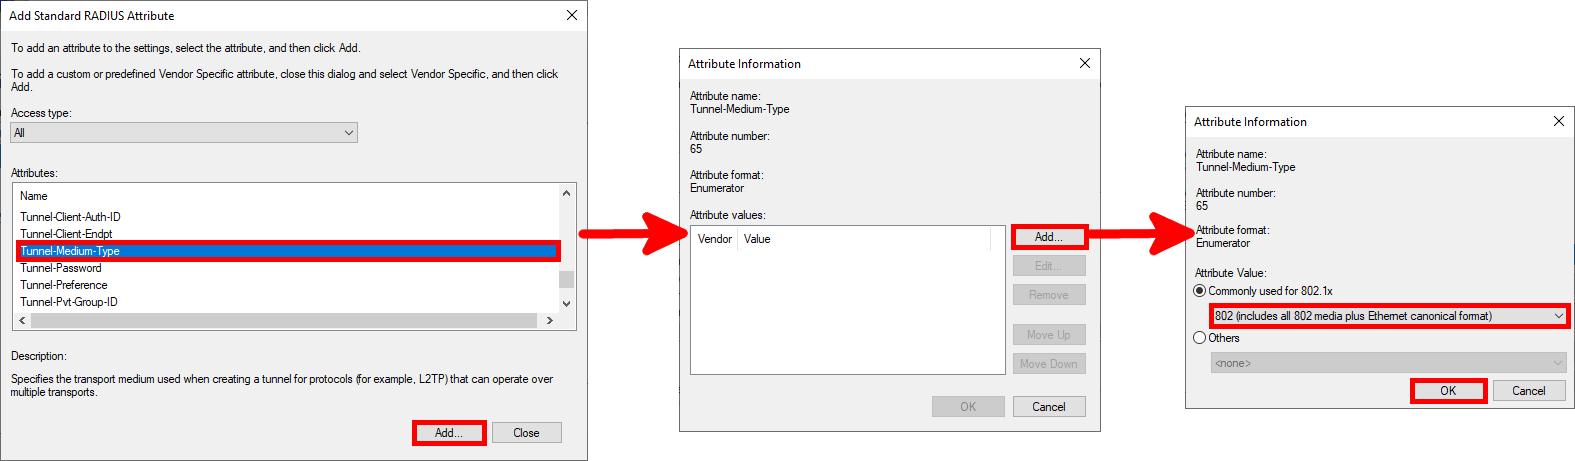
Tunnel-Type: Virtual LANs (VLAN)Tunnel-Pvt-Group-ID: 100 for ADMINS or 10 for USERSTunnel-Medium-Type: 802 (including all 802 media as well as the canonical Ethernet format)
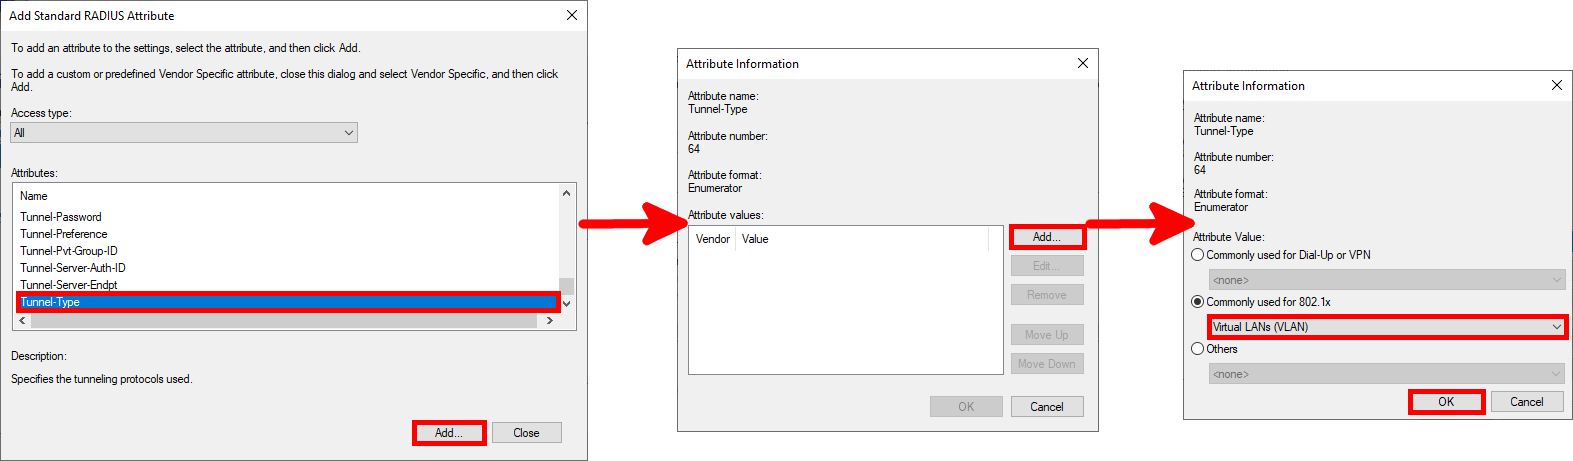
- Add
Tunnel-Typeparameter:
- Add
Tunnel-Pvt-Group-IDparameter:
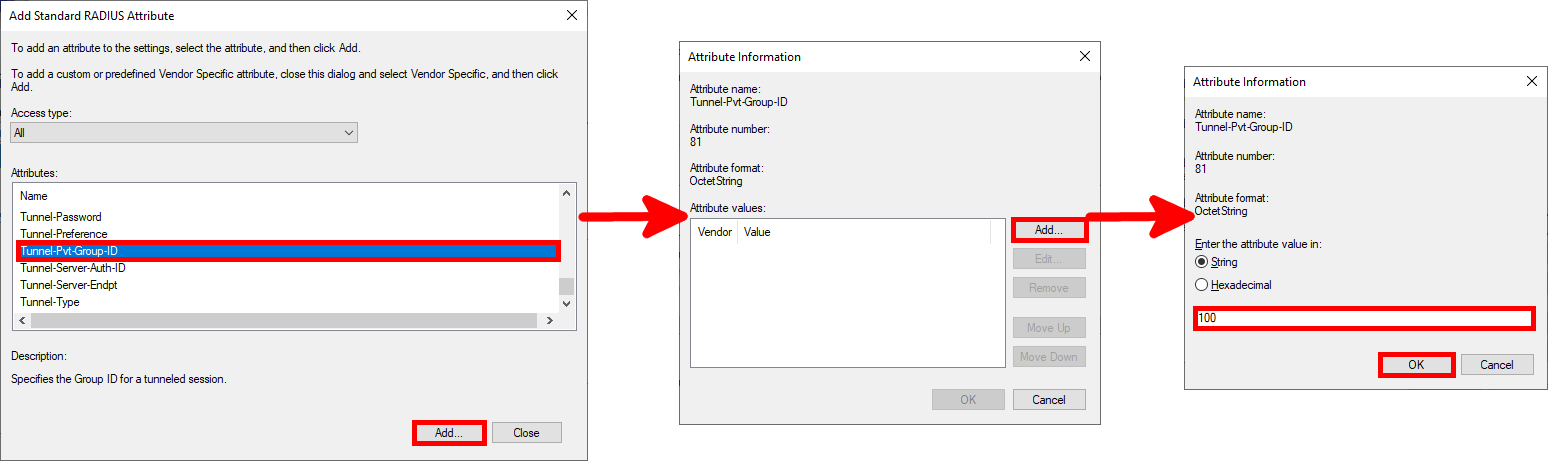
- Add
Tunnel-Medium-Typeparameter:
- Once you have entered all the parameters, click Next…:
- Finally, click on Finish to finalize the creation of the Policy:
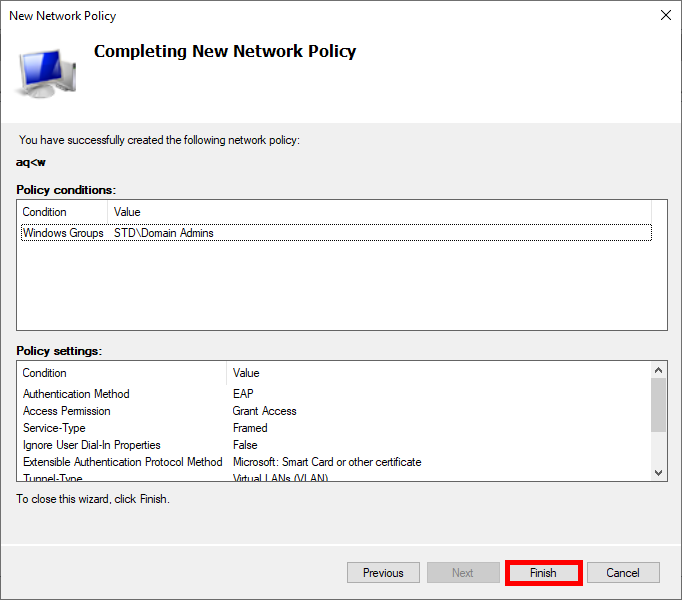
- All you have to do is repeat the same process for the USERS VLANs, and you're done!